The Contacts Import tool allows you to bulk upload Contacts from external sources directly into Mria CRM.
You can access it either from the Contacts section or under Settings → Data Administration → Contacts — the process is identical in both places.
Getting Started #
Before importing, you can:
- Download a sample file (
.CSVor.XLSX) to understand the correct structure. The sample file now includes columns for any custom fields configured on Contacts, so you can see exactly where to enter their values. - Export Contacts from another CRM — Mria CRM supports files exported “as is” from most common systems.
Because Contacts involve complex linking logic (Companies, Leads, updates), the maximum file size is 1 MB, and we recommend limiting each import to ~1,000 Contacts per file for best performance.
Step 1. Upload File #
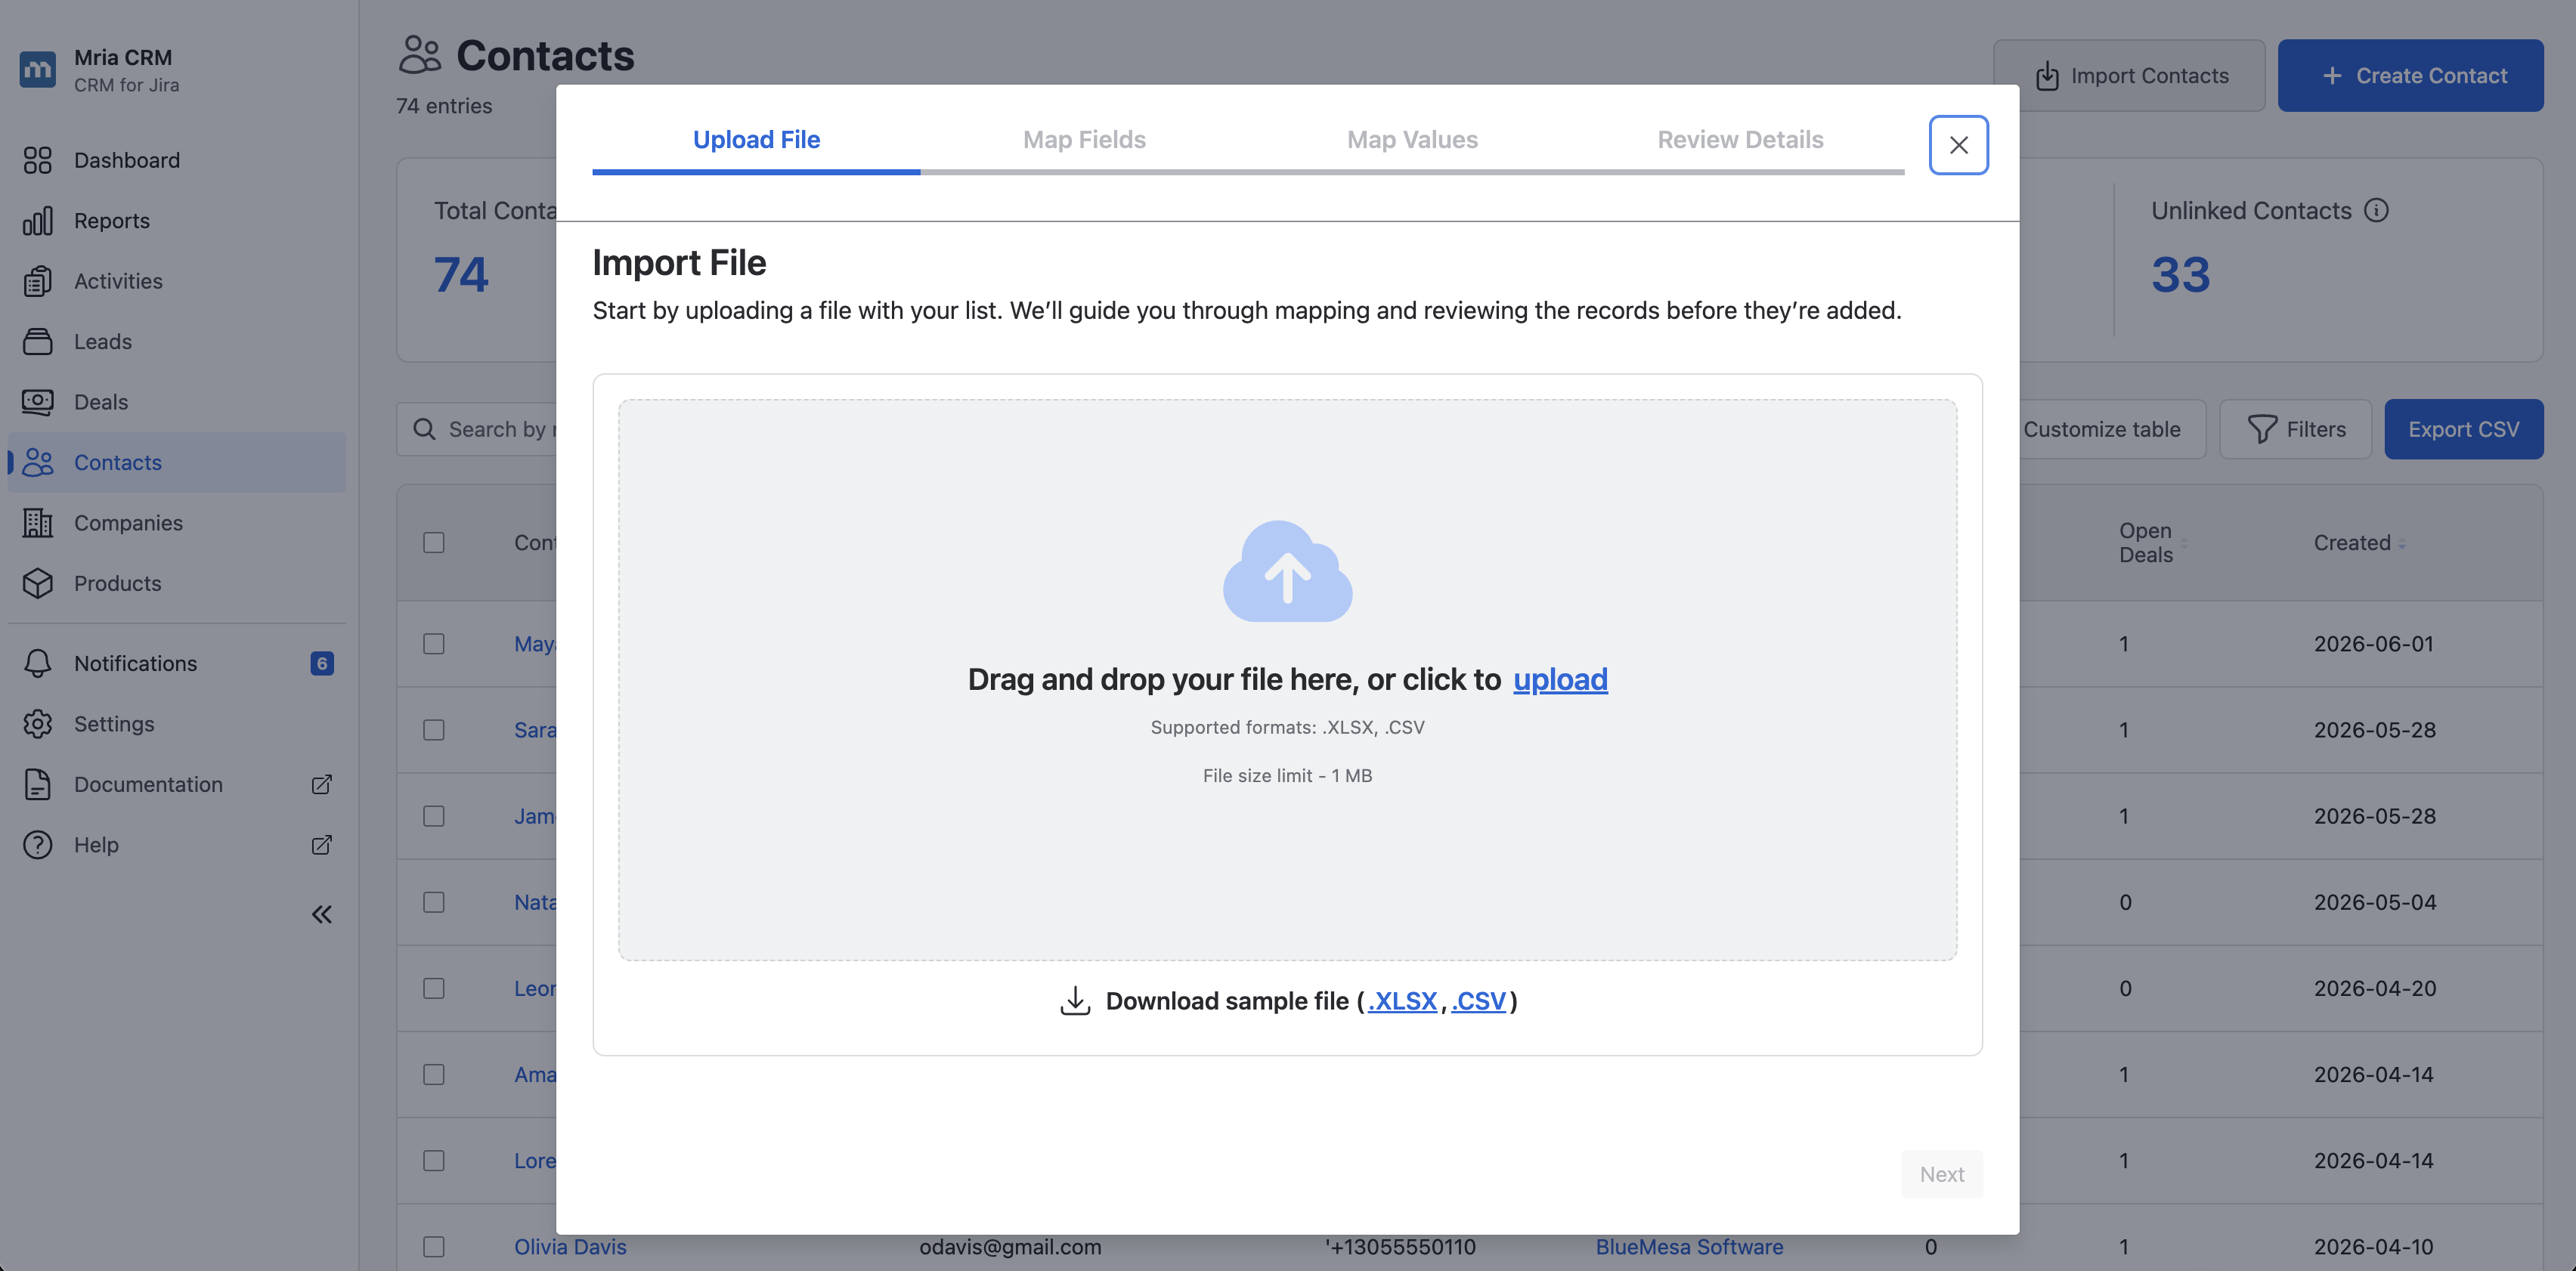
Drag and drop your file or click upload to browse your computer.
Supported formats: .XLSX, .CSV
Maximum file size: 1 MB
Once uploaded, click Next to move to the field-mapping step.
Step 2. Map Fields #
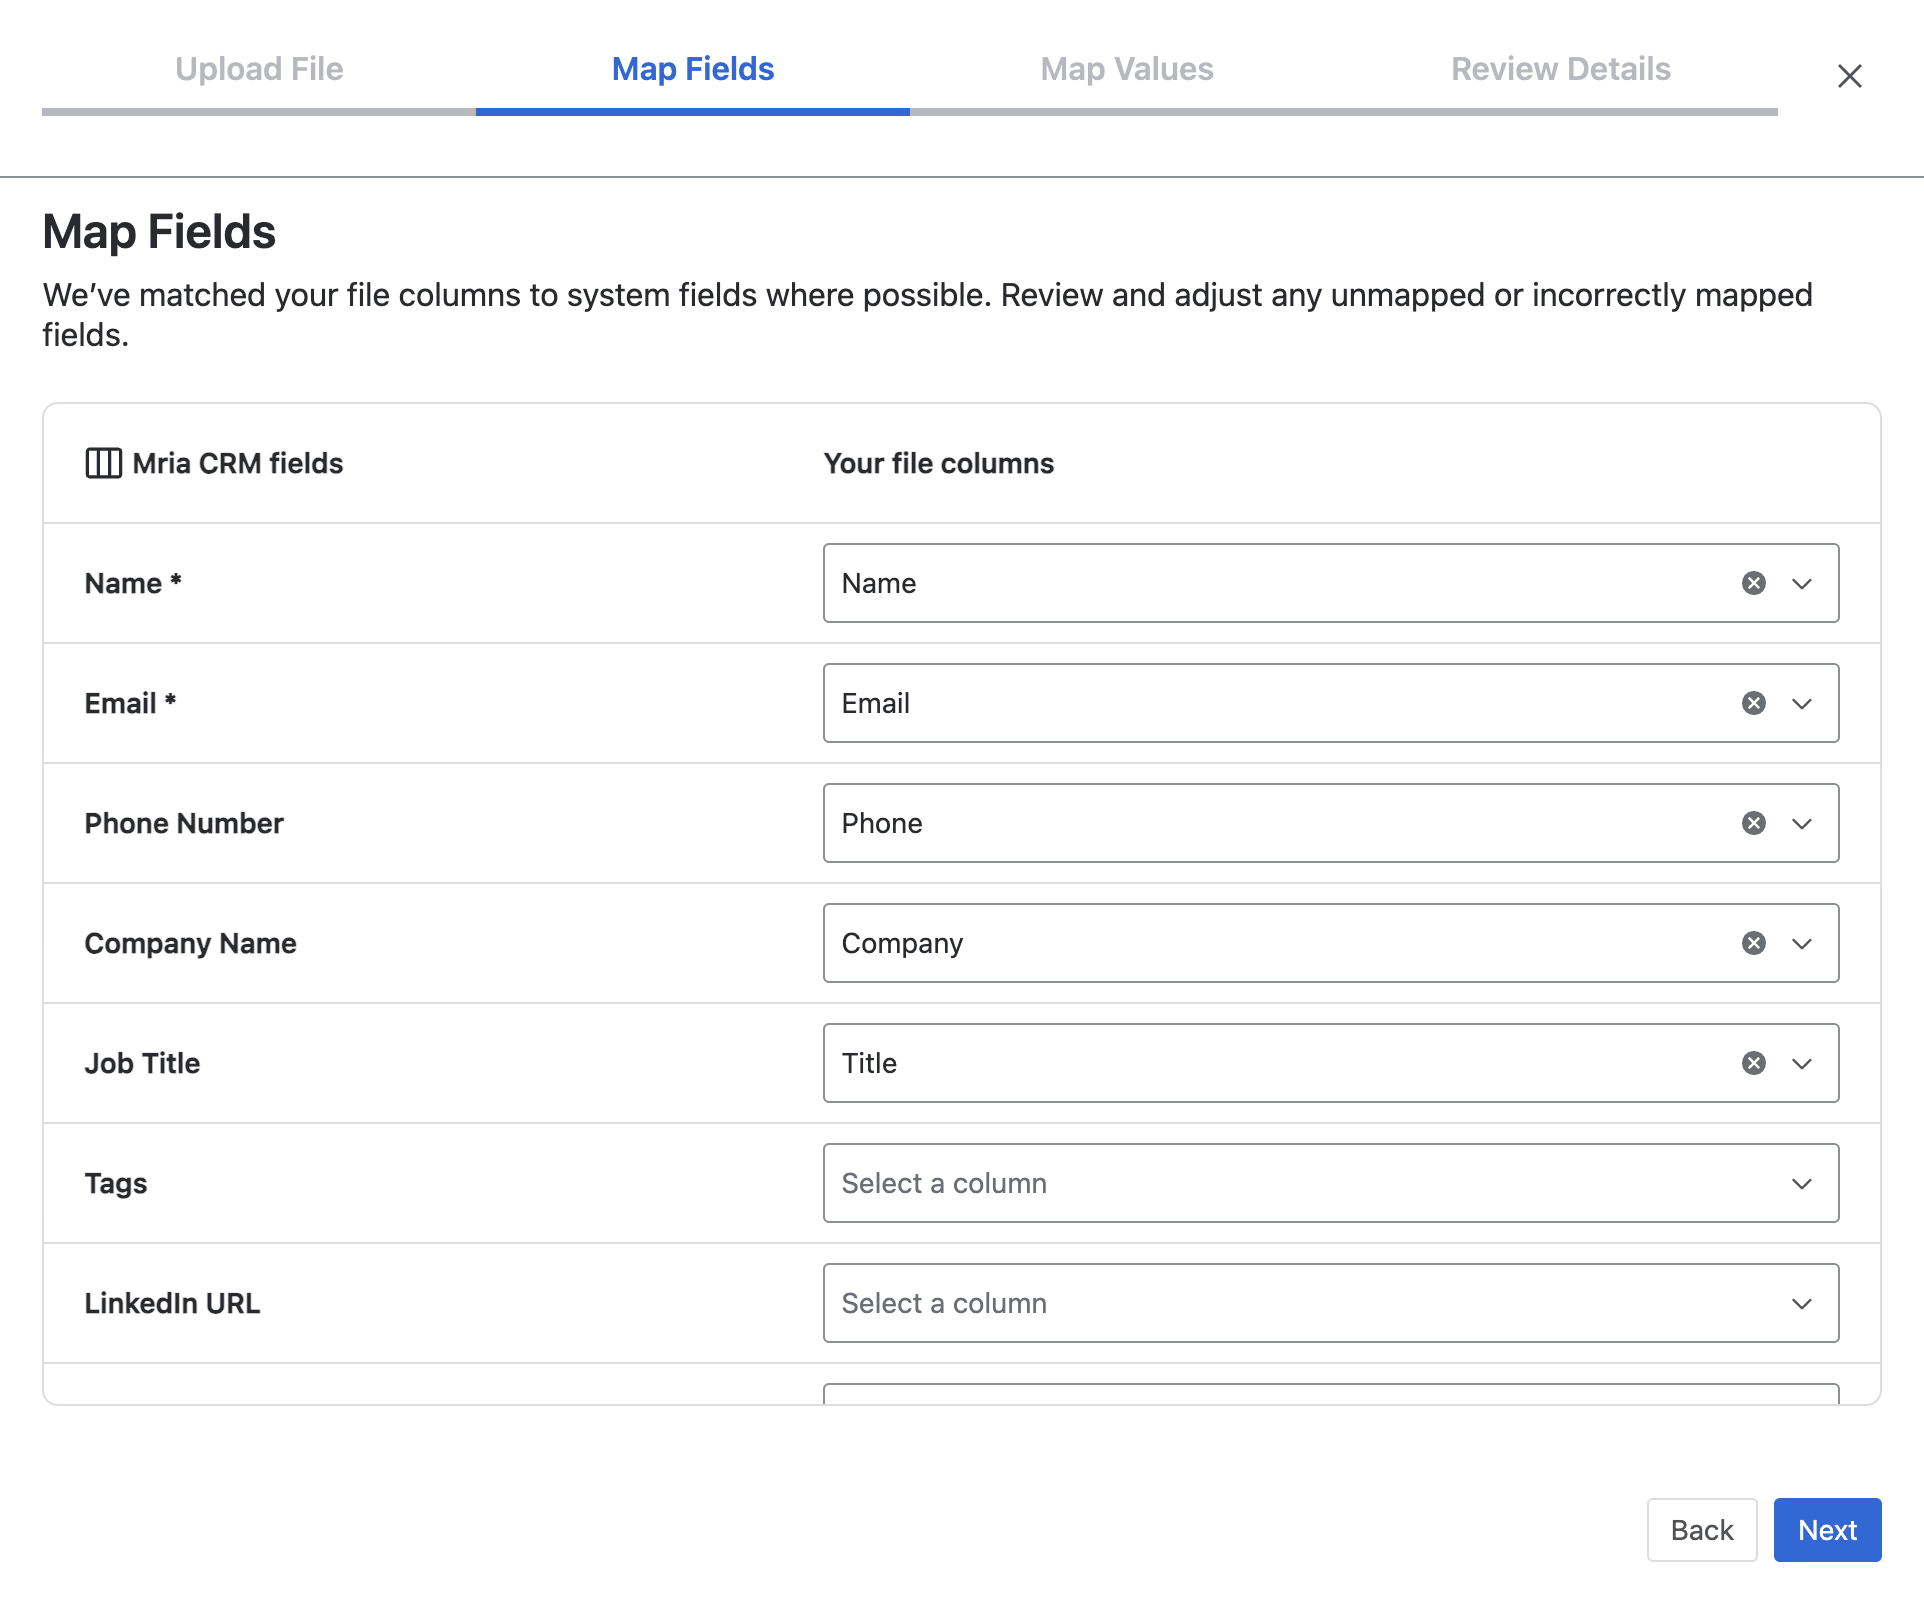
Mria CRM tries to auto-match your file columns to system fields based on similar names.
For example, columns like Name, Contact Name, Full Name, or First Name may all map to Name automatically.
You can:
- Change the mapping by clicking ✕ next to a field and selecting another option.
- Leave an optional field unmapped — that column simply will not be imported. The required fields below are the exception: they have to be mapped for the import to run.
Required fields:
- Name
- Email (must be unique per Contact)
Optional fields include Company, Phone, Title and Type.
Required fields cannot be skipped. If your file has no column for one of them, add it before uploading rather than trying to map around it.
Custom fields: Any Custom Fields configured on Contacts also appear in this list alongside the standard fields. They follow the same auto-match rules — a column named Department will map to a Department custom field automatically. You can map, change, or skip them just like any other field.
💡 Important Difference from Leads Import:
Contacts cannot have duplicated emails in Mria CRM. If your file contains multiple rows with the same email, only one will be processed (the last one in the file), if “Update existing Contacts” is enabled.
Combining two columns into one field #
A file that keeps First Name and Last Name in separate columns no longer needs fixing up before you import it. Map both onto Name and the wizard joins them.
Mria CRM usually does this for you: if your file has columns that look like a first and a last name, both are already mapped onto Name when the step opens. Each mapped column appears as a chip with an ✕ to remove it.
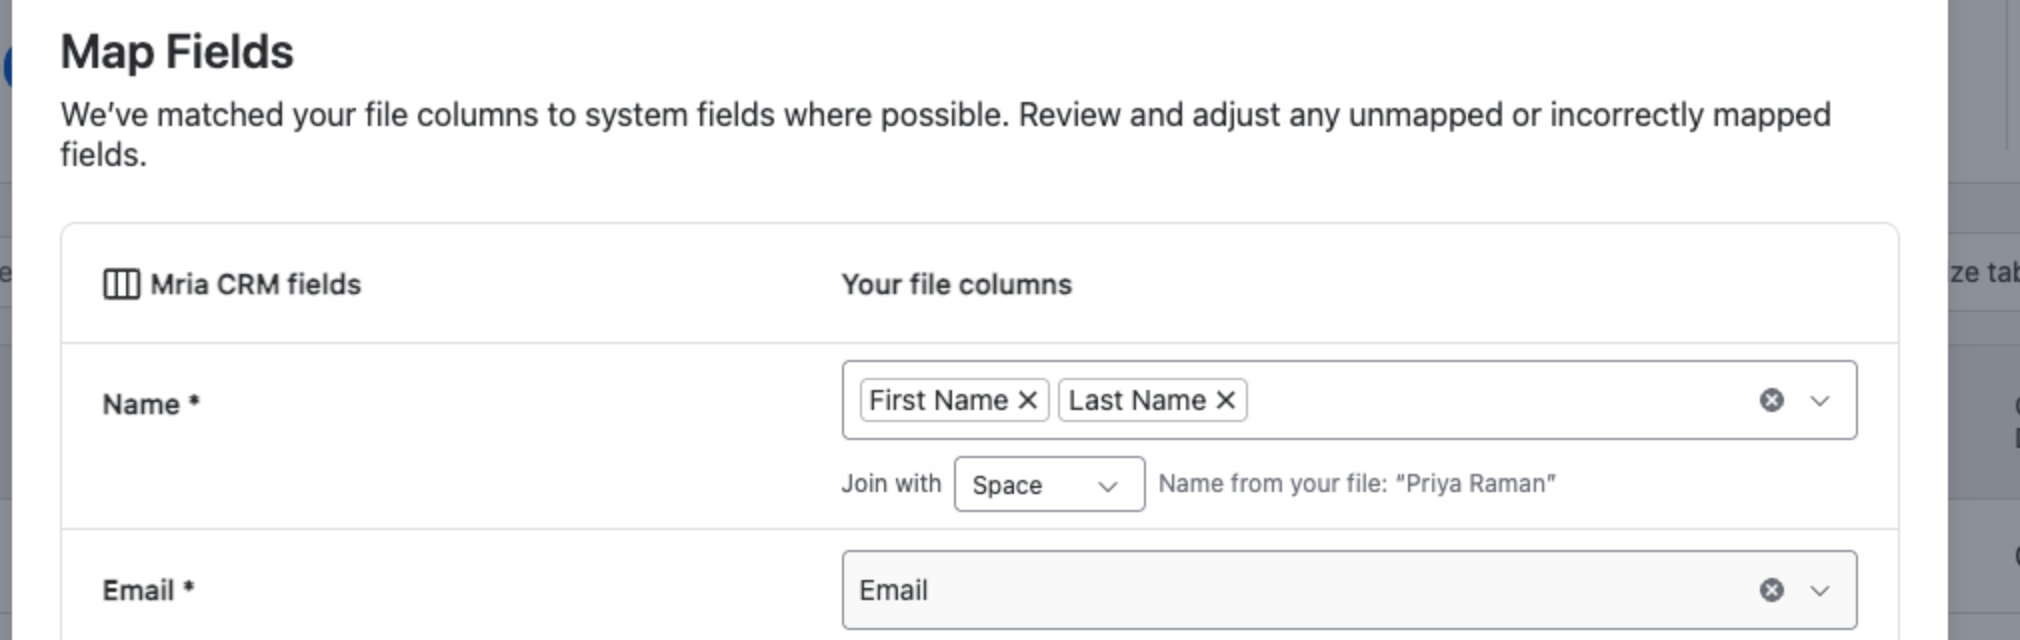
Join with controls what goes between them, and the preview beside it shows the result using the first row of your file, so you can check it before importing anything:
| Join with | “Priya” + “Raman” becomes | |
|---|---|---|
| Space | Priya Raman | The default, and what you want for a name. |
| Comma | Priya, Raman | A comma AND a space — useful for “Surname, Forename” ordering. |
| Hyphen | Priya-Raman | Joined with a hyphen and no spaces. |
| None | PriyaRaman | Run together with nothing between them. |
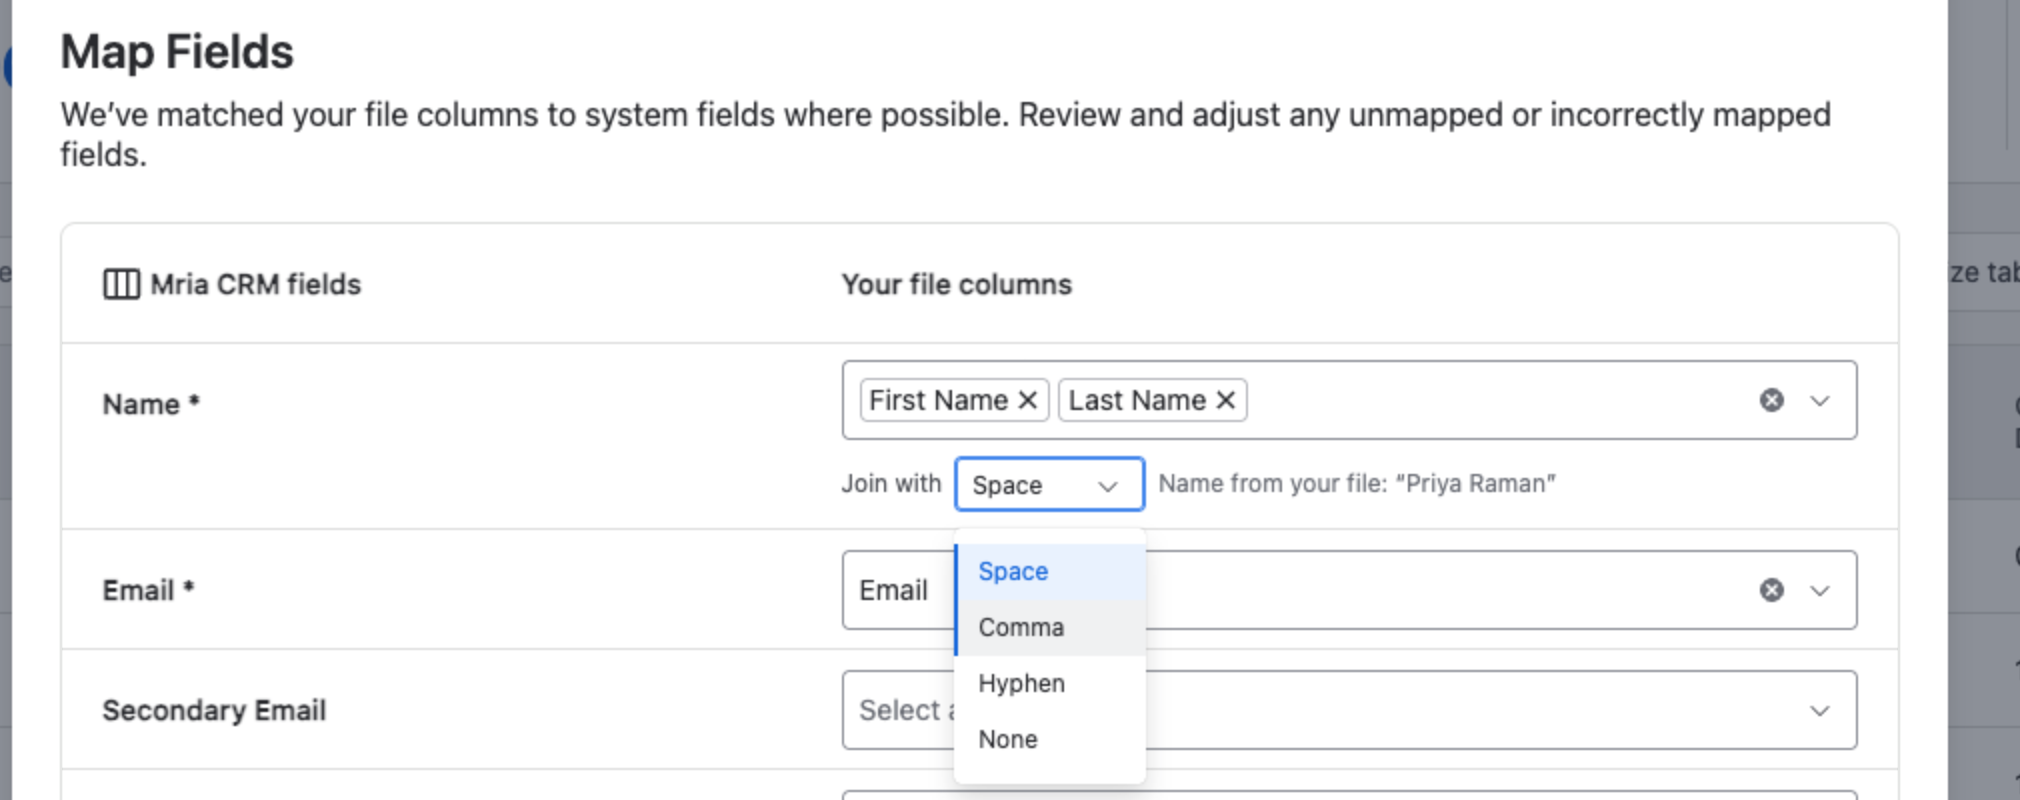
Comma inserts a comma and a space — Priya, Raman, not Priya,Raman. Worth knowing before you import a few thousand rows.
This is not limited to names, and not limited to Contacts. Any two columns can be combined onto any one field, on every import wizard — the control is part of the shared Map Fields step.
Step 3. Map Values #
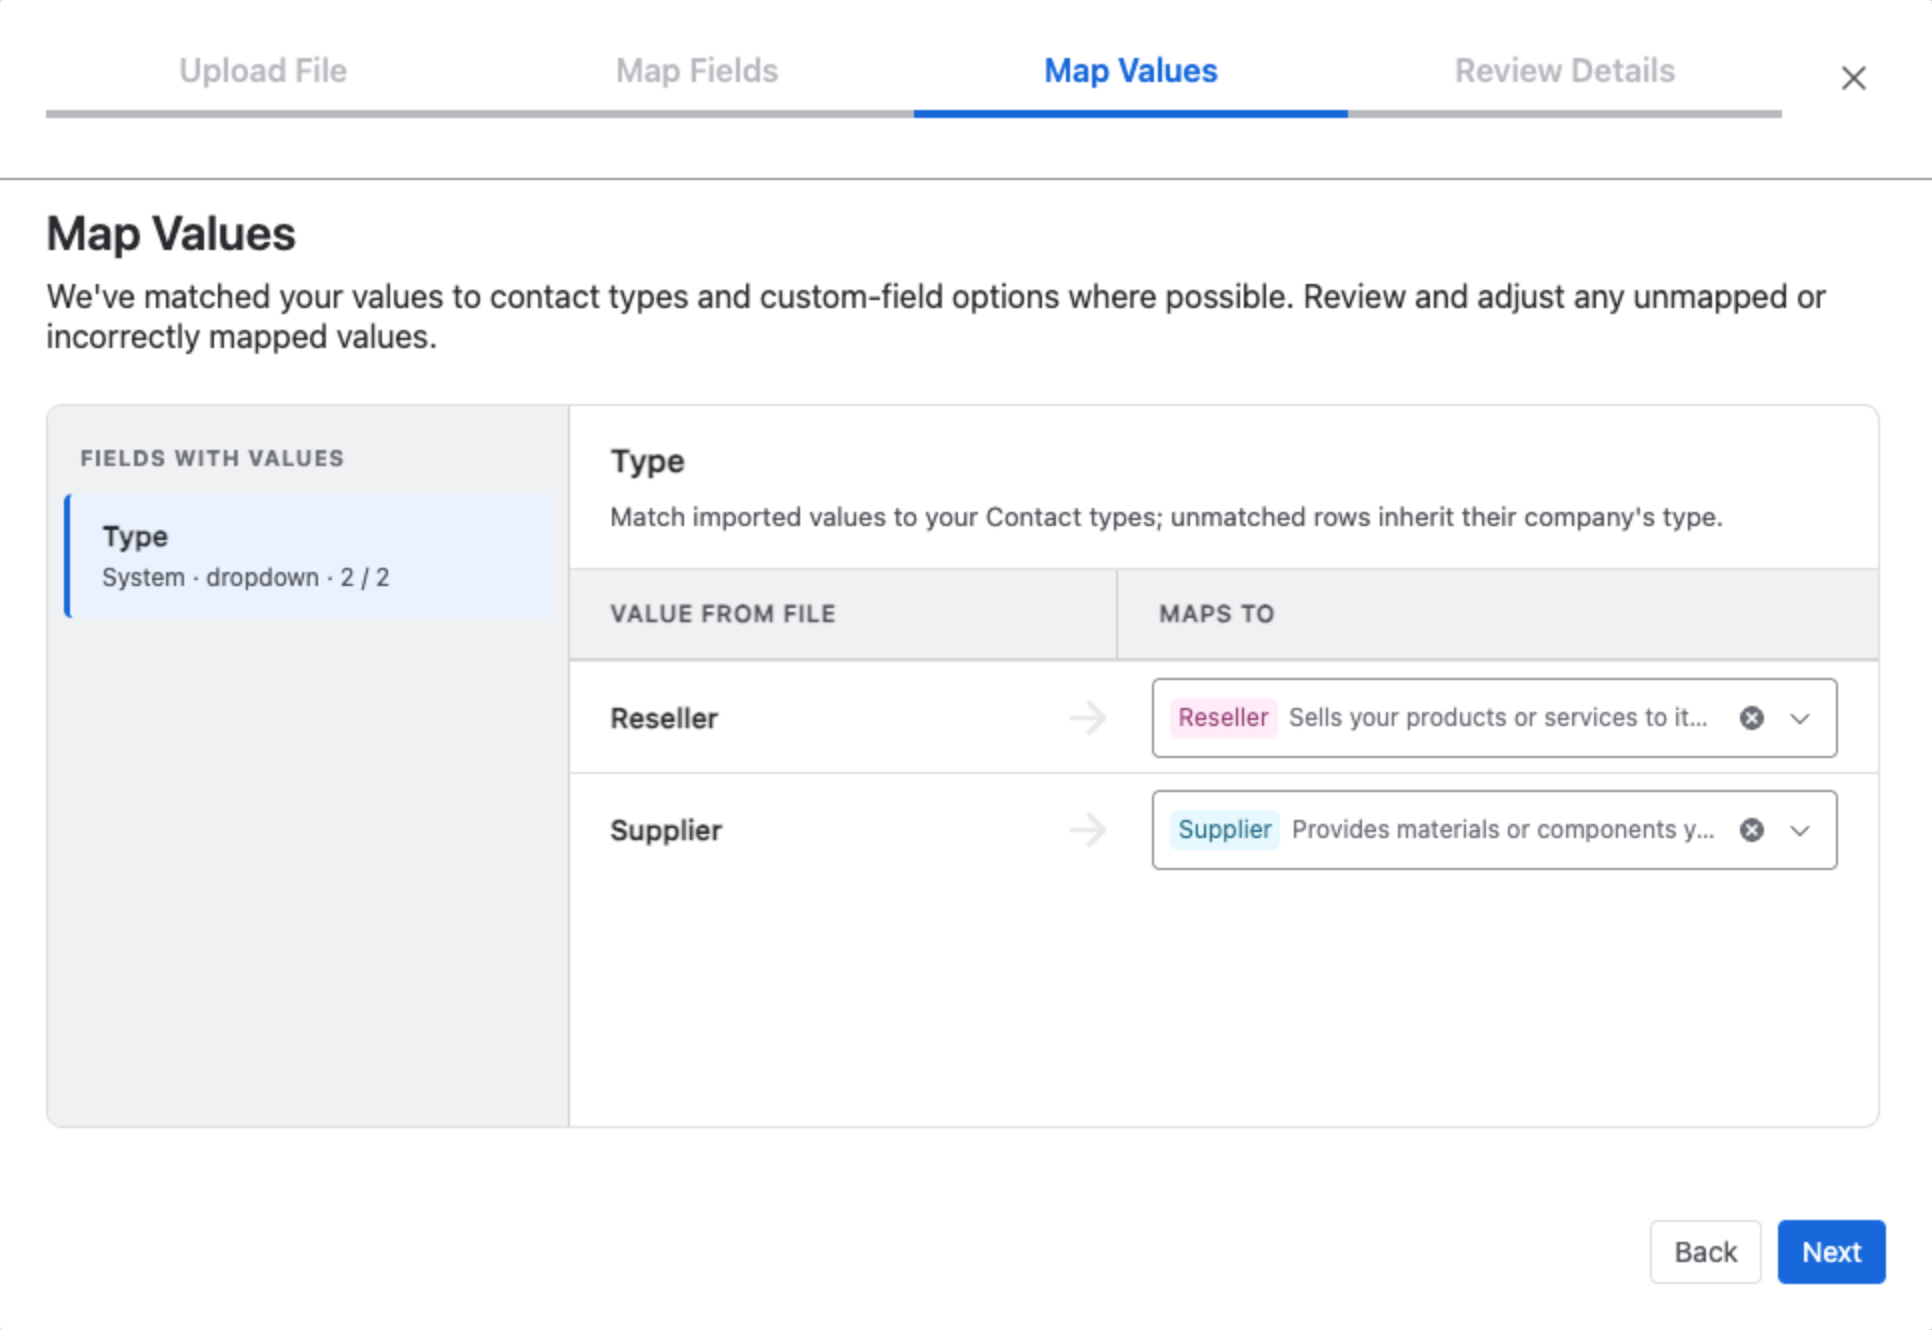
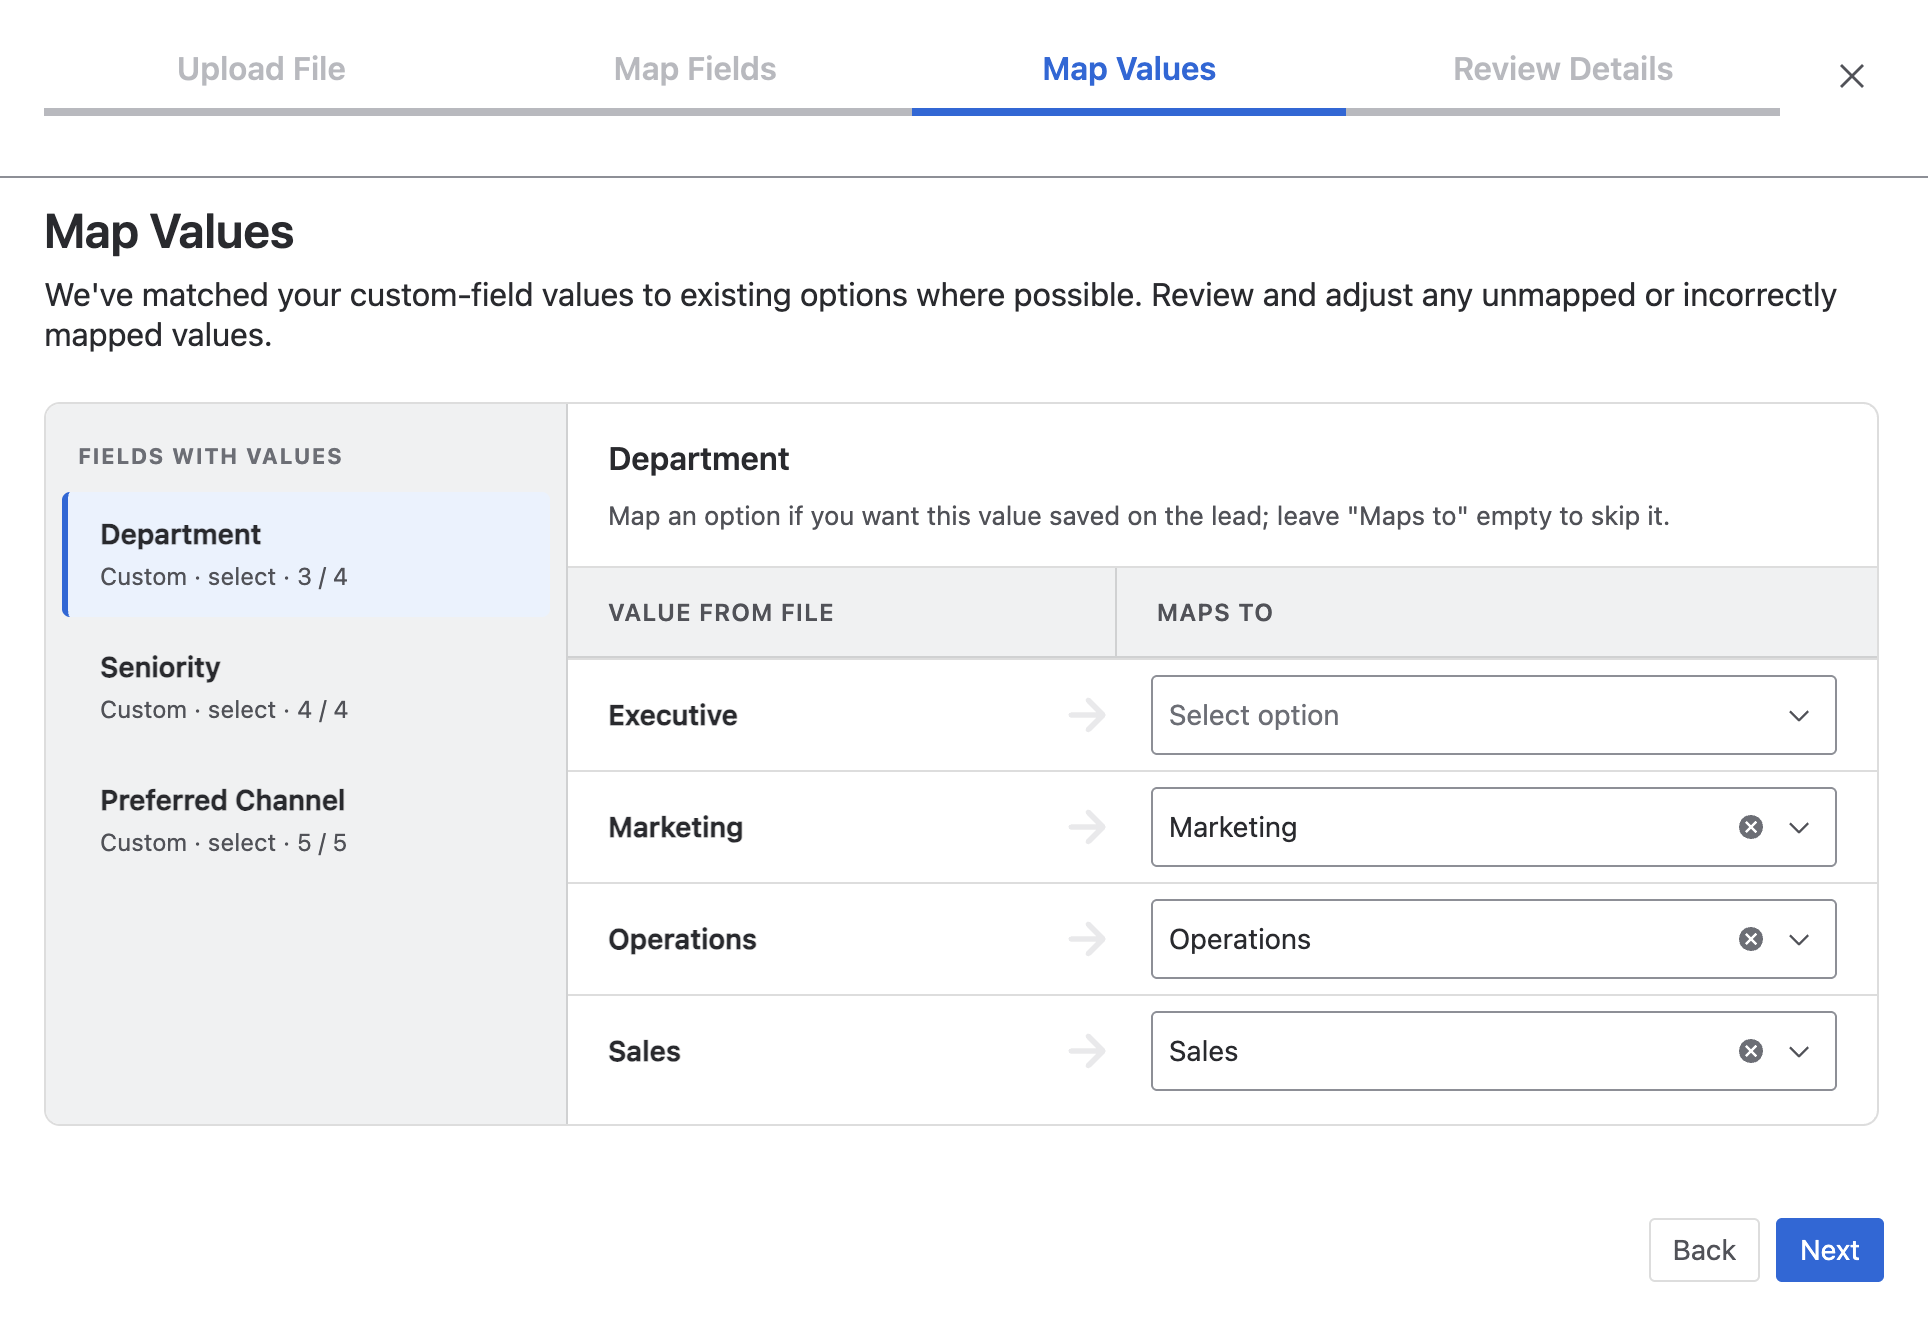
For fields whose values come from a fixed list, Mria CRM matches the values in your file to the options configured in the CRM: the built-in Type field, and any custom Dropdown, Multi-select or Labels field on Contacts.
The Fields with values sidebar on the left lists every field that has values to map. For each one, you’ll see:
- The field name, labeled System or Custom.
- The field type (dropdown, select, multi-select, labels).
- A counter showing how many file values are mapped vs. the total found (for example,
3 / 4means three of the four values in your file are mapped; one is unmapped and will be skipped).
Click any field in the sidebar to review and adjust its mapping on the right. For each value found in your file, choose the matching CRM option from Maps to — or leave it empty to skip that value.
Type is listed as System · dropdown. Each value in your file is matched to one of your Contact types — and unmatched rows inherit their company’s type:
If your file has no Type column and there are no custom picklist fields on Contacts, this step may show as empty and you can proceed directly to Review Details.
Step 4. Review Details #
Before importing, review the summary and choose how the system should handle:
- Existing Contacts
- Companies
- Links to Leads
The Contact Import Options card contains four checkboxes, all unique to Contacts Import:
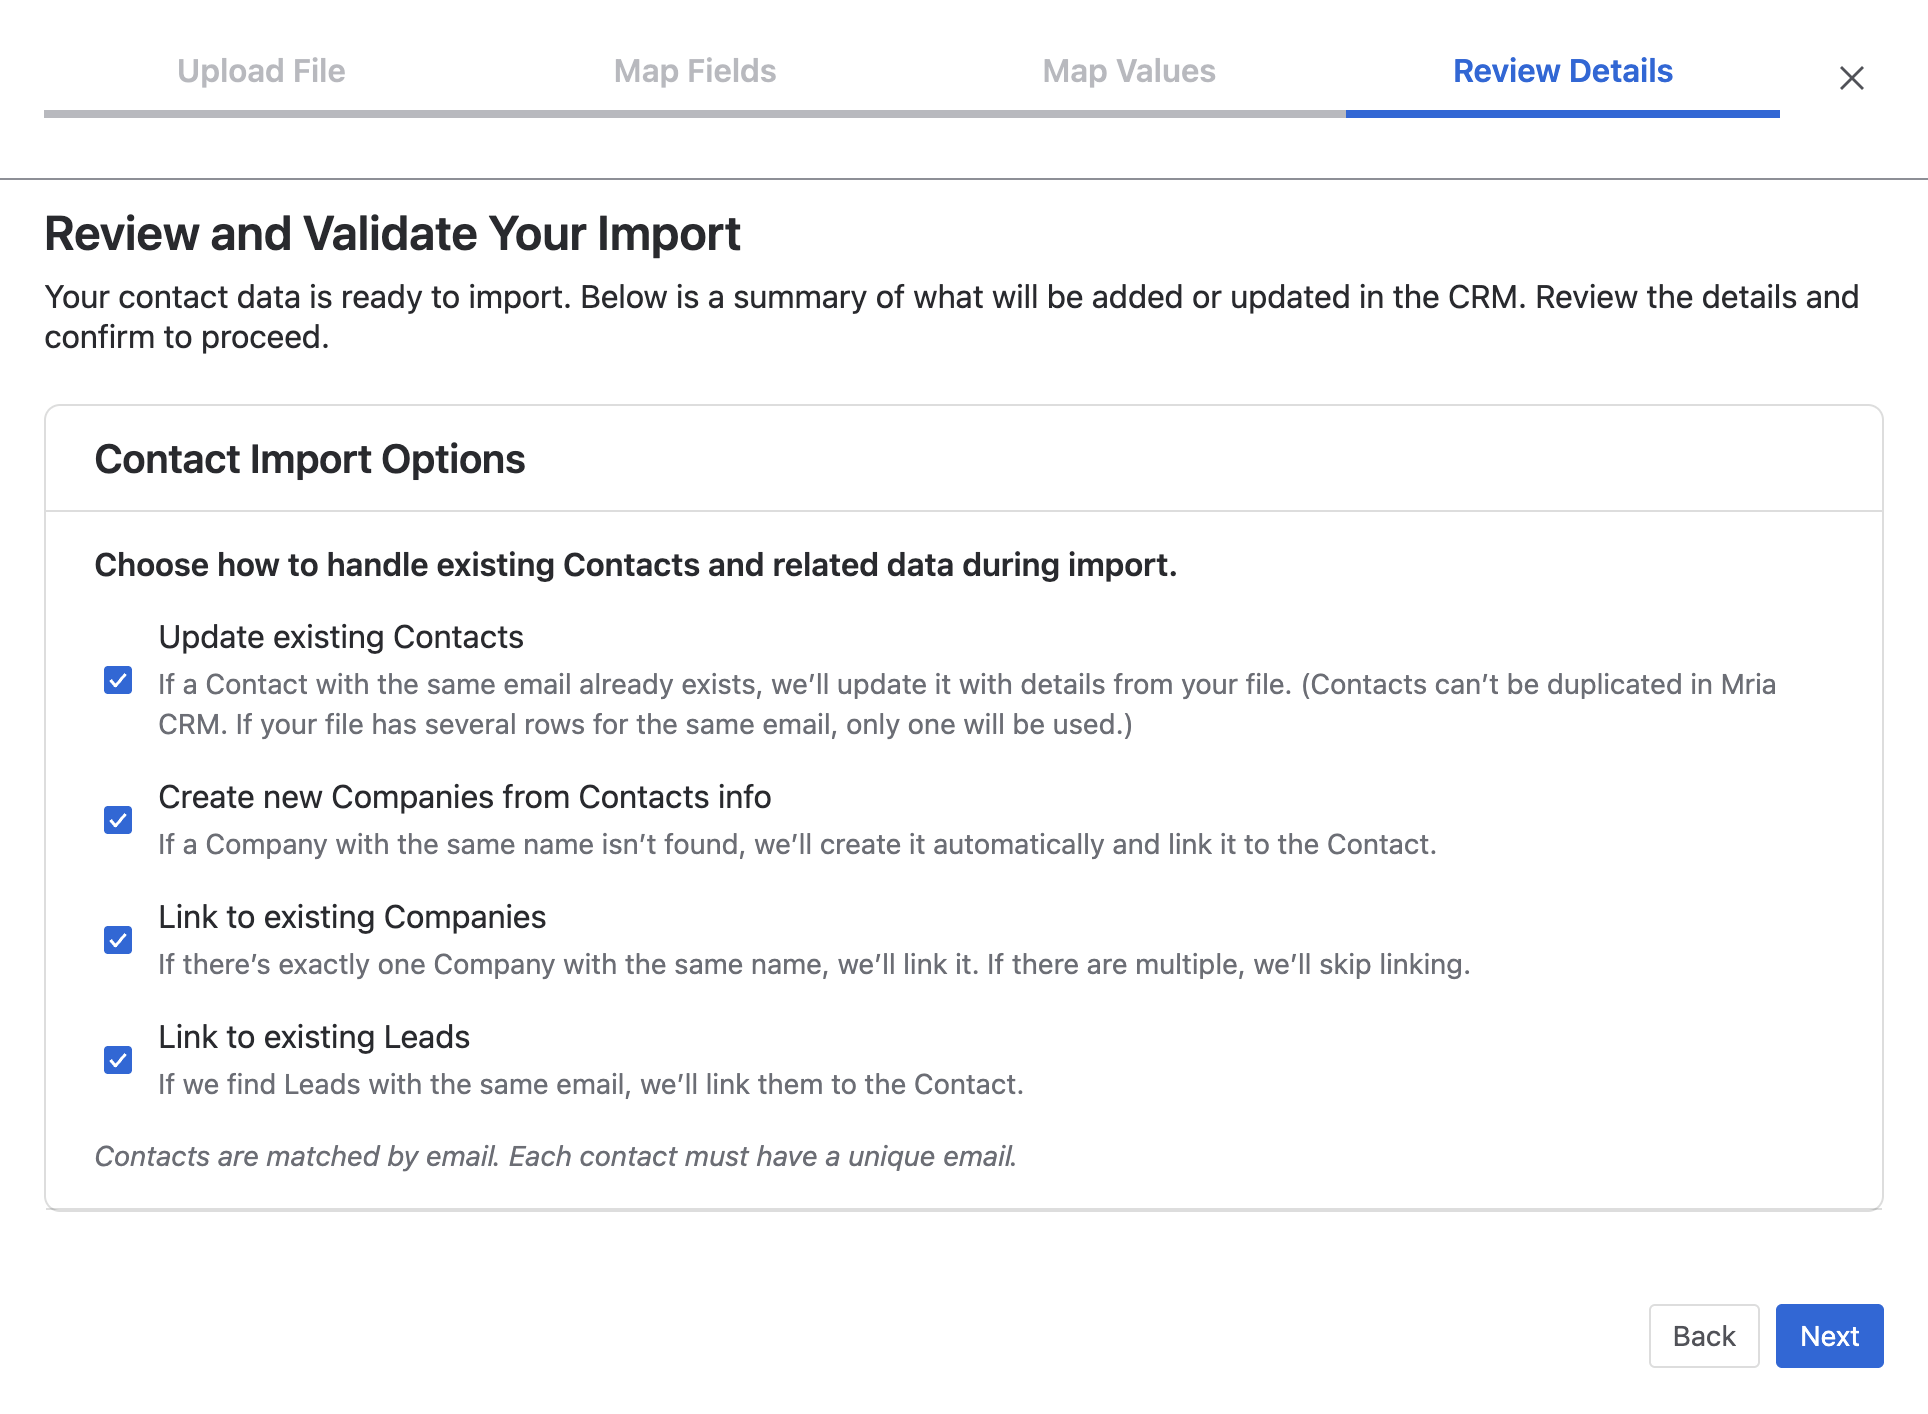
1. Update existing Contacts #
If a Contact with the same email already exists in CRM, Mria CRM will update it with the data from your file.
- Contacts cannot be duplicated in Mria CRM.
- If several rows in your file use the same email, only the last one is used when updating.
Updating a Contact does not change its linked Company — only the Contact’s info fields (Name, phone, job title, tags, custom fields, etc.) are updated.
2. Create new Companies from Contacts info #
If the import finds a Company name that doesn’t yet exist, Mria CRM will create it automatically and link the Contact to it.
3. Link to existing Companies #
If a Company with the same name already exists:
- If exactly one match is found → it will be linked.
- If multiple Companies have the same name → the link will be skipped.
4. Link to existing Leads #
Contacts and Leads are matched by email.
If Leads with the same email already exist in CRM, they will be linked automatically to the imported Contact.
Summary of Contact Matching Rules:
- Contacts are matched by email only.
- A Contact’s email must be unique in CRM.
- Companies are matched by name.
- No Company will be unlinked during the update — only new links may be created (depending on checkboxes).
Step 5. Import in Progress #
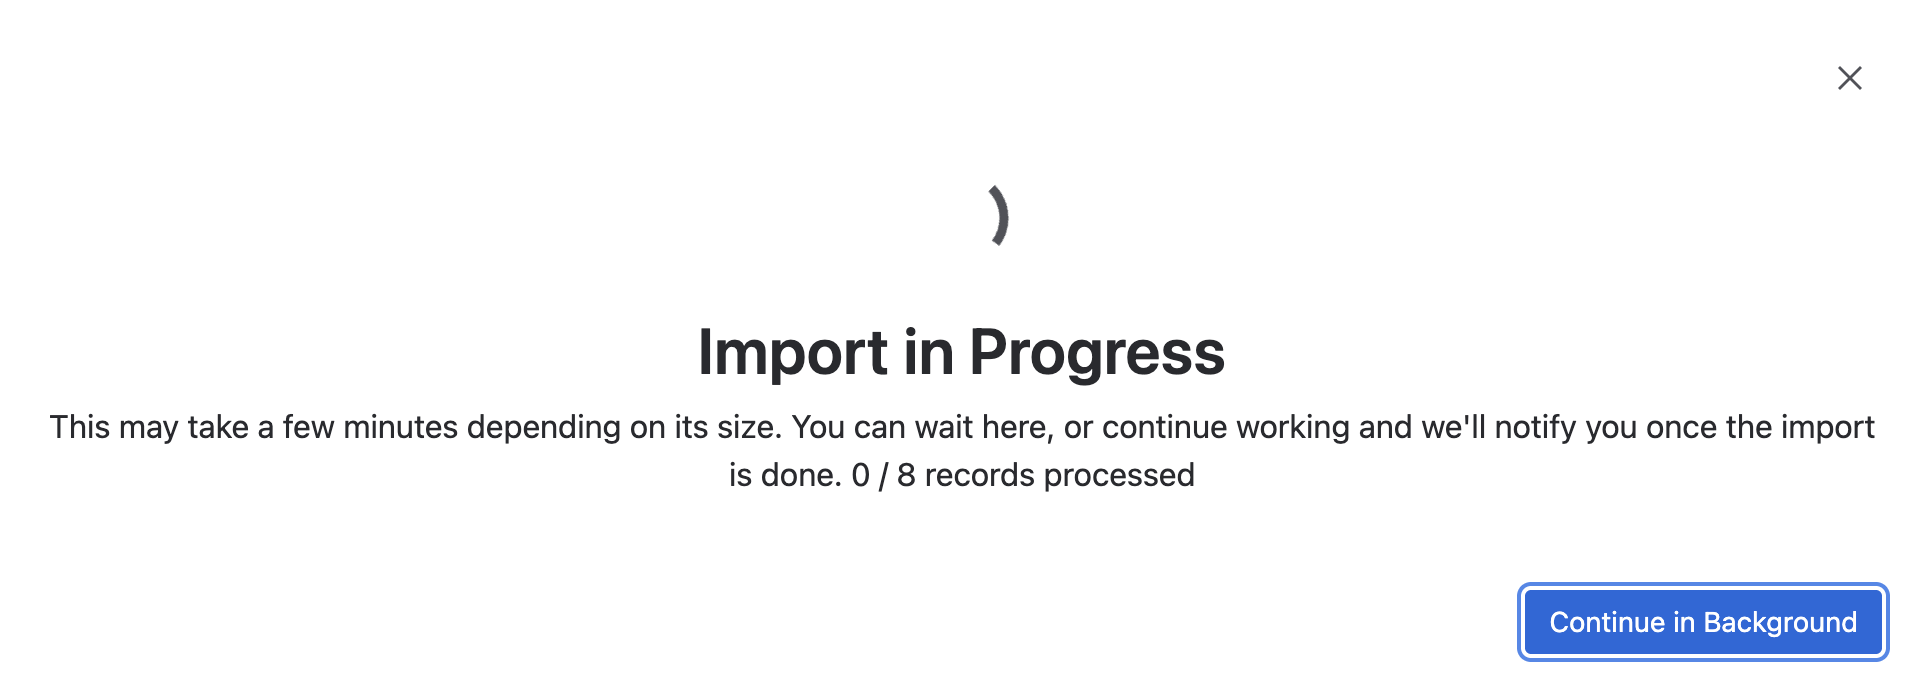
When the import starts, you’ll see a progress indicator with a running count of records processed (for example, 0 / 8 records processed).
You can stay on this screen or click Continue in Background and keep working — the import will proceed automatically and you’ll be notified when it finishes.
Step 6. Import Completed #
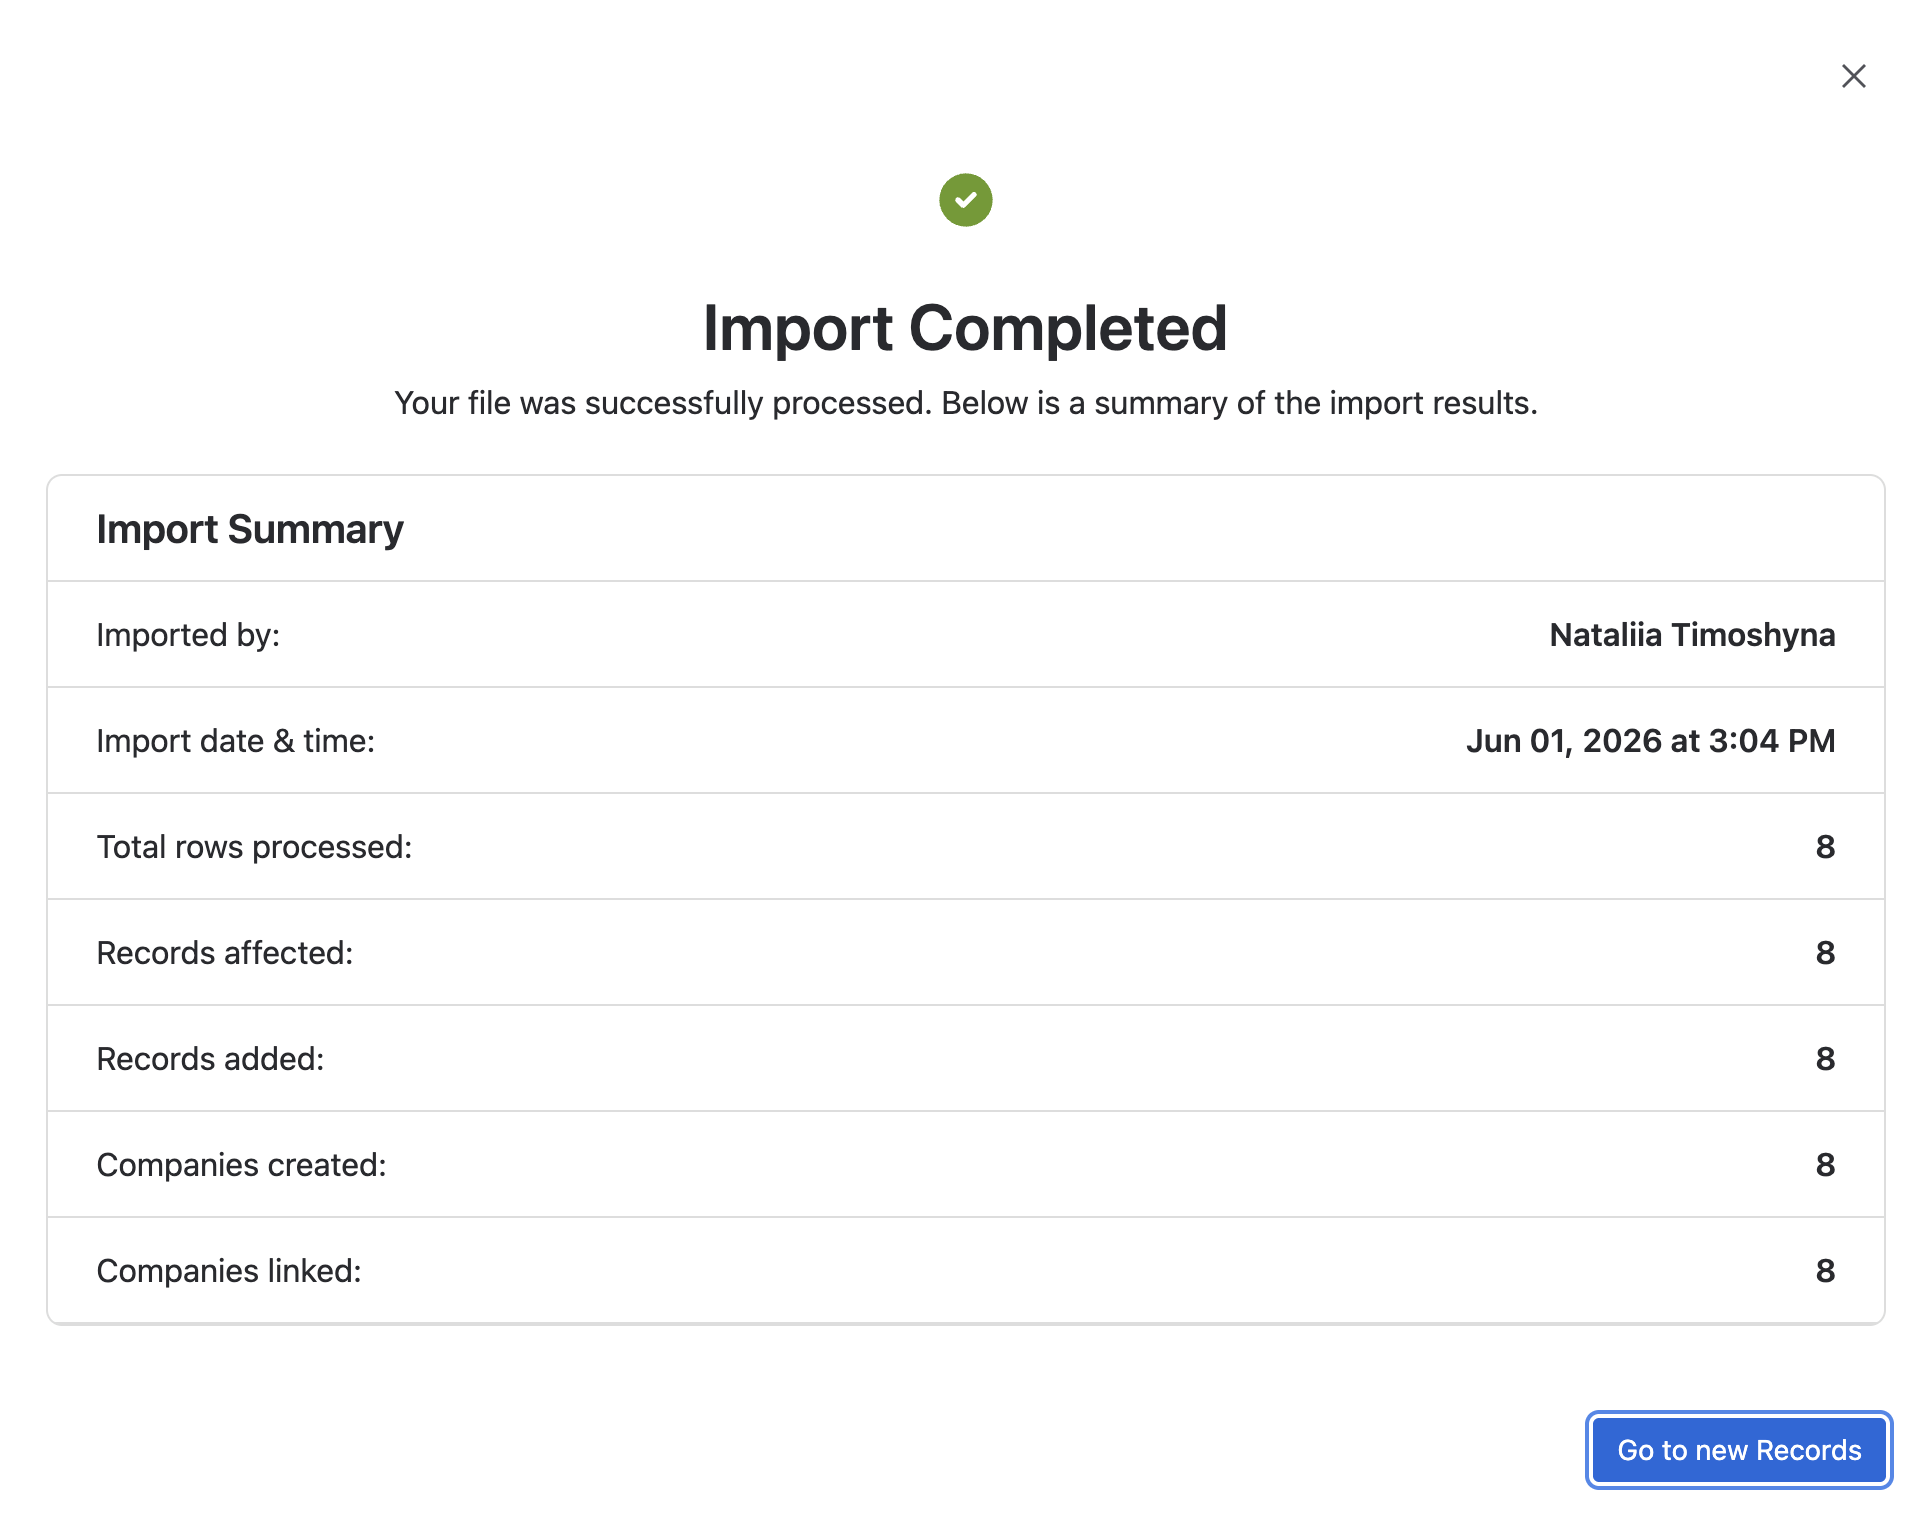
After a successful import, you’ll see:
- Imported by
- Import date & time
- Total rows processed
- Records affected
- Records added
- Companies created
- Companies linked
Click Go to new Records to view your newly imported Contacts.
Viewing Imported Contacts #
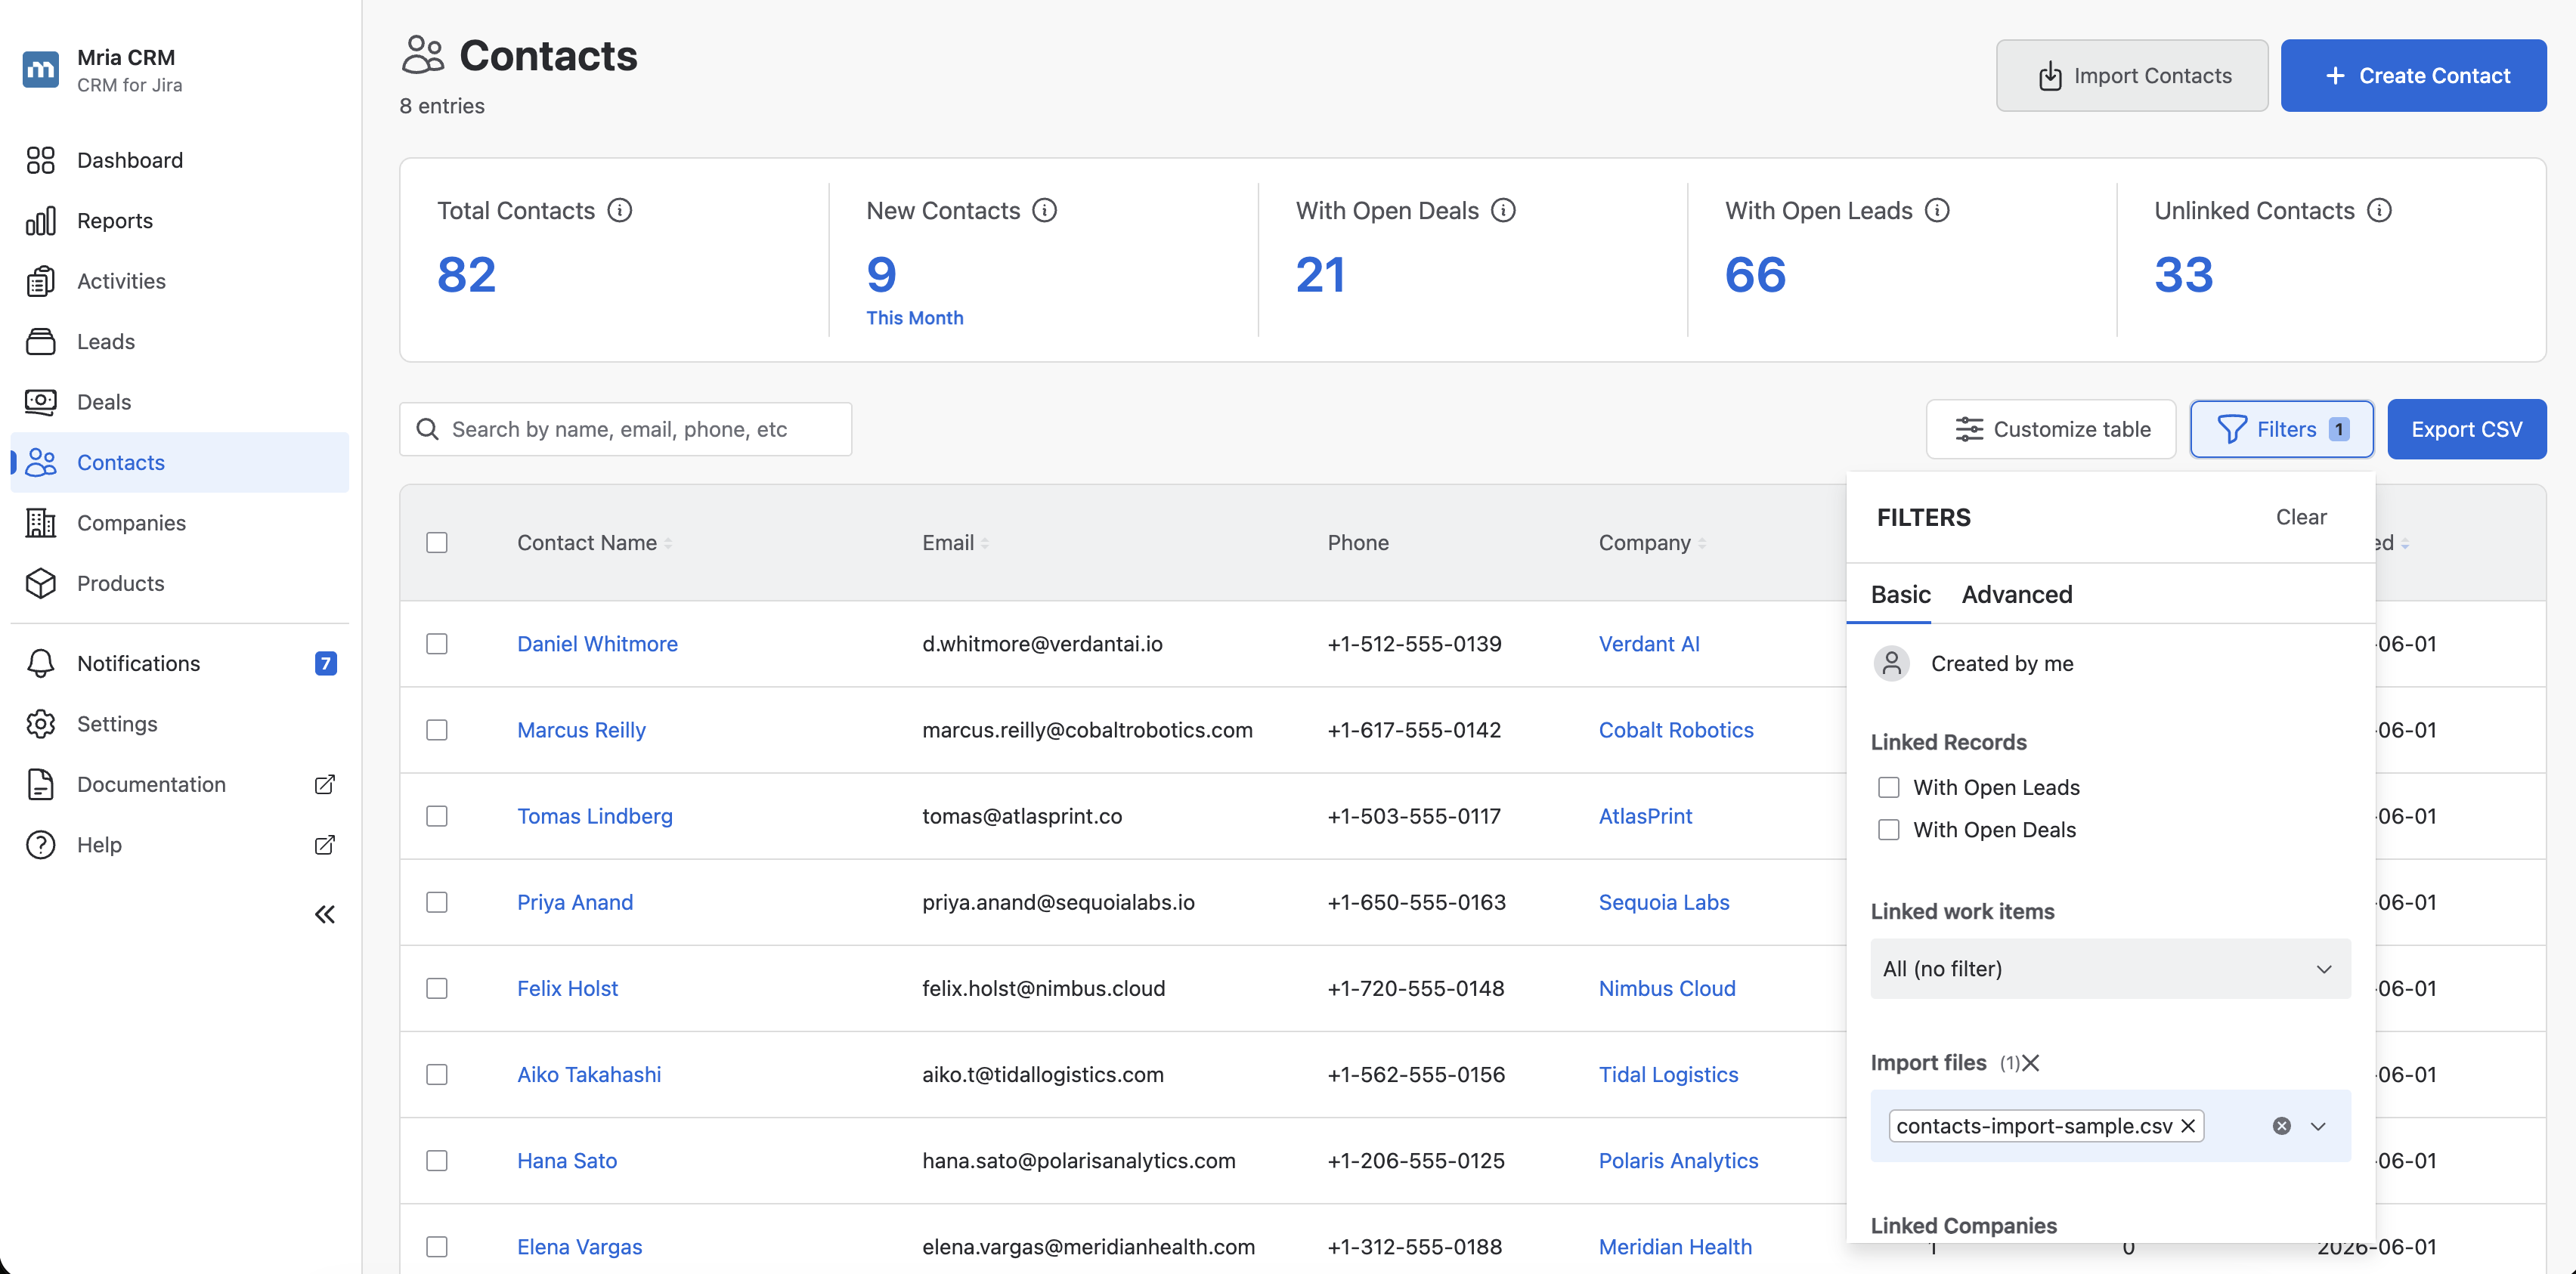
You can find imported Contacts in several ways:
- From the notification you receive after the import finishes.
- From Settings → Data Administration → Contacts, by clicking the number in the “Records” column for the file you imported.
- From the Contacts list, using the Filters panel — the Import files filter lets you pick one or more import files and see exactly the Contacts that came from each.
Handling Import Errors #
If your import fails (for example, due to a temporary Forge issue), don’t worry — all Contacts processed before the error remain saved. Simply re-upload the same file and run the import again. The already existing Contacts won’t be duplicated.
Notifications & Assignment #
If imported Contacts are assigned to another user (for example, if Contacts are linked to the user’s Leads), that user will receive a notification such as:
“Nataliia Timoshyna imported webinar_contacts_50.csv and assigned new Contacts to you.”
They can open and work with these records immediately.


