Zapier can call the Mria CRM REST API, but only through a Zapier step that speaks OAuth 2.0. This page walks through one complete use case, logging an email campaign as a note on the matching contact, and every screen you pass on the way. The same connection and request steps work for any other endpoint in the OpenAPI spec.
Before you start #
- The API uses Atlassian OAuth 2.0 (3LO) only. There are no API keys, so the plain Webhooks by Zapier action cannot authenticate: it supports basic auth and nothing else.
- Use API by Zapier instead. It is available on Zapier’s Professional, Team and Enterprise plans (a new account gets a 14-day Professional trial), creates an OAuth2 connection, and then runs an API Request action per call.
- Complete REST API: Setup first, or follow the Atlassian steps below. The person who creates the OAuth integration must have a verified Atlassian account in the organization that owns the site.
- Everything Zapier writes runs as the user who connected the account and is limited by that user’s CRM role.
The use case #
A marketing tool sends a campaign. For every recipient who is a contact in Mria CRM, the sales team wants a note on the contact saying which email went out and when. In Zapier this is three steps:
- Trigger: the source app reports the sent email with the recipient’s address and the subject. The example uses a Catch Hook trigger fed with a sample payload, so the screenshots are tool-neutral; with Mailchimp the trigger would be New Campaign, Email Opened or Link Clicked.
- Find the contact:
POST /contacts/searchwith the recipient’s email as the search term. - Add the note:
POST /contacts/{contactId}/noteswith the subject in the note text.
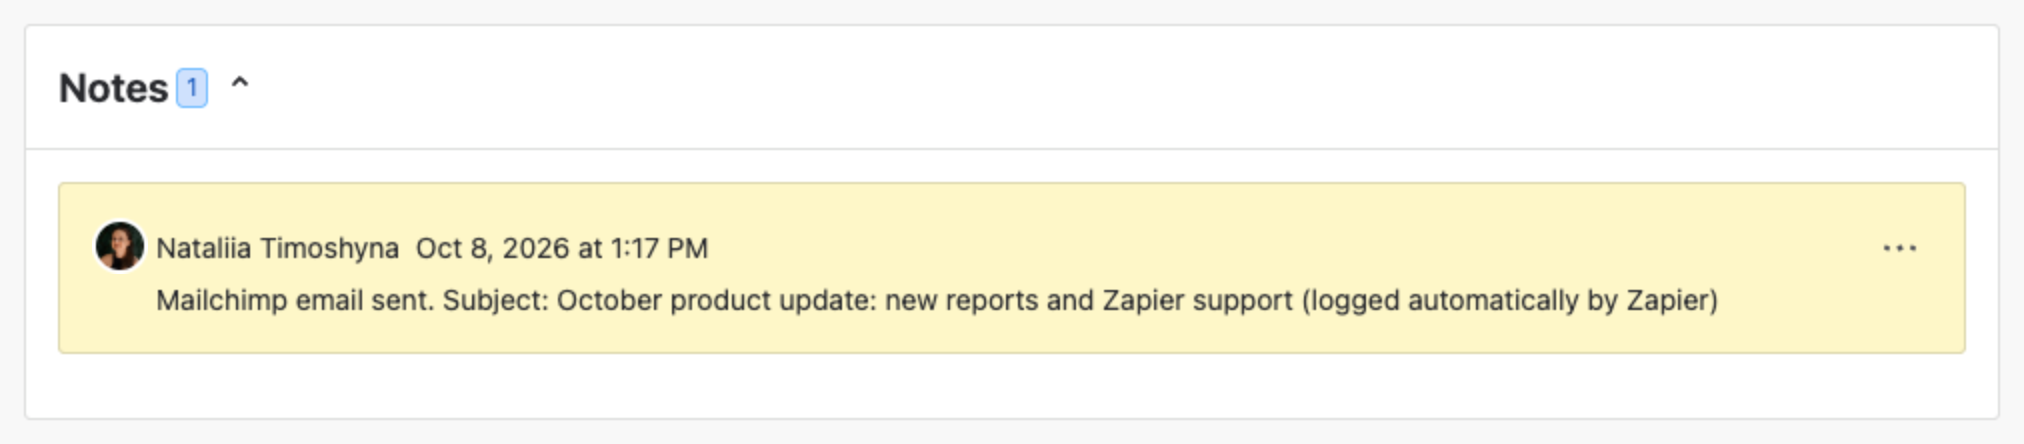
The API has no Emails endpoint. External emails can be stored as Notes on a Contact, Lead or Deal; they appear in the record’s Notes section and on its timeline, not under the Emails tab, which is reserved for the Gmail and Outlook connectors.
Part 1: Atlassian side #
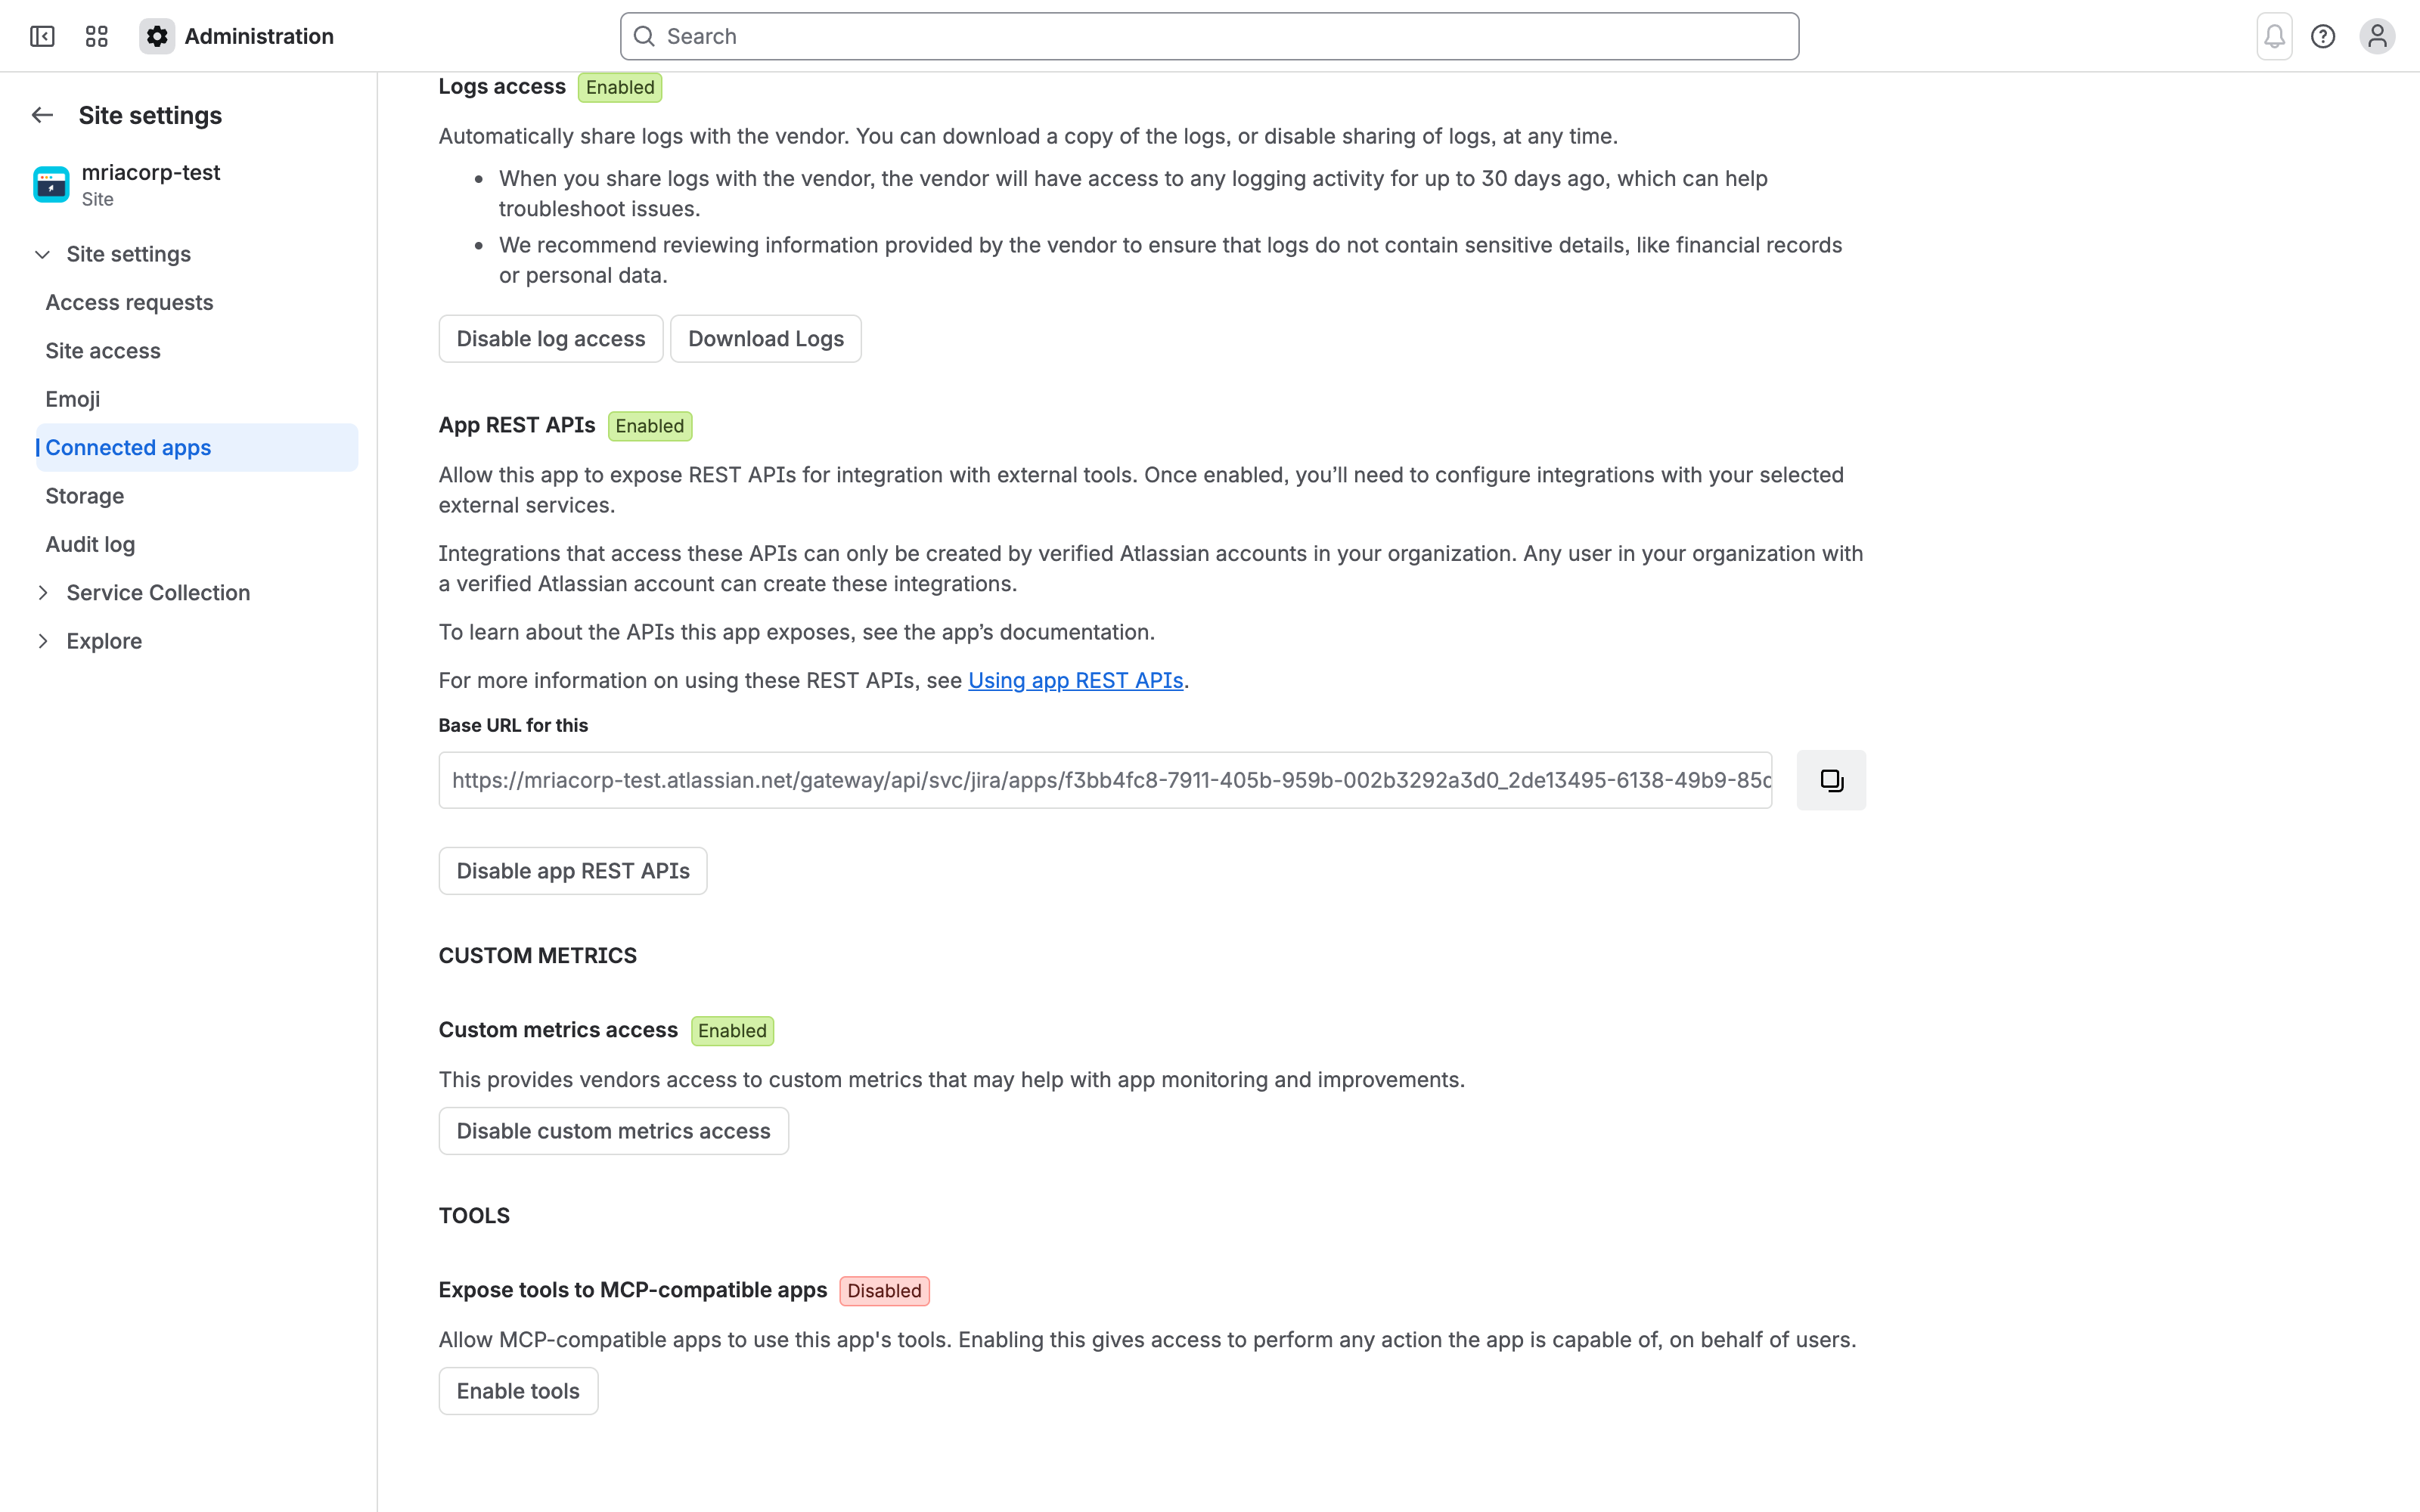
1. Enable App REST APIs on the site #
A site admin opens admin.atlassian.com → your site → Connected apps → Mria CRM → View app details and enables App REST APIs. Copy the Base URL shown there: it contains the appId_envId segment you will need in every Zapier request.
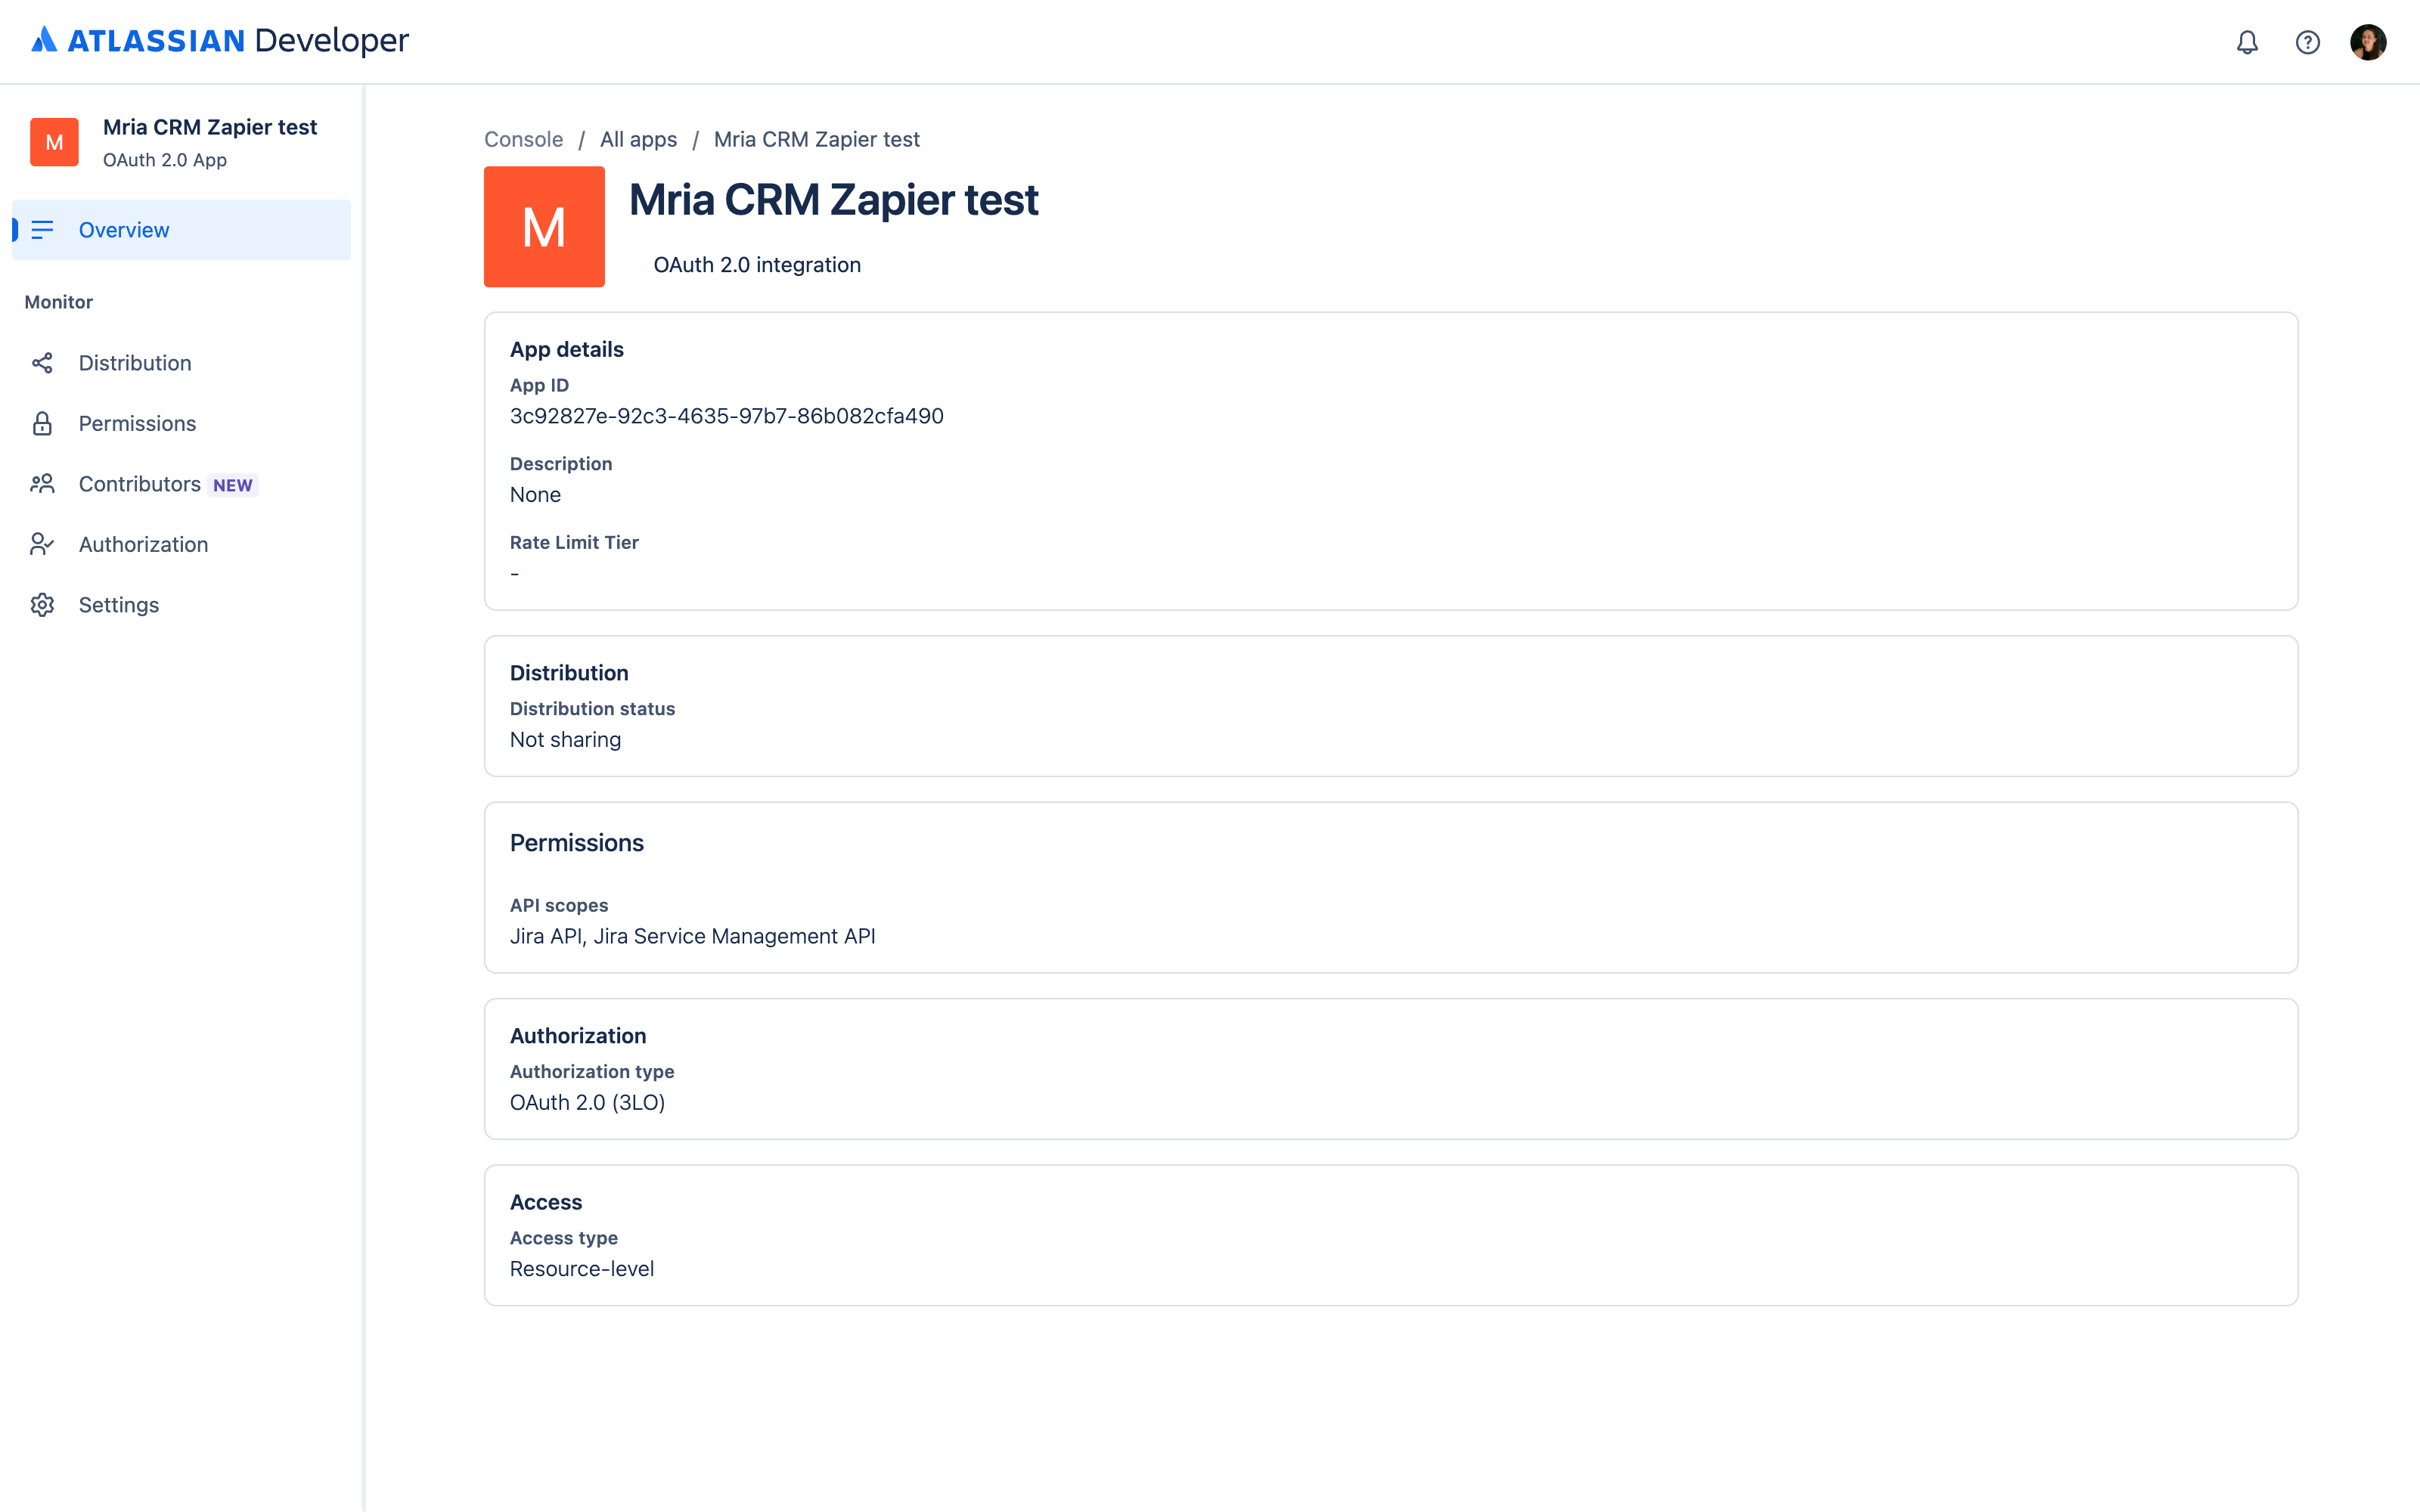
2. Create the OAuth 2.0 integration #
In the Developer console choose Create → OAuth 2.0 integration, give it a name and keep the Resource-level access type.
3. Register Zapier’s callback URL #
Open Authorization → OAuth 2.0 (3LO) → Add and add exactly this callback URL. It is the same for every API by Zapier connection:
https://zapier.com/dashboard/auth/oauth/return/App235435CLIAPI/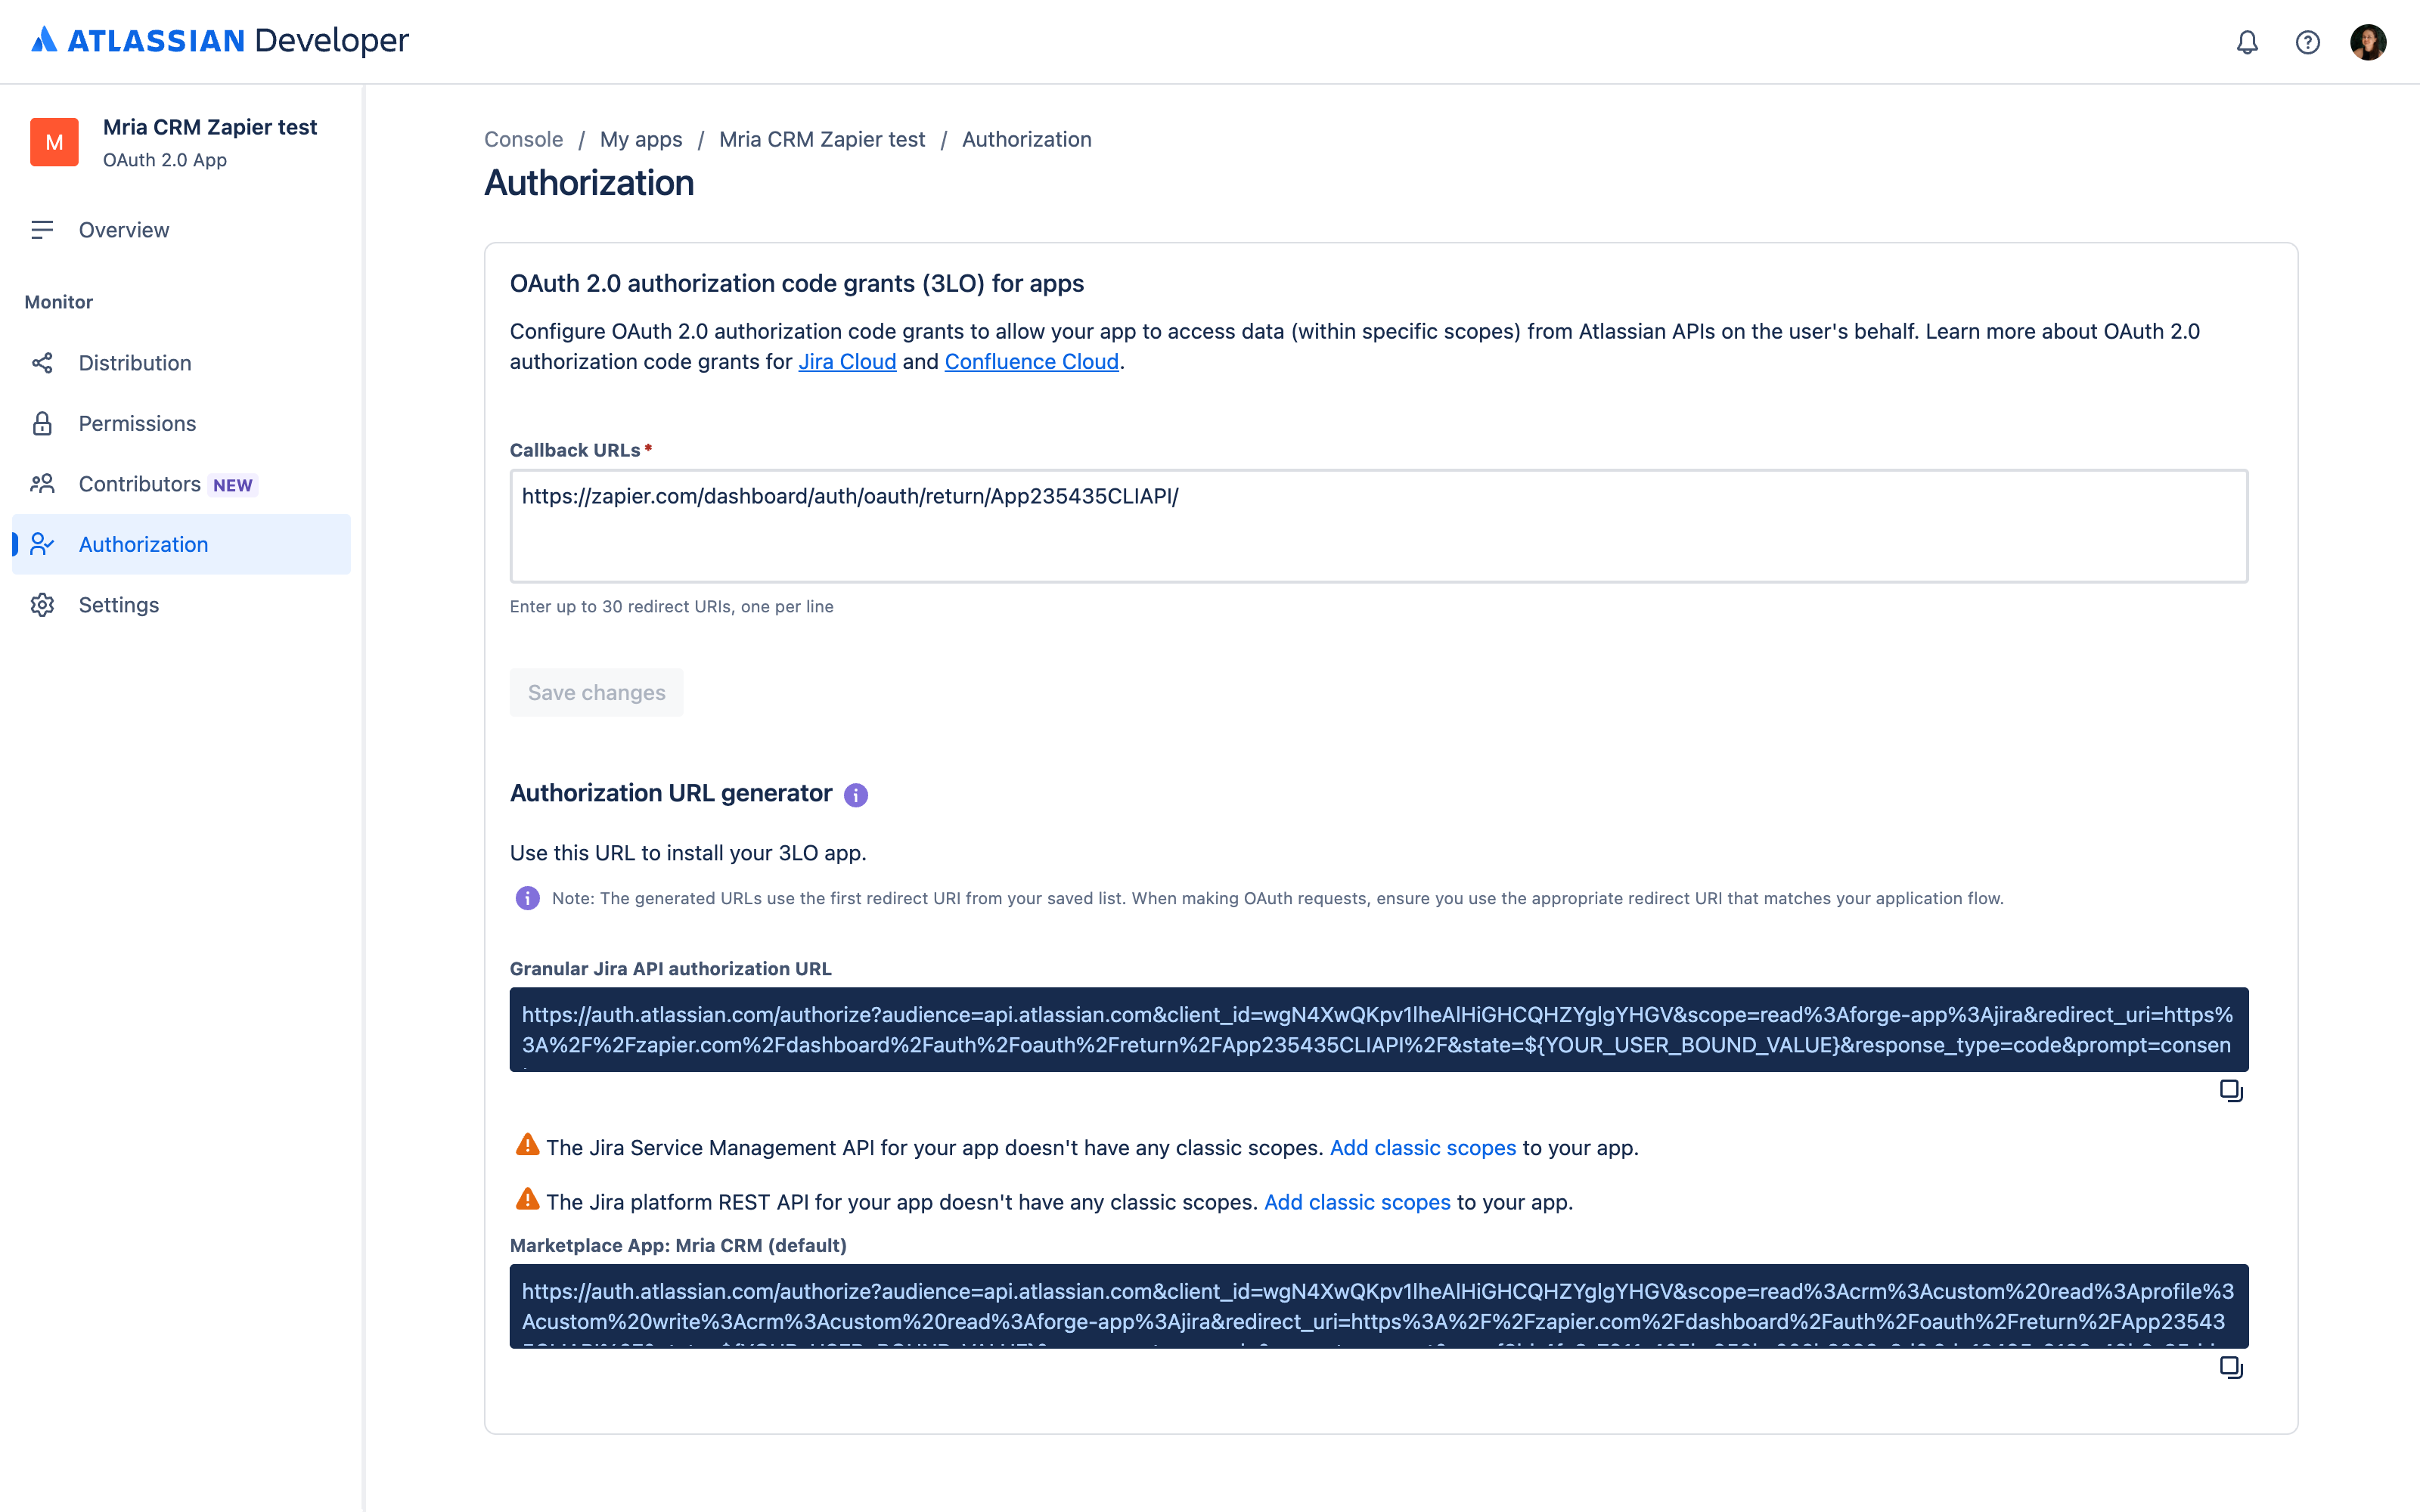
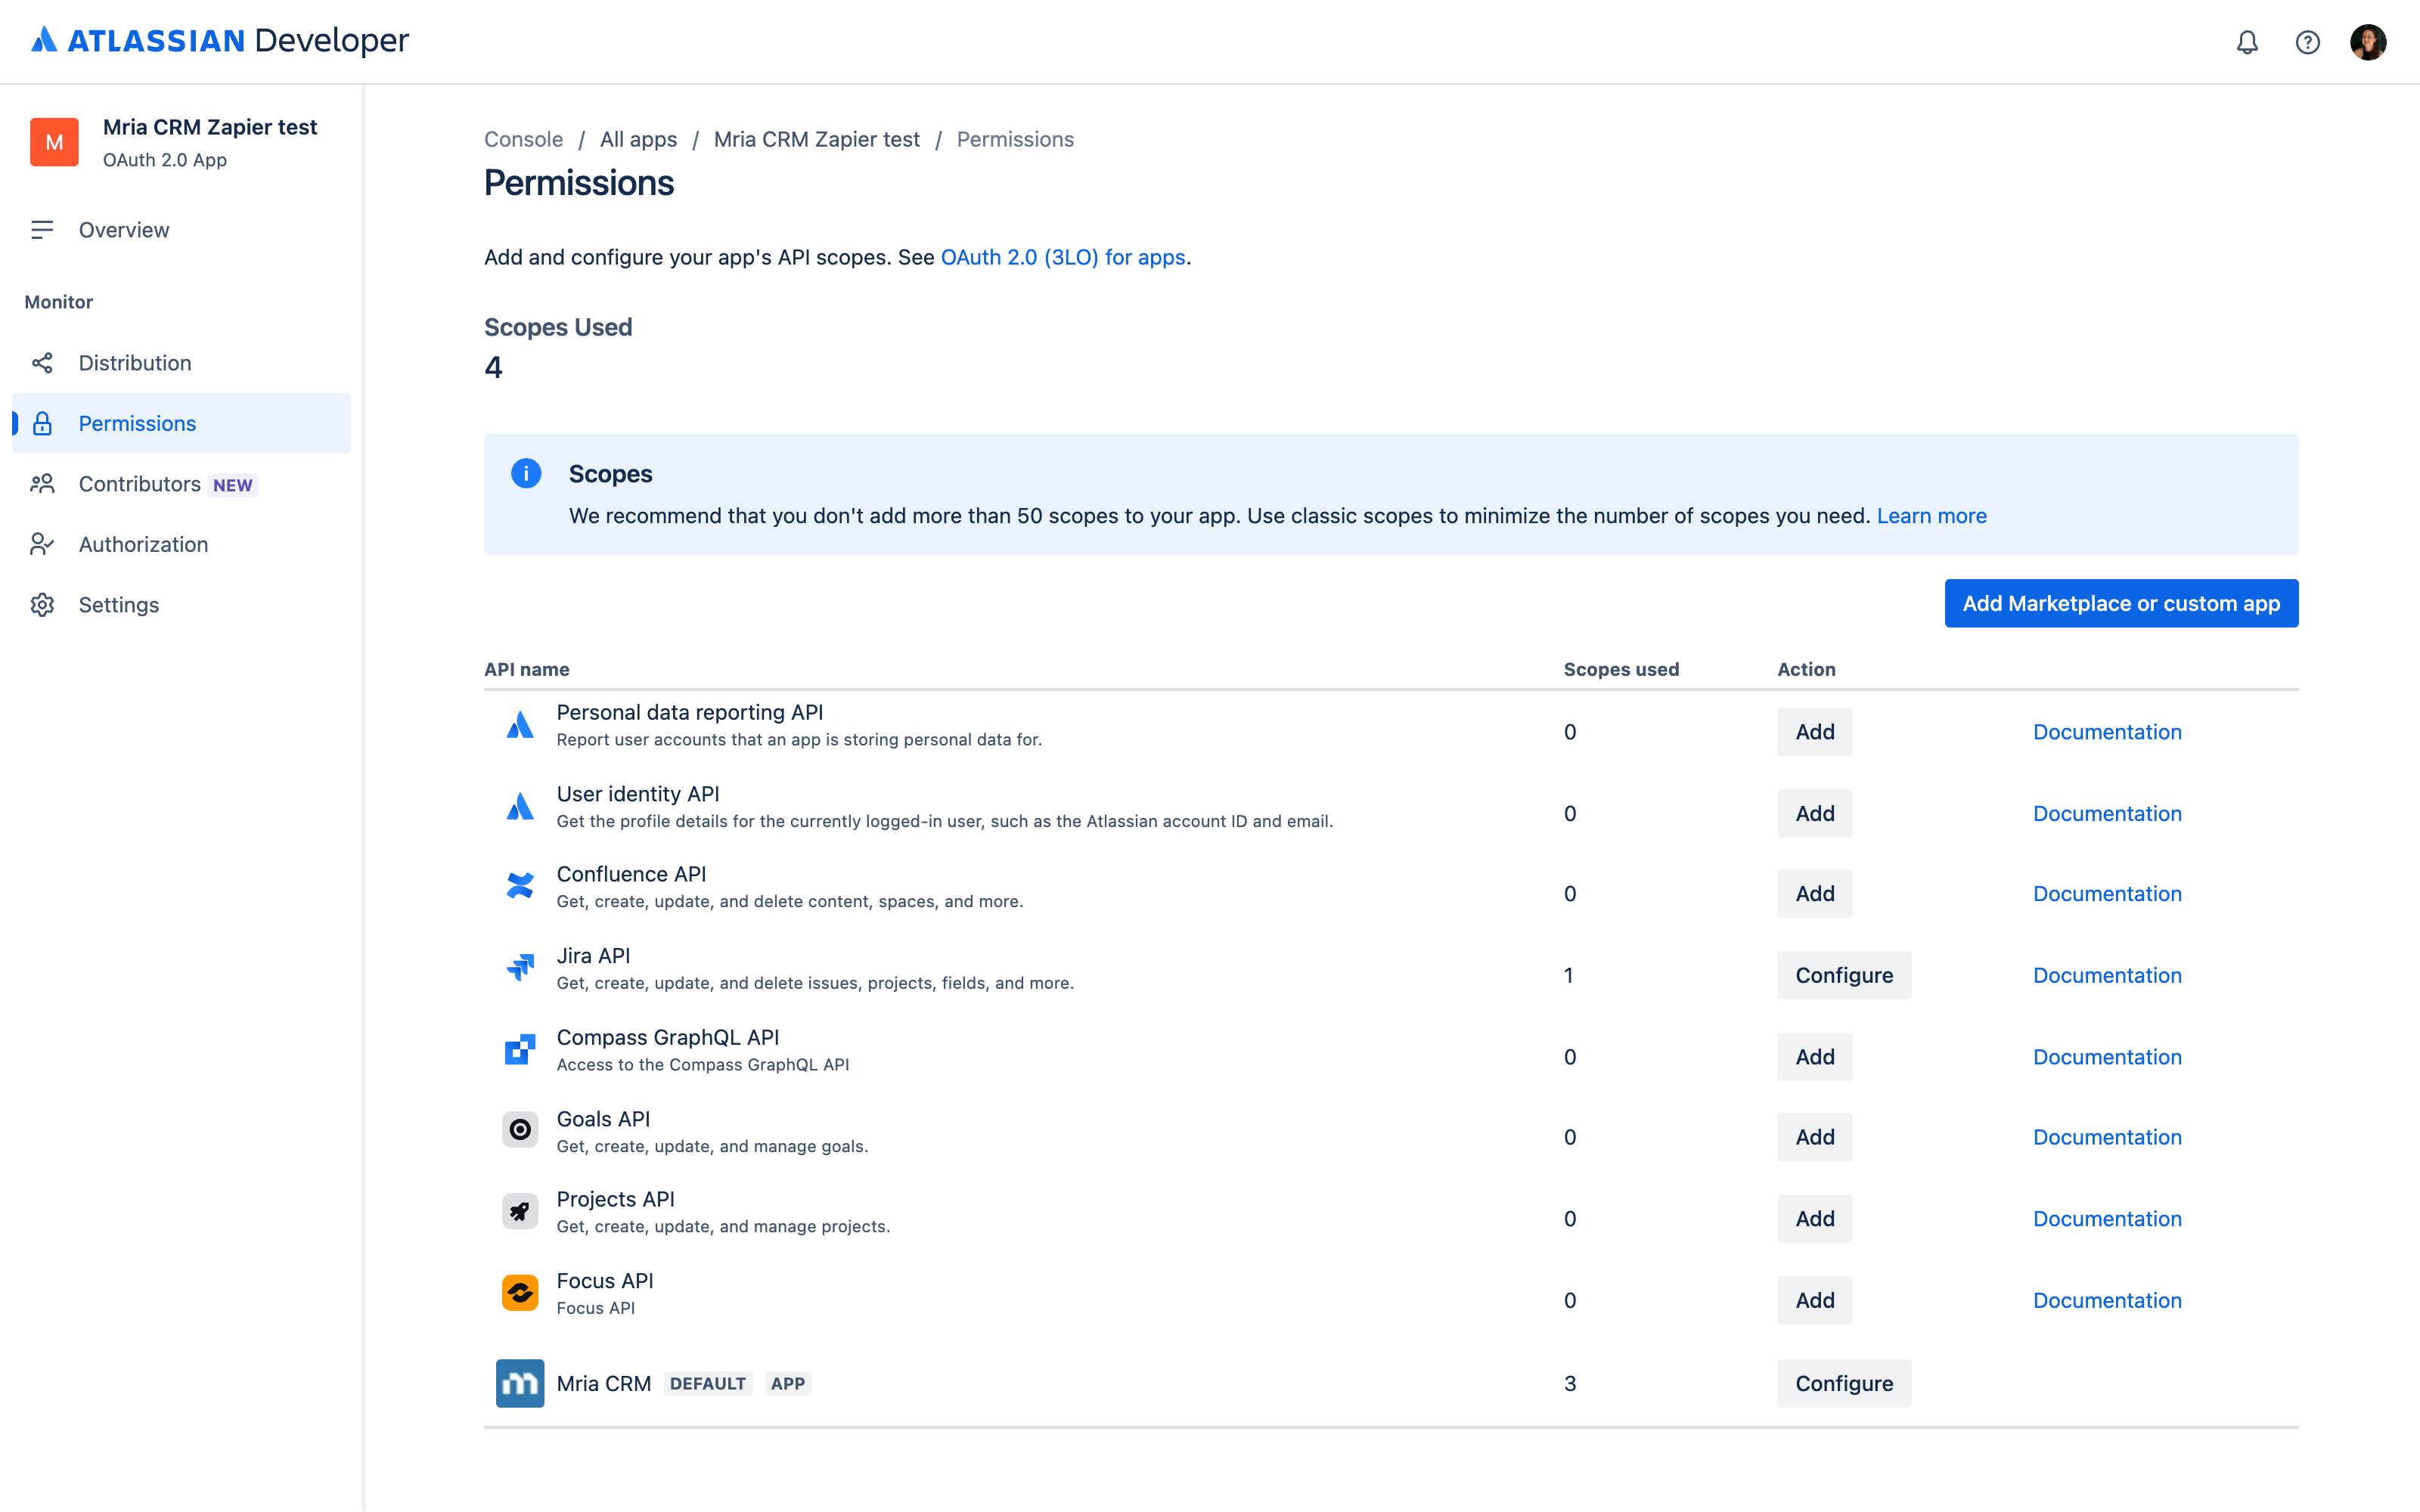
4. Add the scopes #
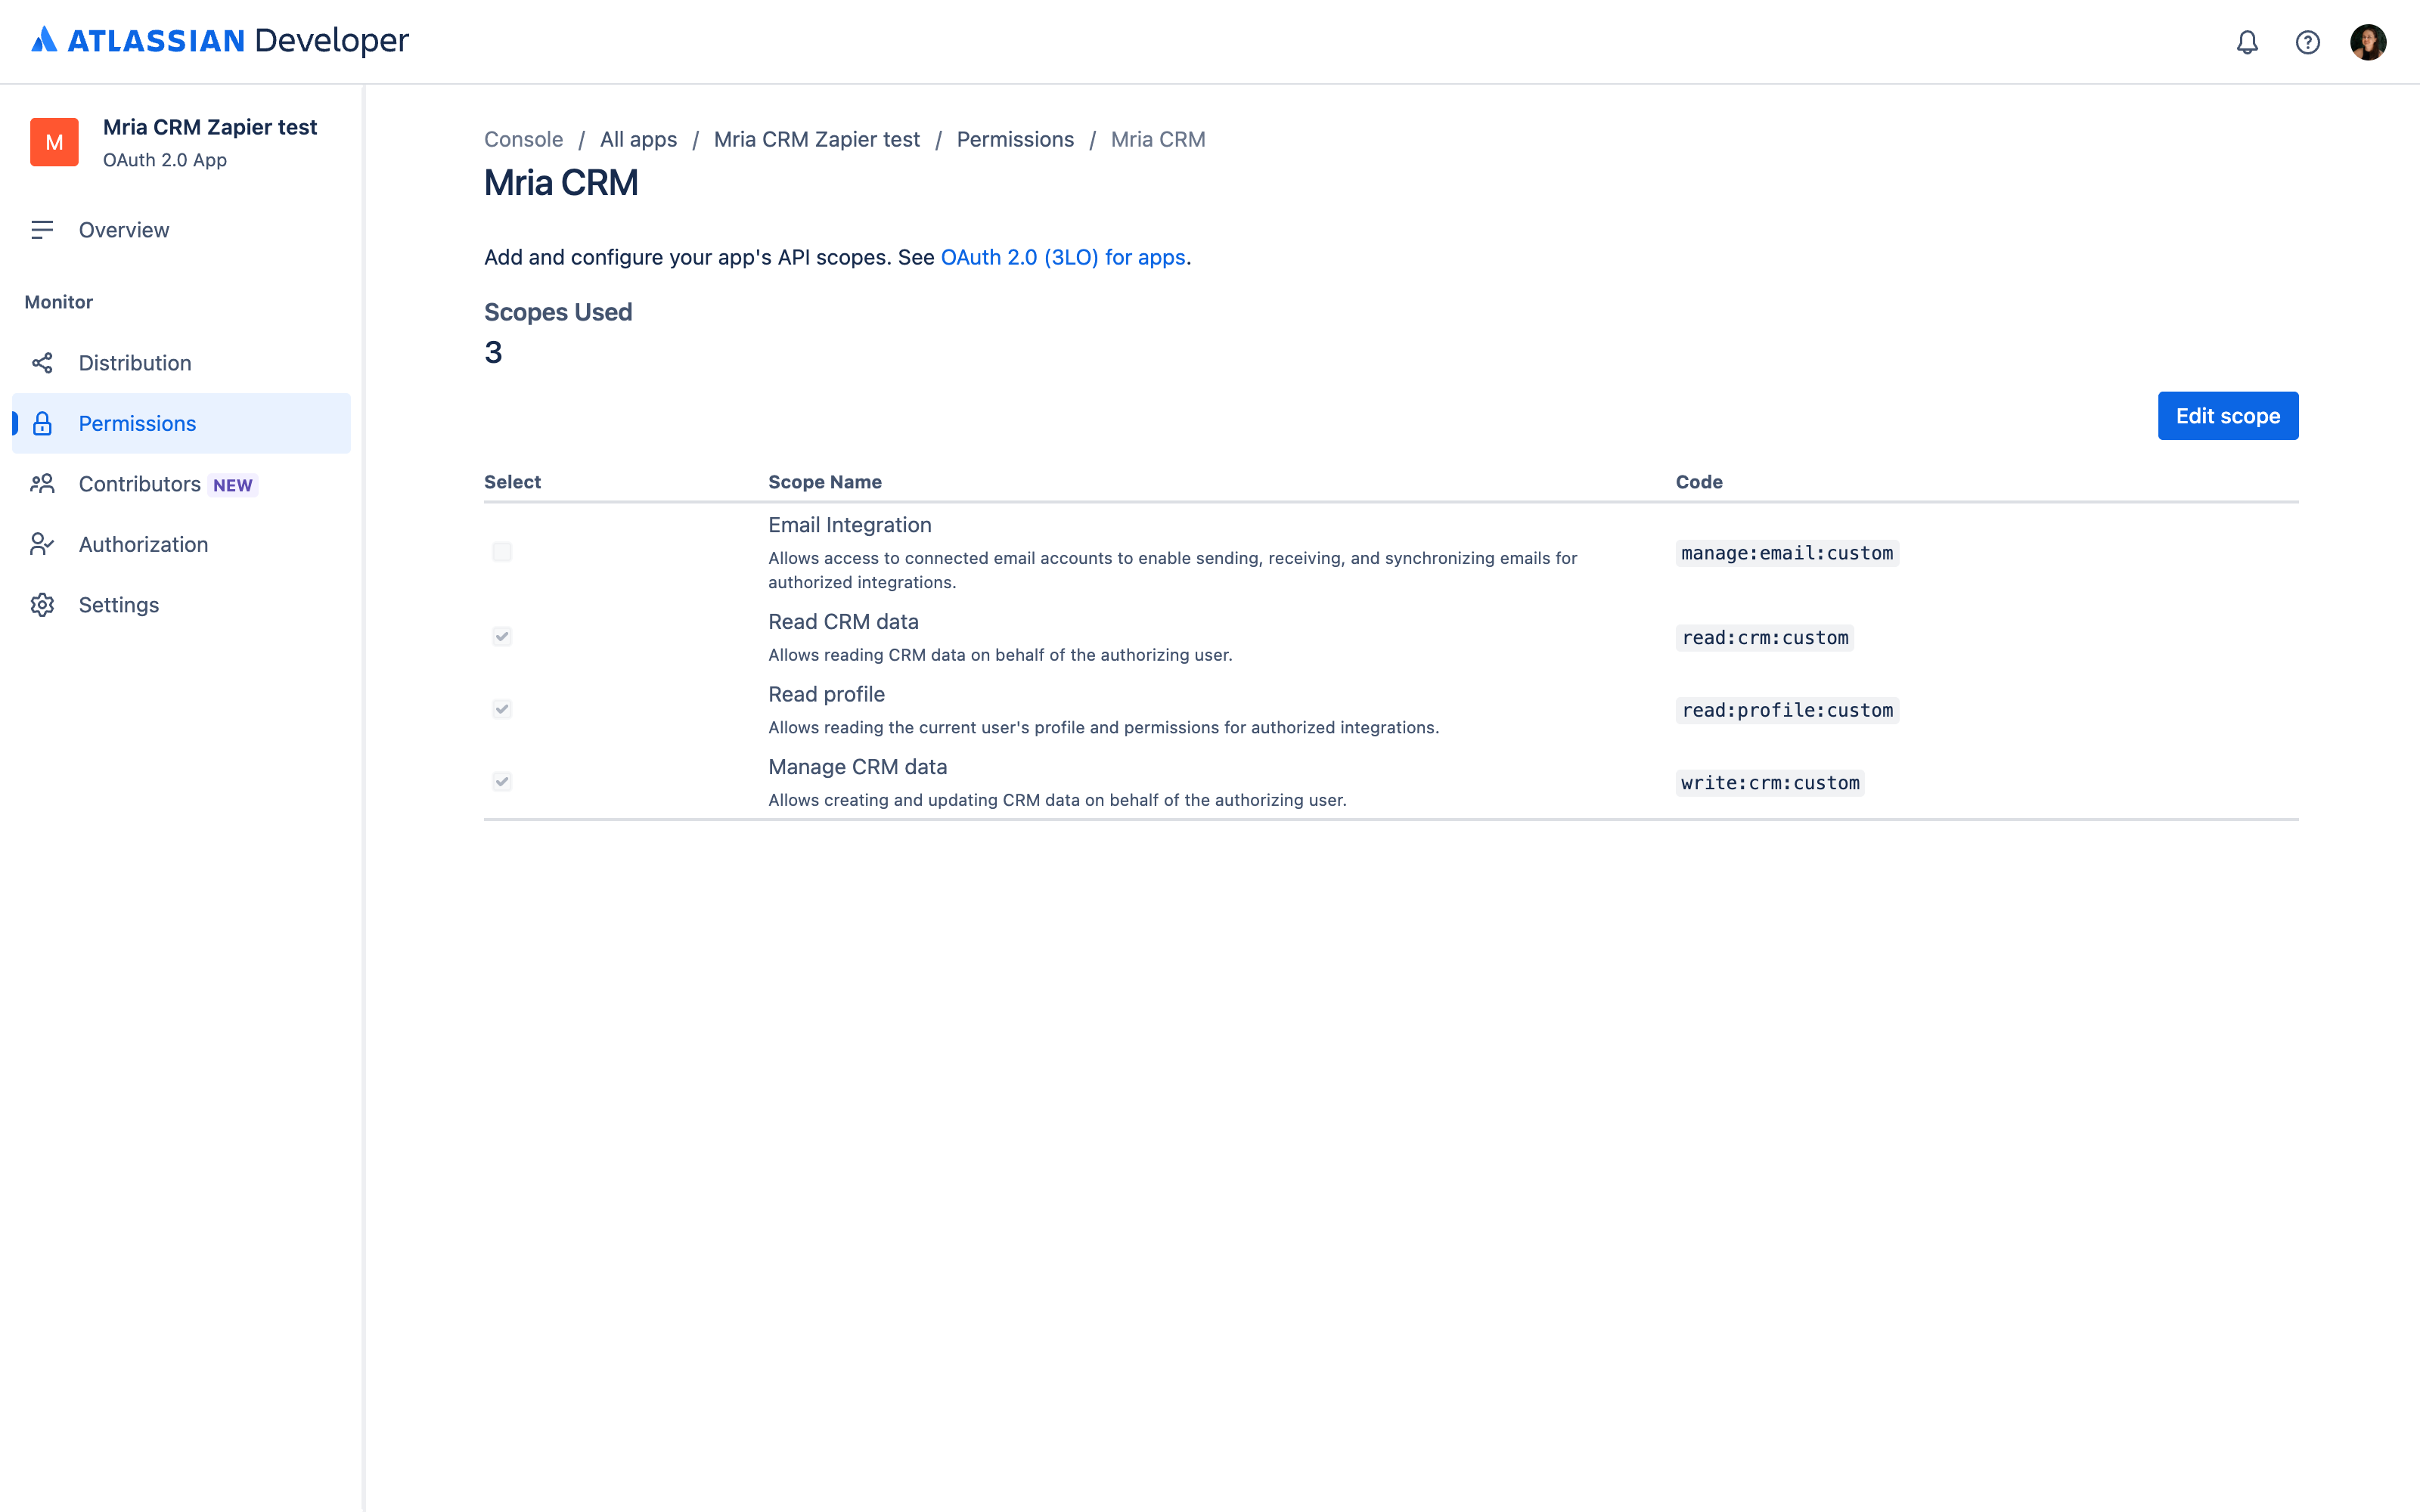
Under Permissions:
- Add Marketplace or custom app → your site → Mria CRM → tick
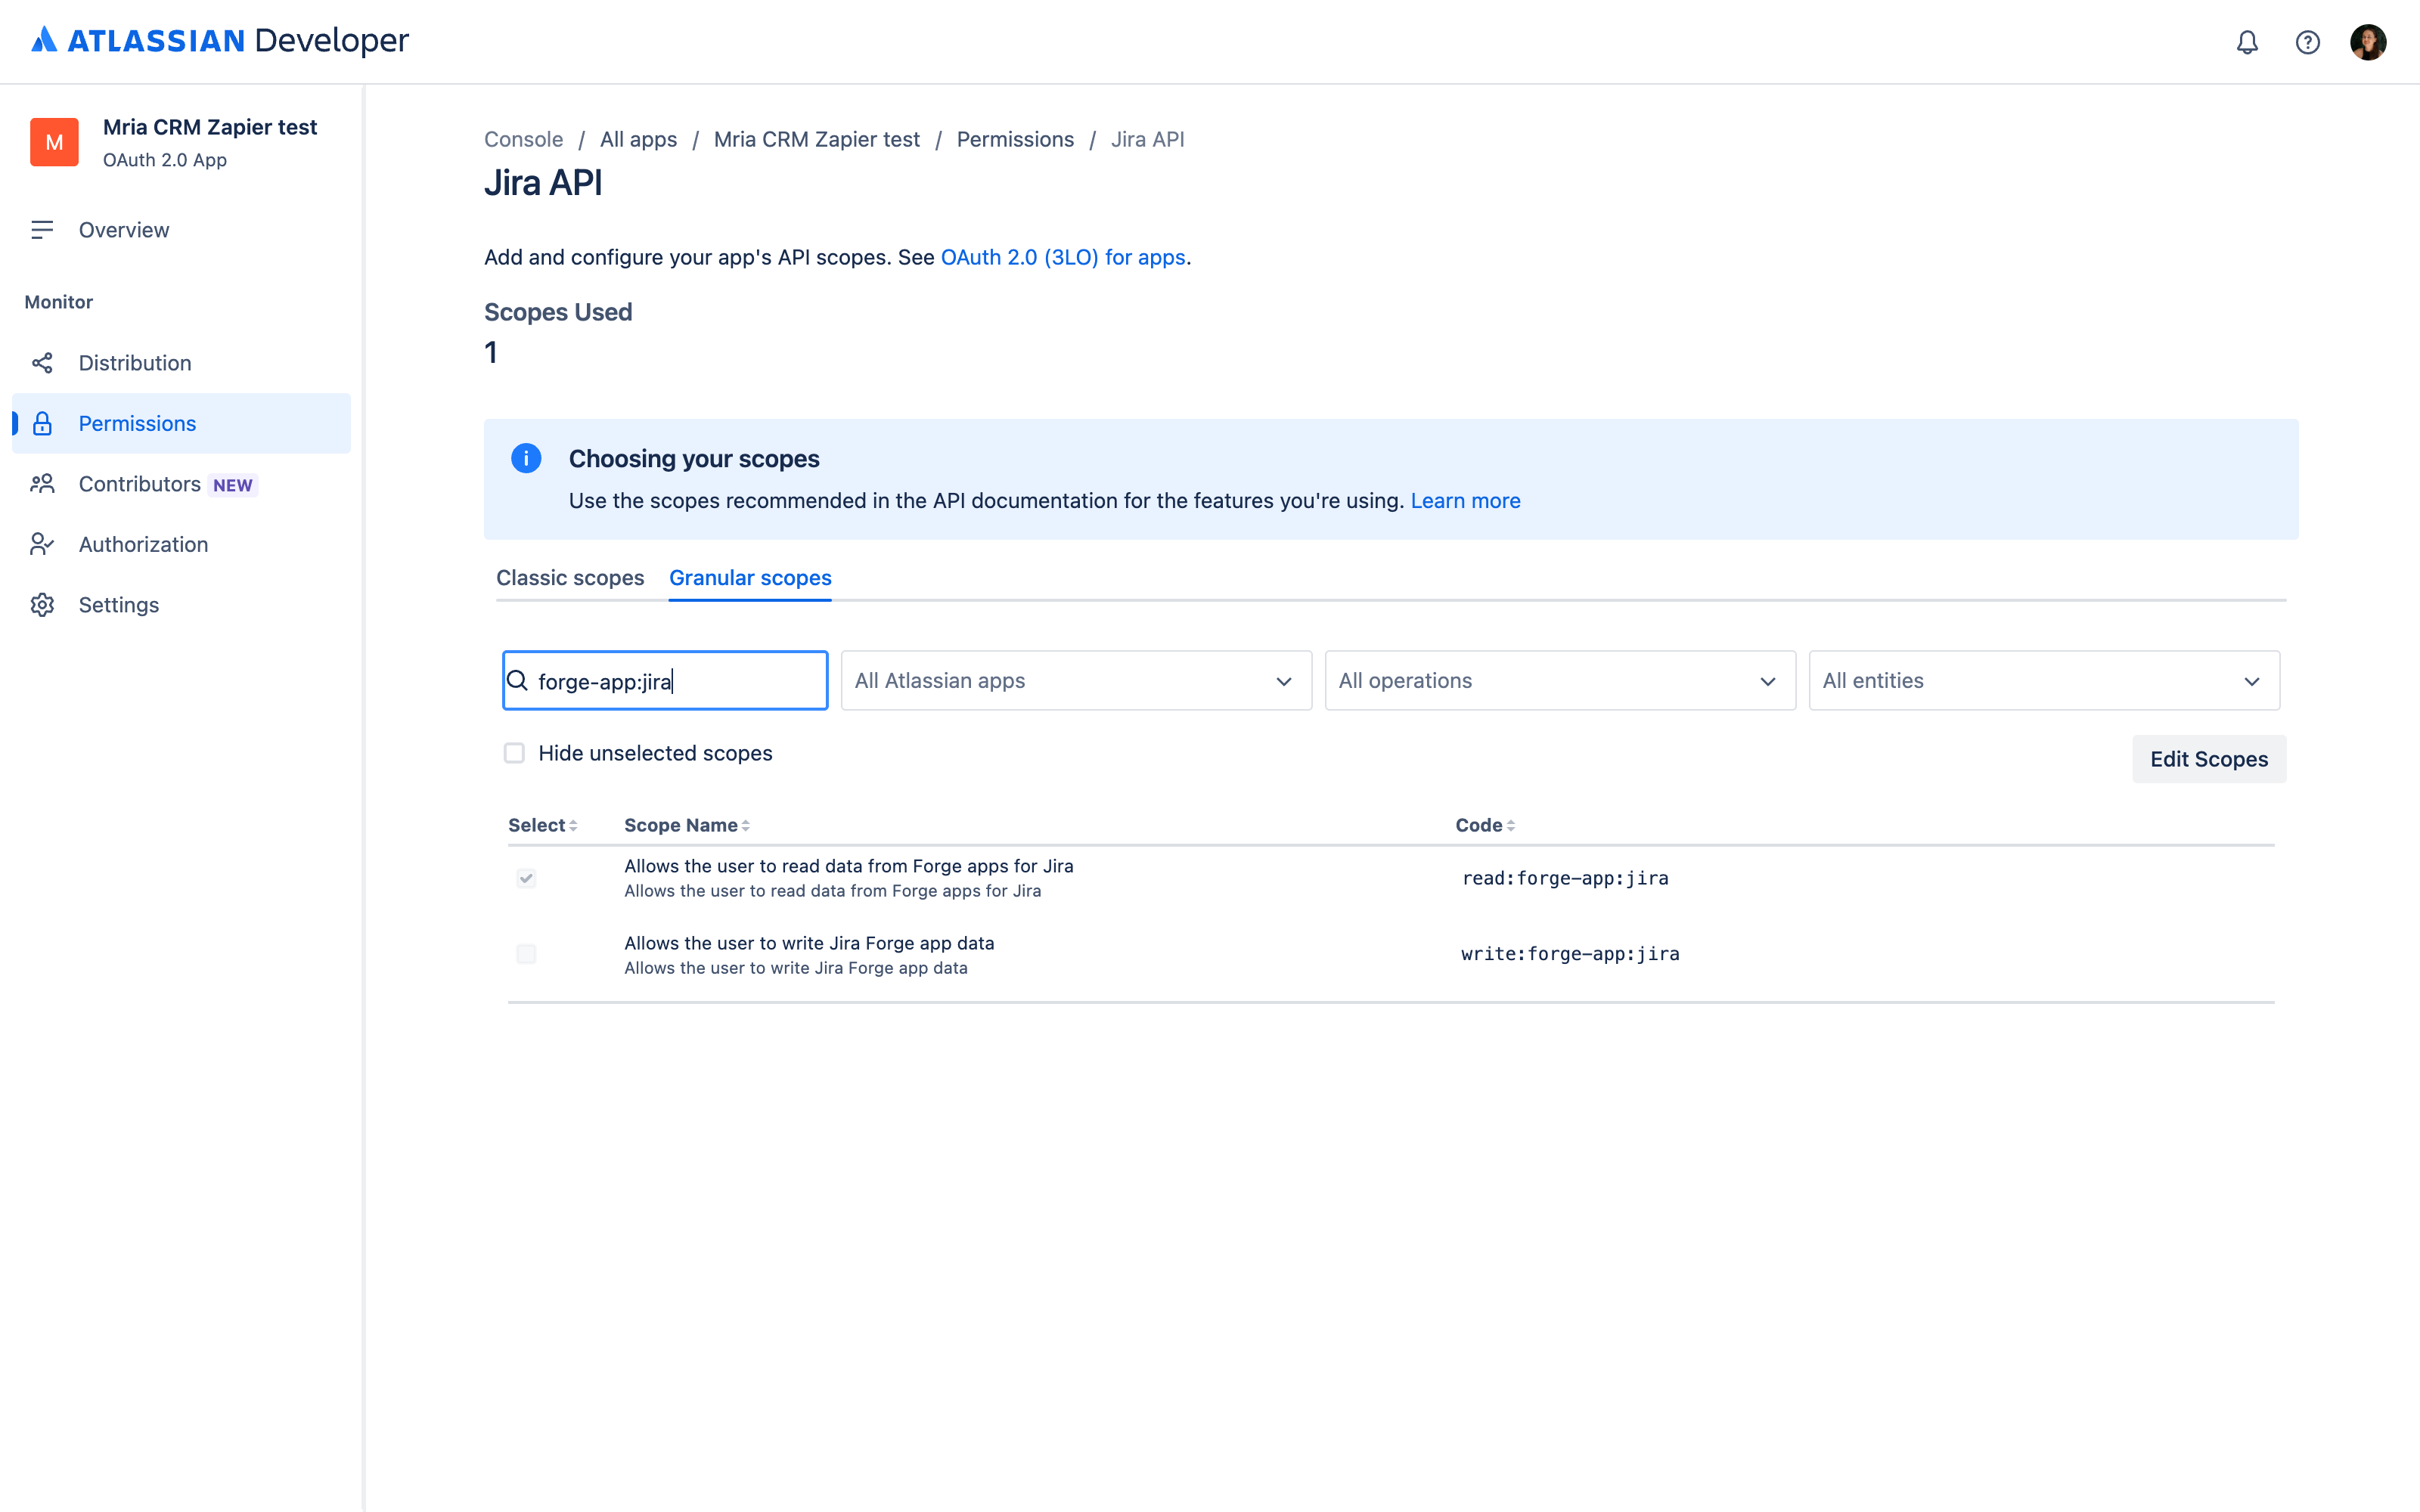
read:crm:custom,write:crm:customandread:profile:custom. If the site has several Mria CRM installs, pick the one whose environment matches your Base URL. - Jira API → Add → Configure → Granular scopes → tick
read:forge-app:jira.
5. Copy the client credentials #
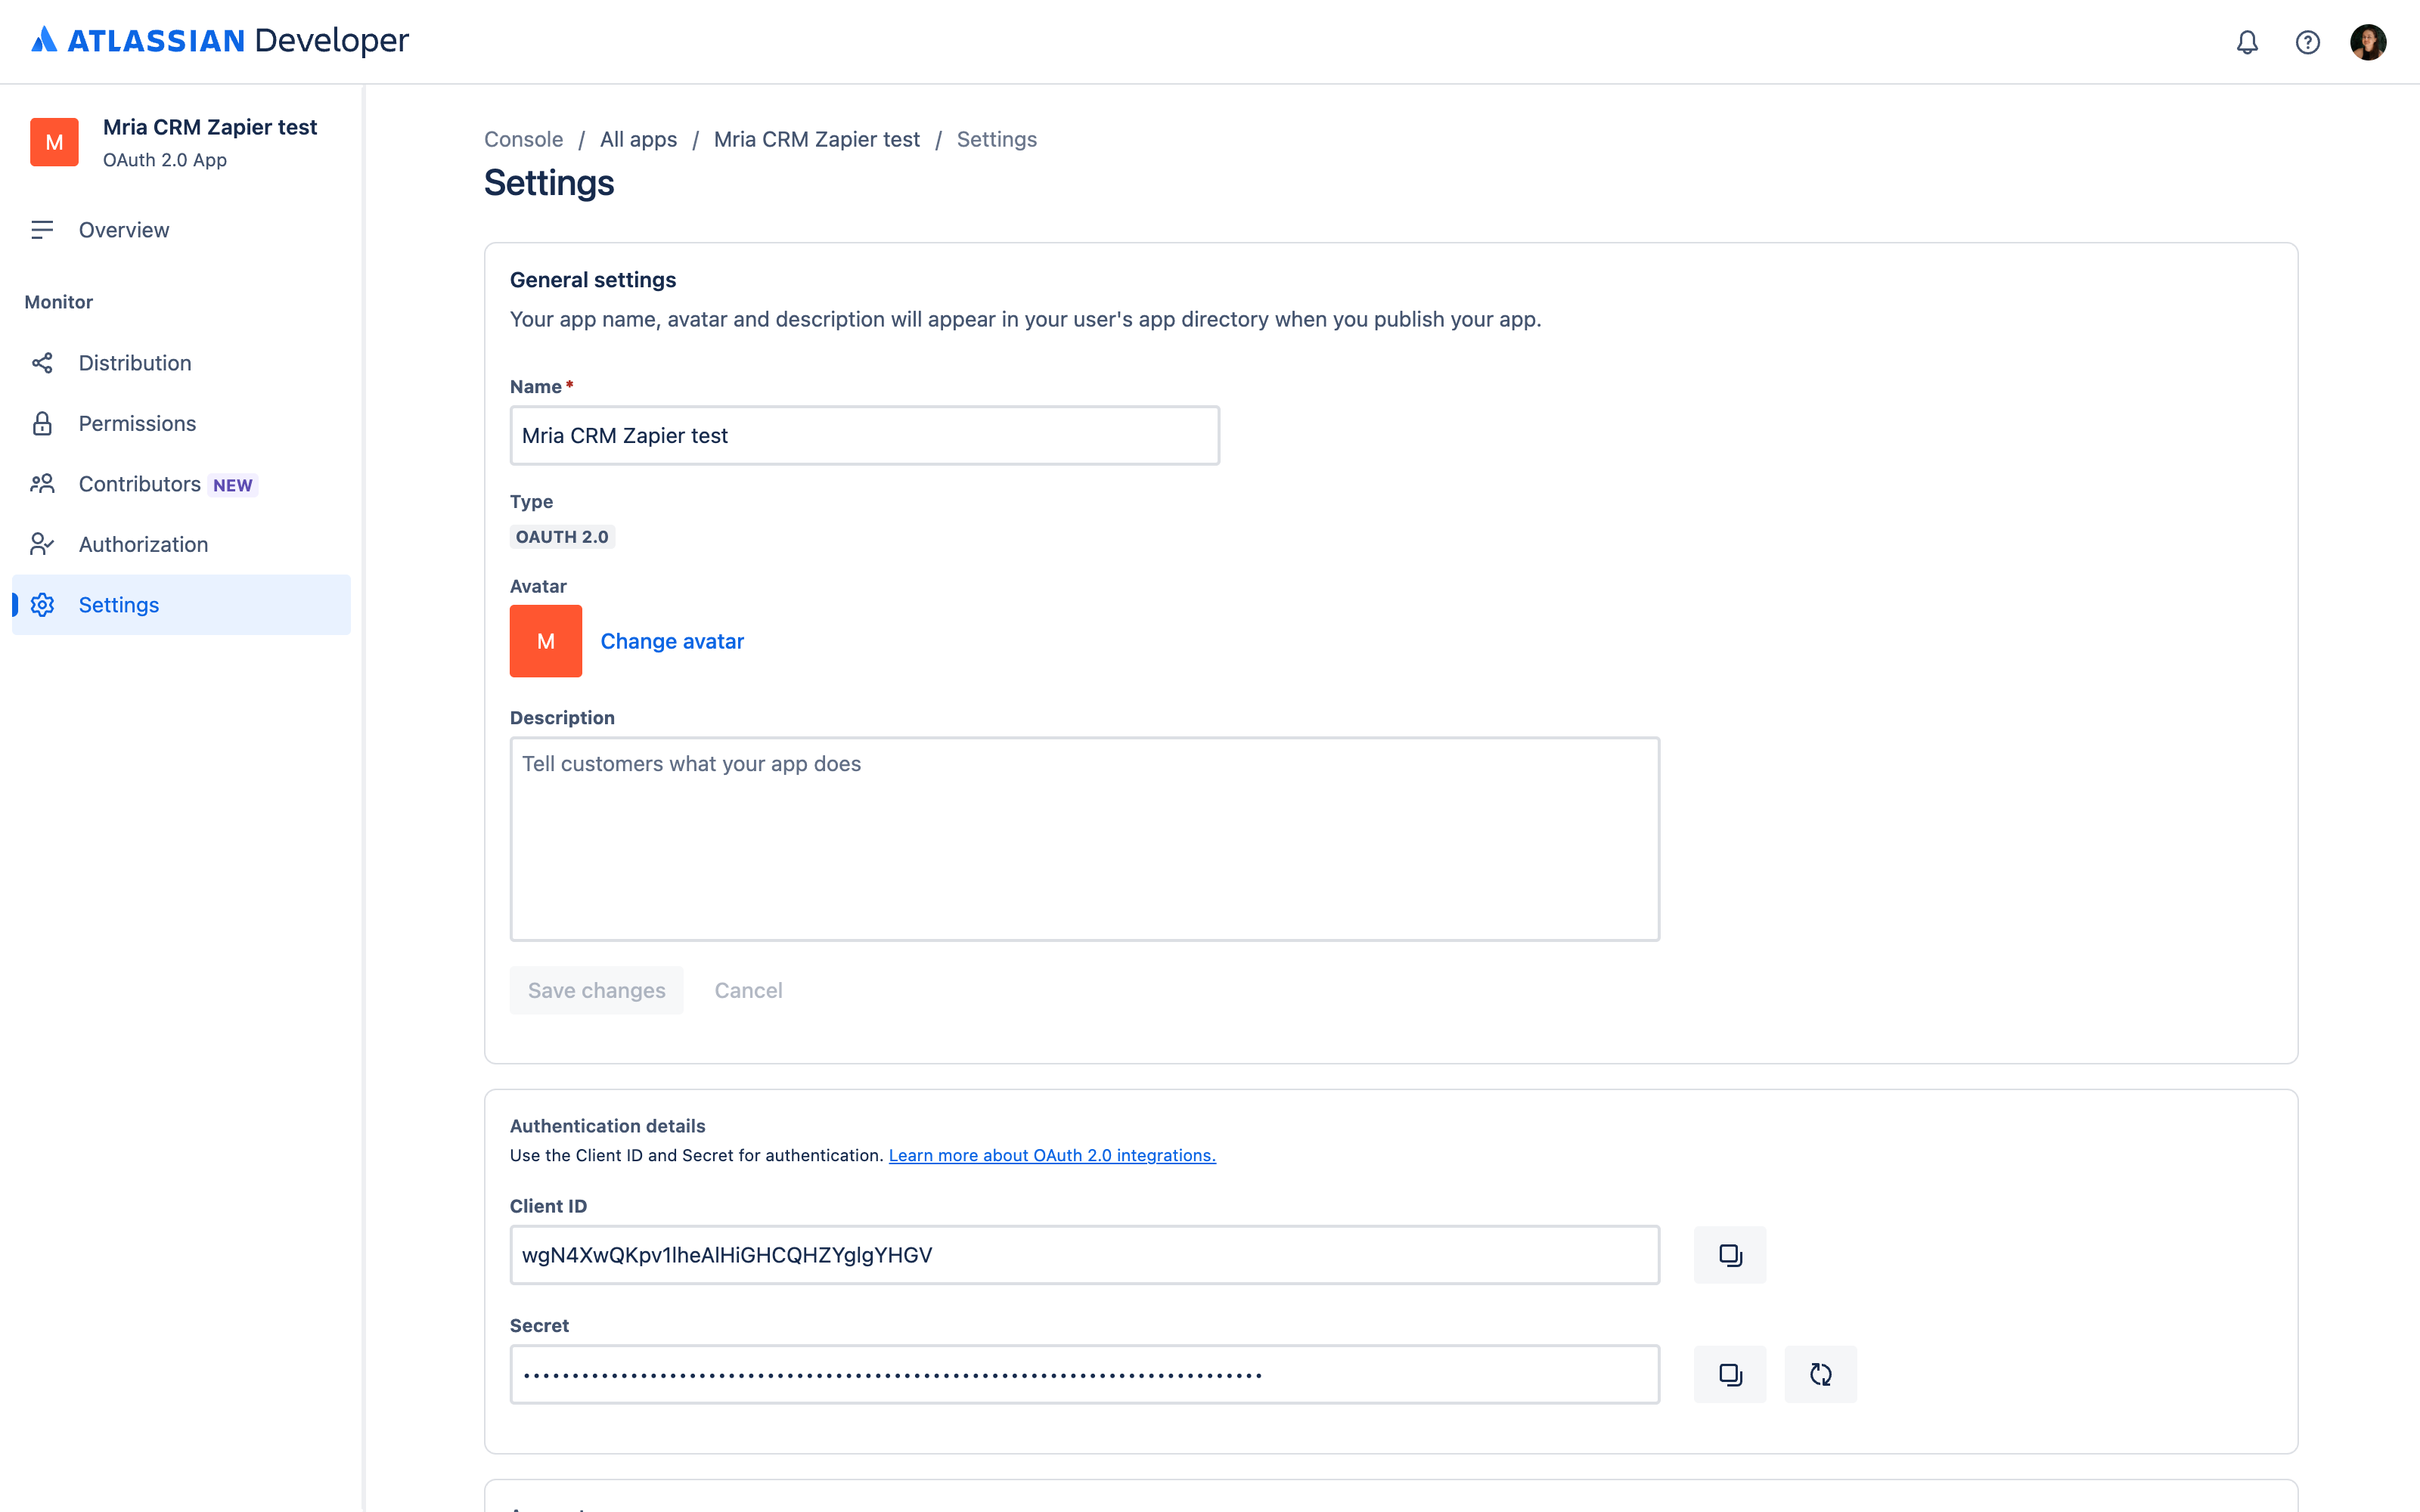
On Settings copy the Client ID and the Secret. You paste both into Zapier in the next part.
Part 2: Zapier side #
6. Create the API by Zapier connection #
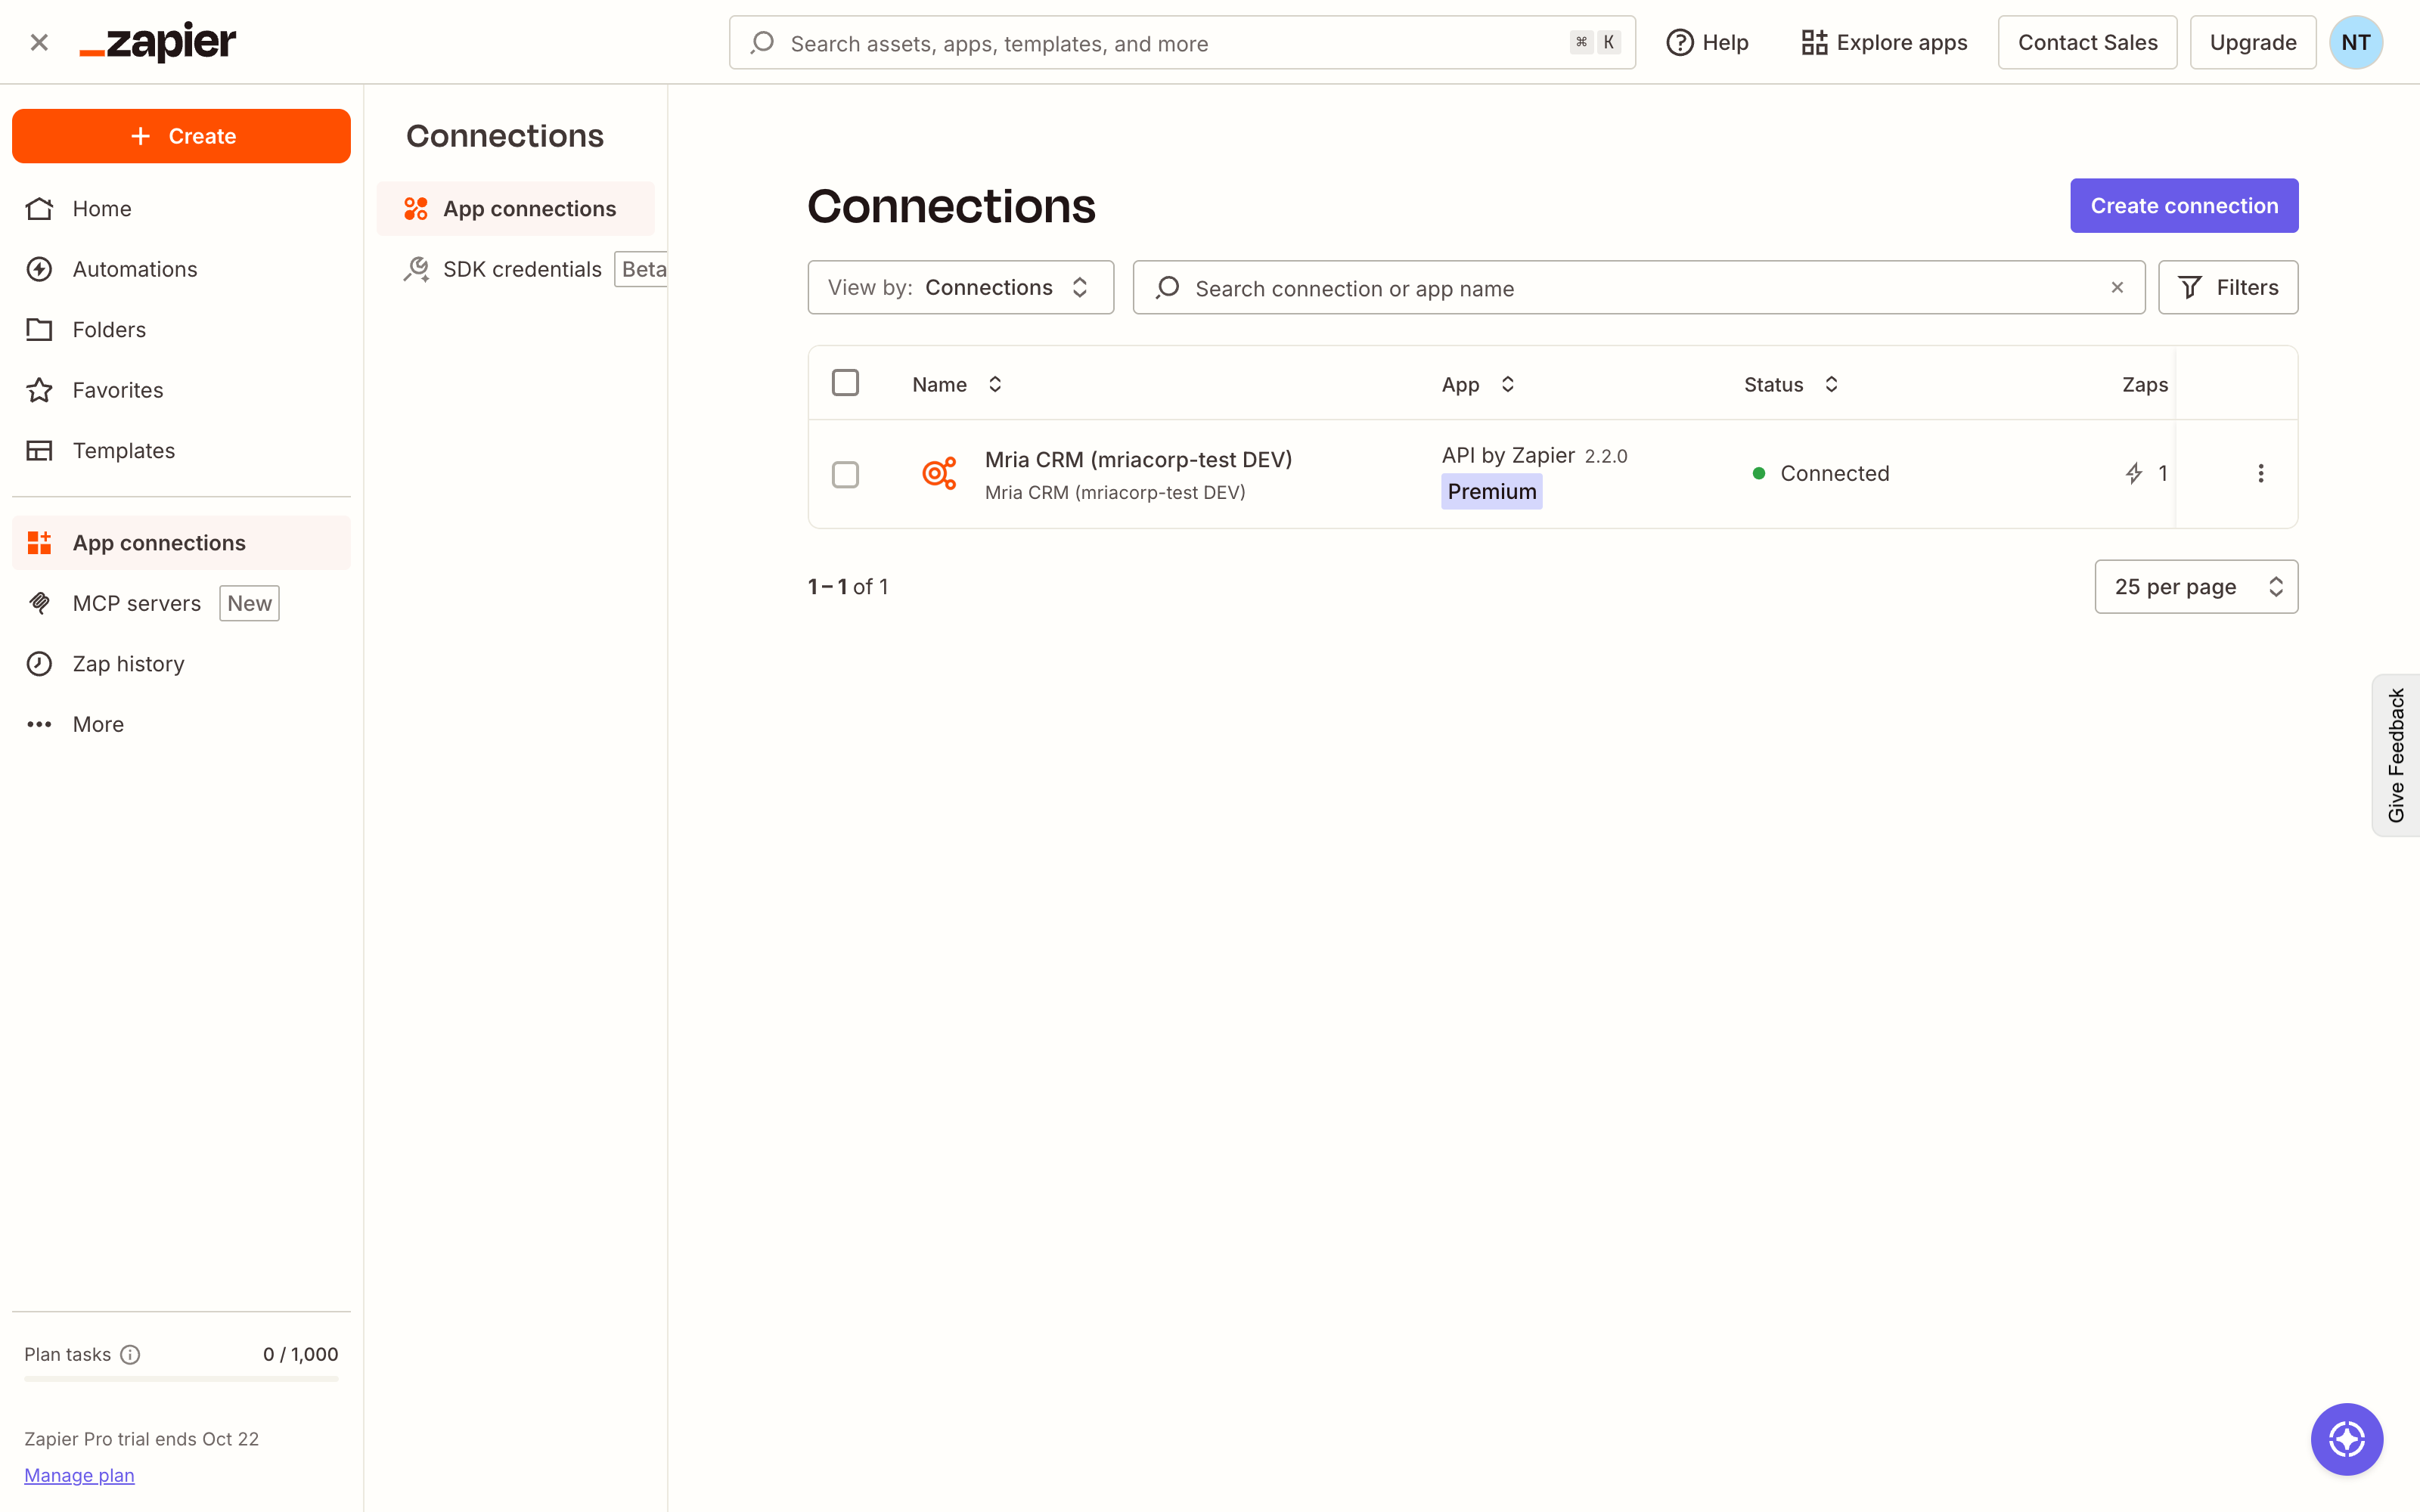
In Zapier open App connections → Create connection, search for API by Zapier and set Authentication Type to OAuth2. Fill the form with the values below; <cloudId>, <appId> and <envId> come from the Base URL in step 1, and the app id is the same on every site: f3bb4fc8-7911-405b-959b-002b3292a3d0.
| Field | Value |
|---|---|
| Connection Name | Any name, for example Mria CRM |
| Domain Filter | api.atlassian.com, auth.atlassian.com, <your-site>.atlassian.net |
| Test URL | https://api.atlassian.com/svc/jira/<cloudId>/apps/<appId>_<envId>/v1/me |
| Client ID / Client Secret | From step 5 |
| Authorize URL | https://auth.atlassian.com/authorize?audience=api.atlassian.com&prompt=consent&sns=<appId>.<envId> |
| Token URL | https://auth.atlassian.com/oauth/token |
| Scopes | read:crm:custom write:crm:custom read:profile:custom read:forge-app:jira offline_access |
Three details are easy to miss. The Authorize URL must carry audience, prompt=consent and sns=<appId>.<envId> (the environment joined with a dot, not the underscore used in the path). The scope list must include offline_access, which is what lets Zapier refresh the one-hour access token. And the sns environment, the envId in your request URLs and the install you ticked in step 4 must all be the same environment, or every call answers 401 Unauthorized; scope does not match.
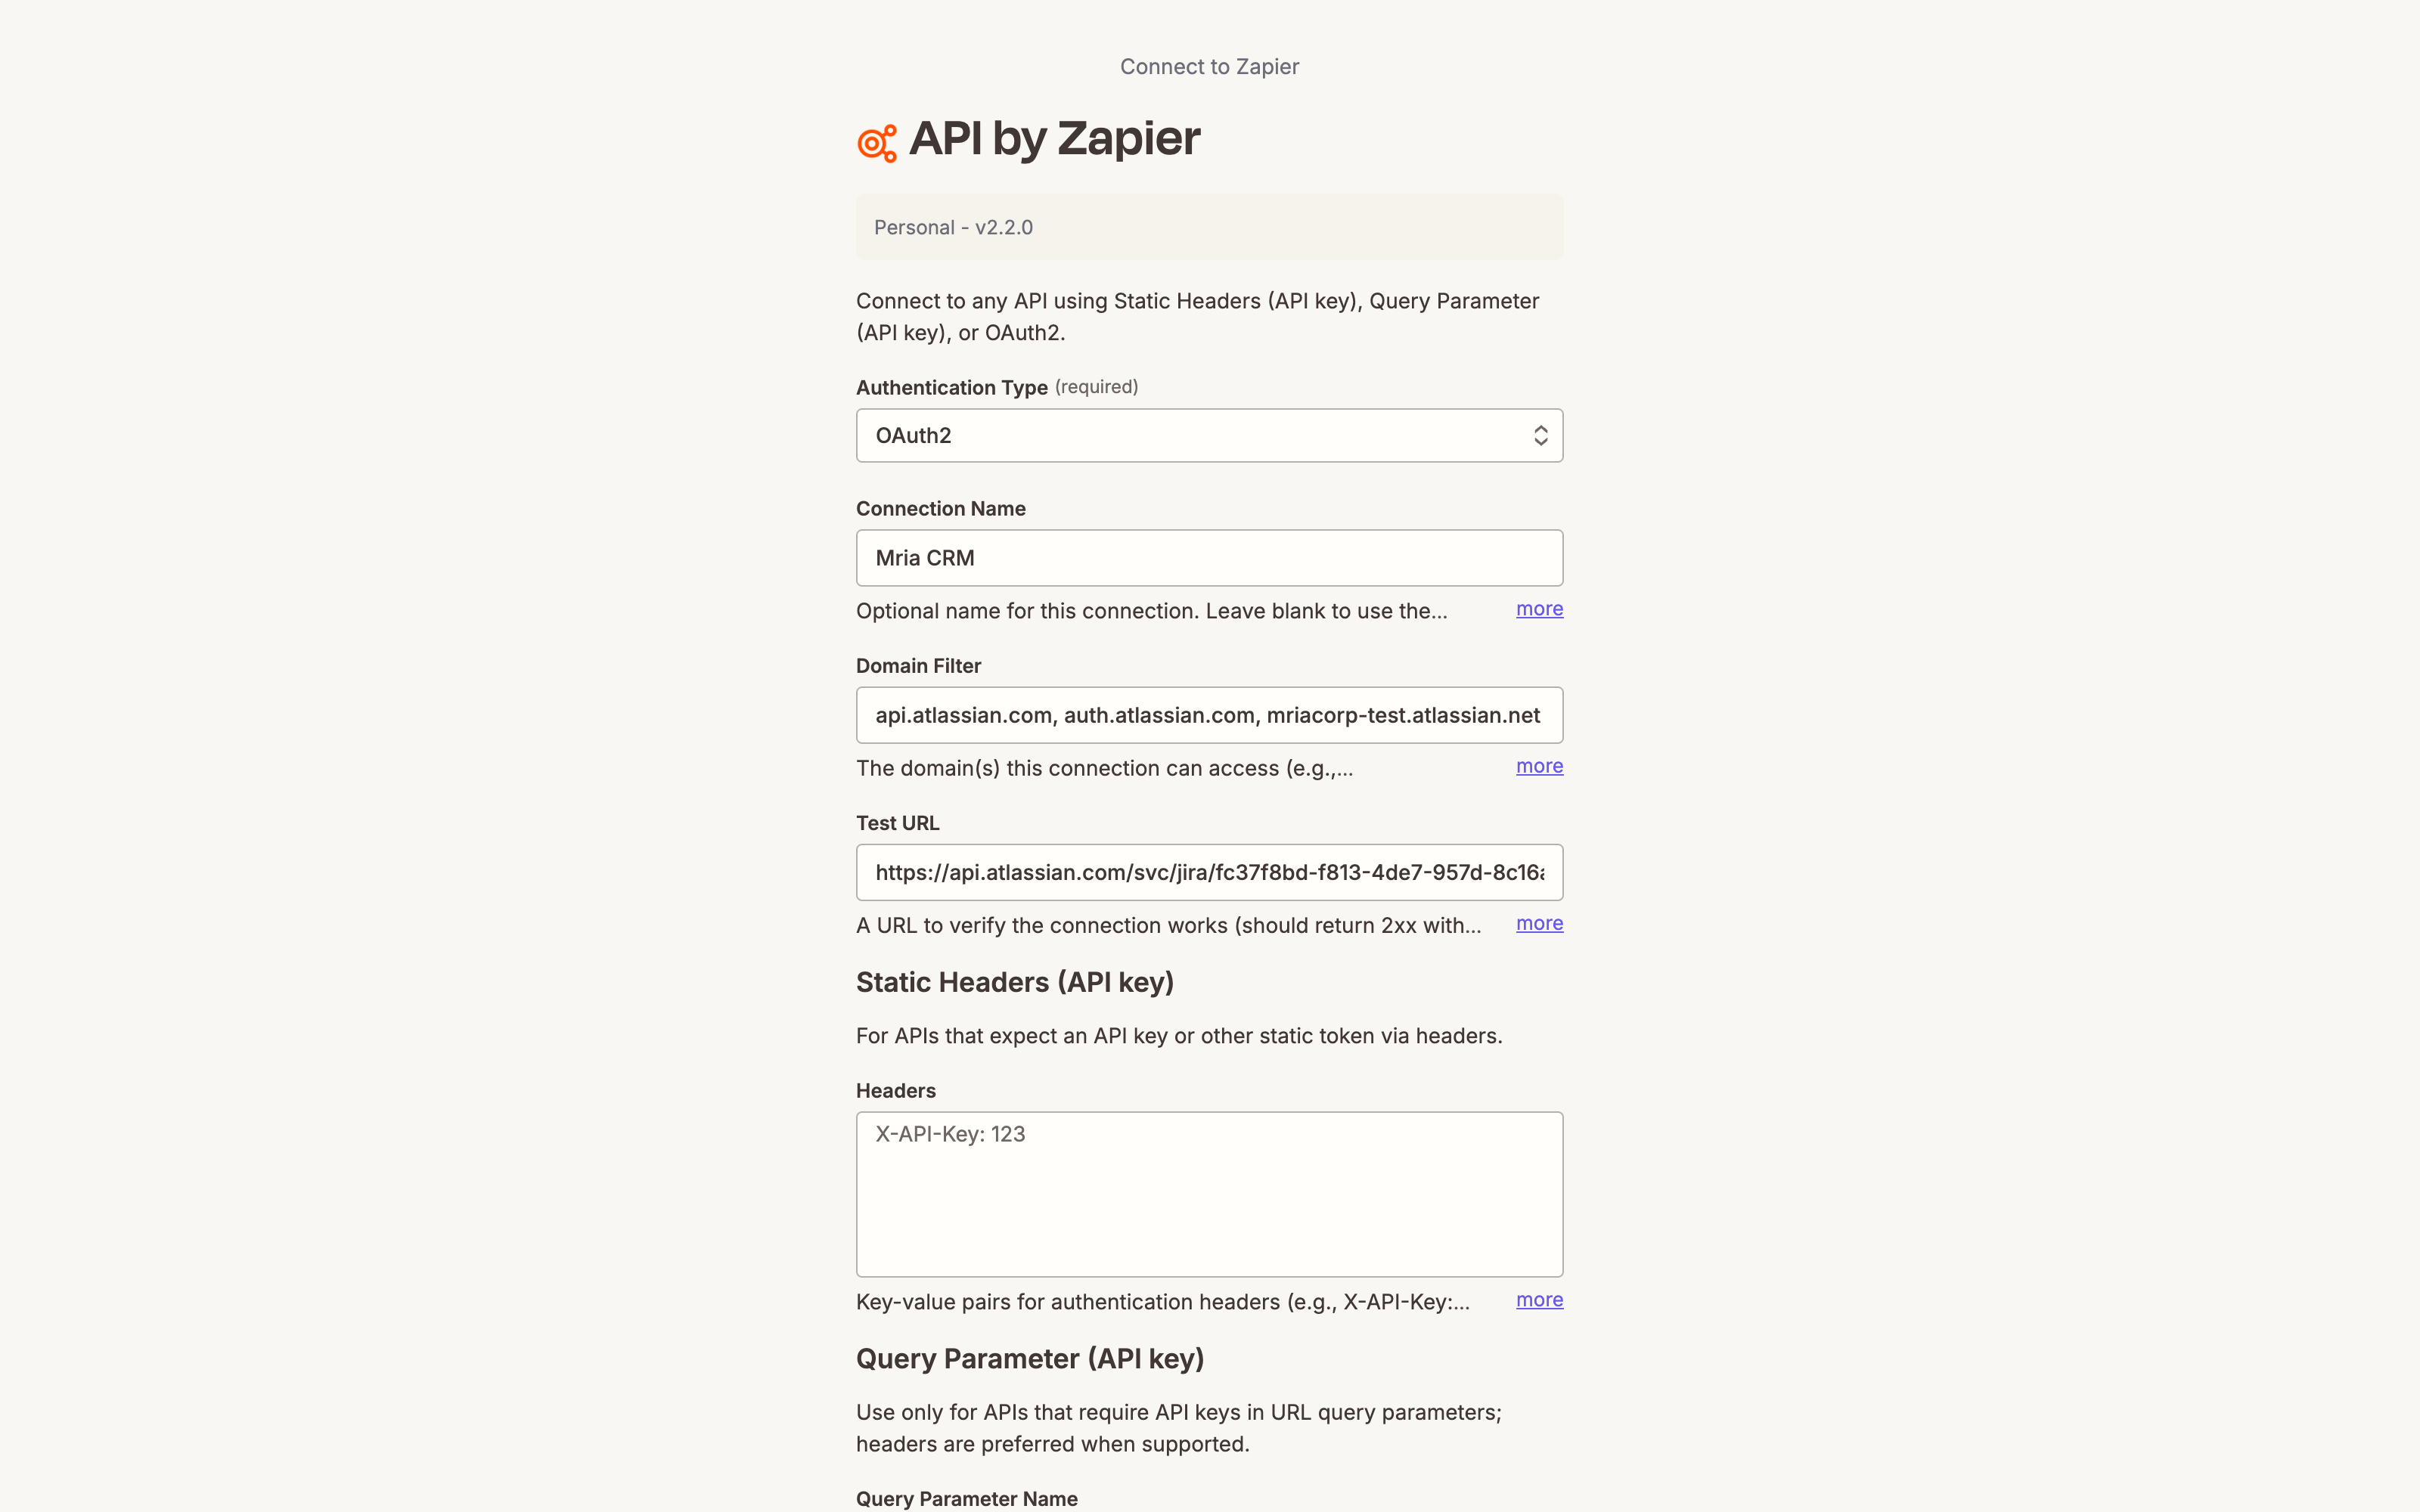
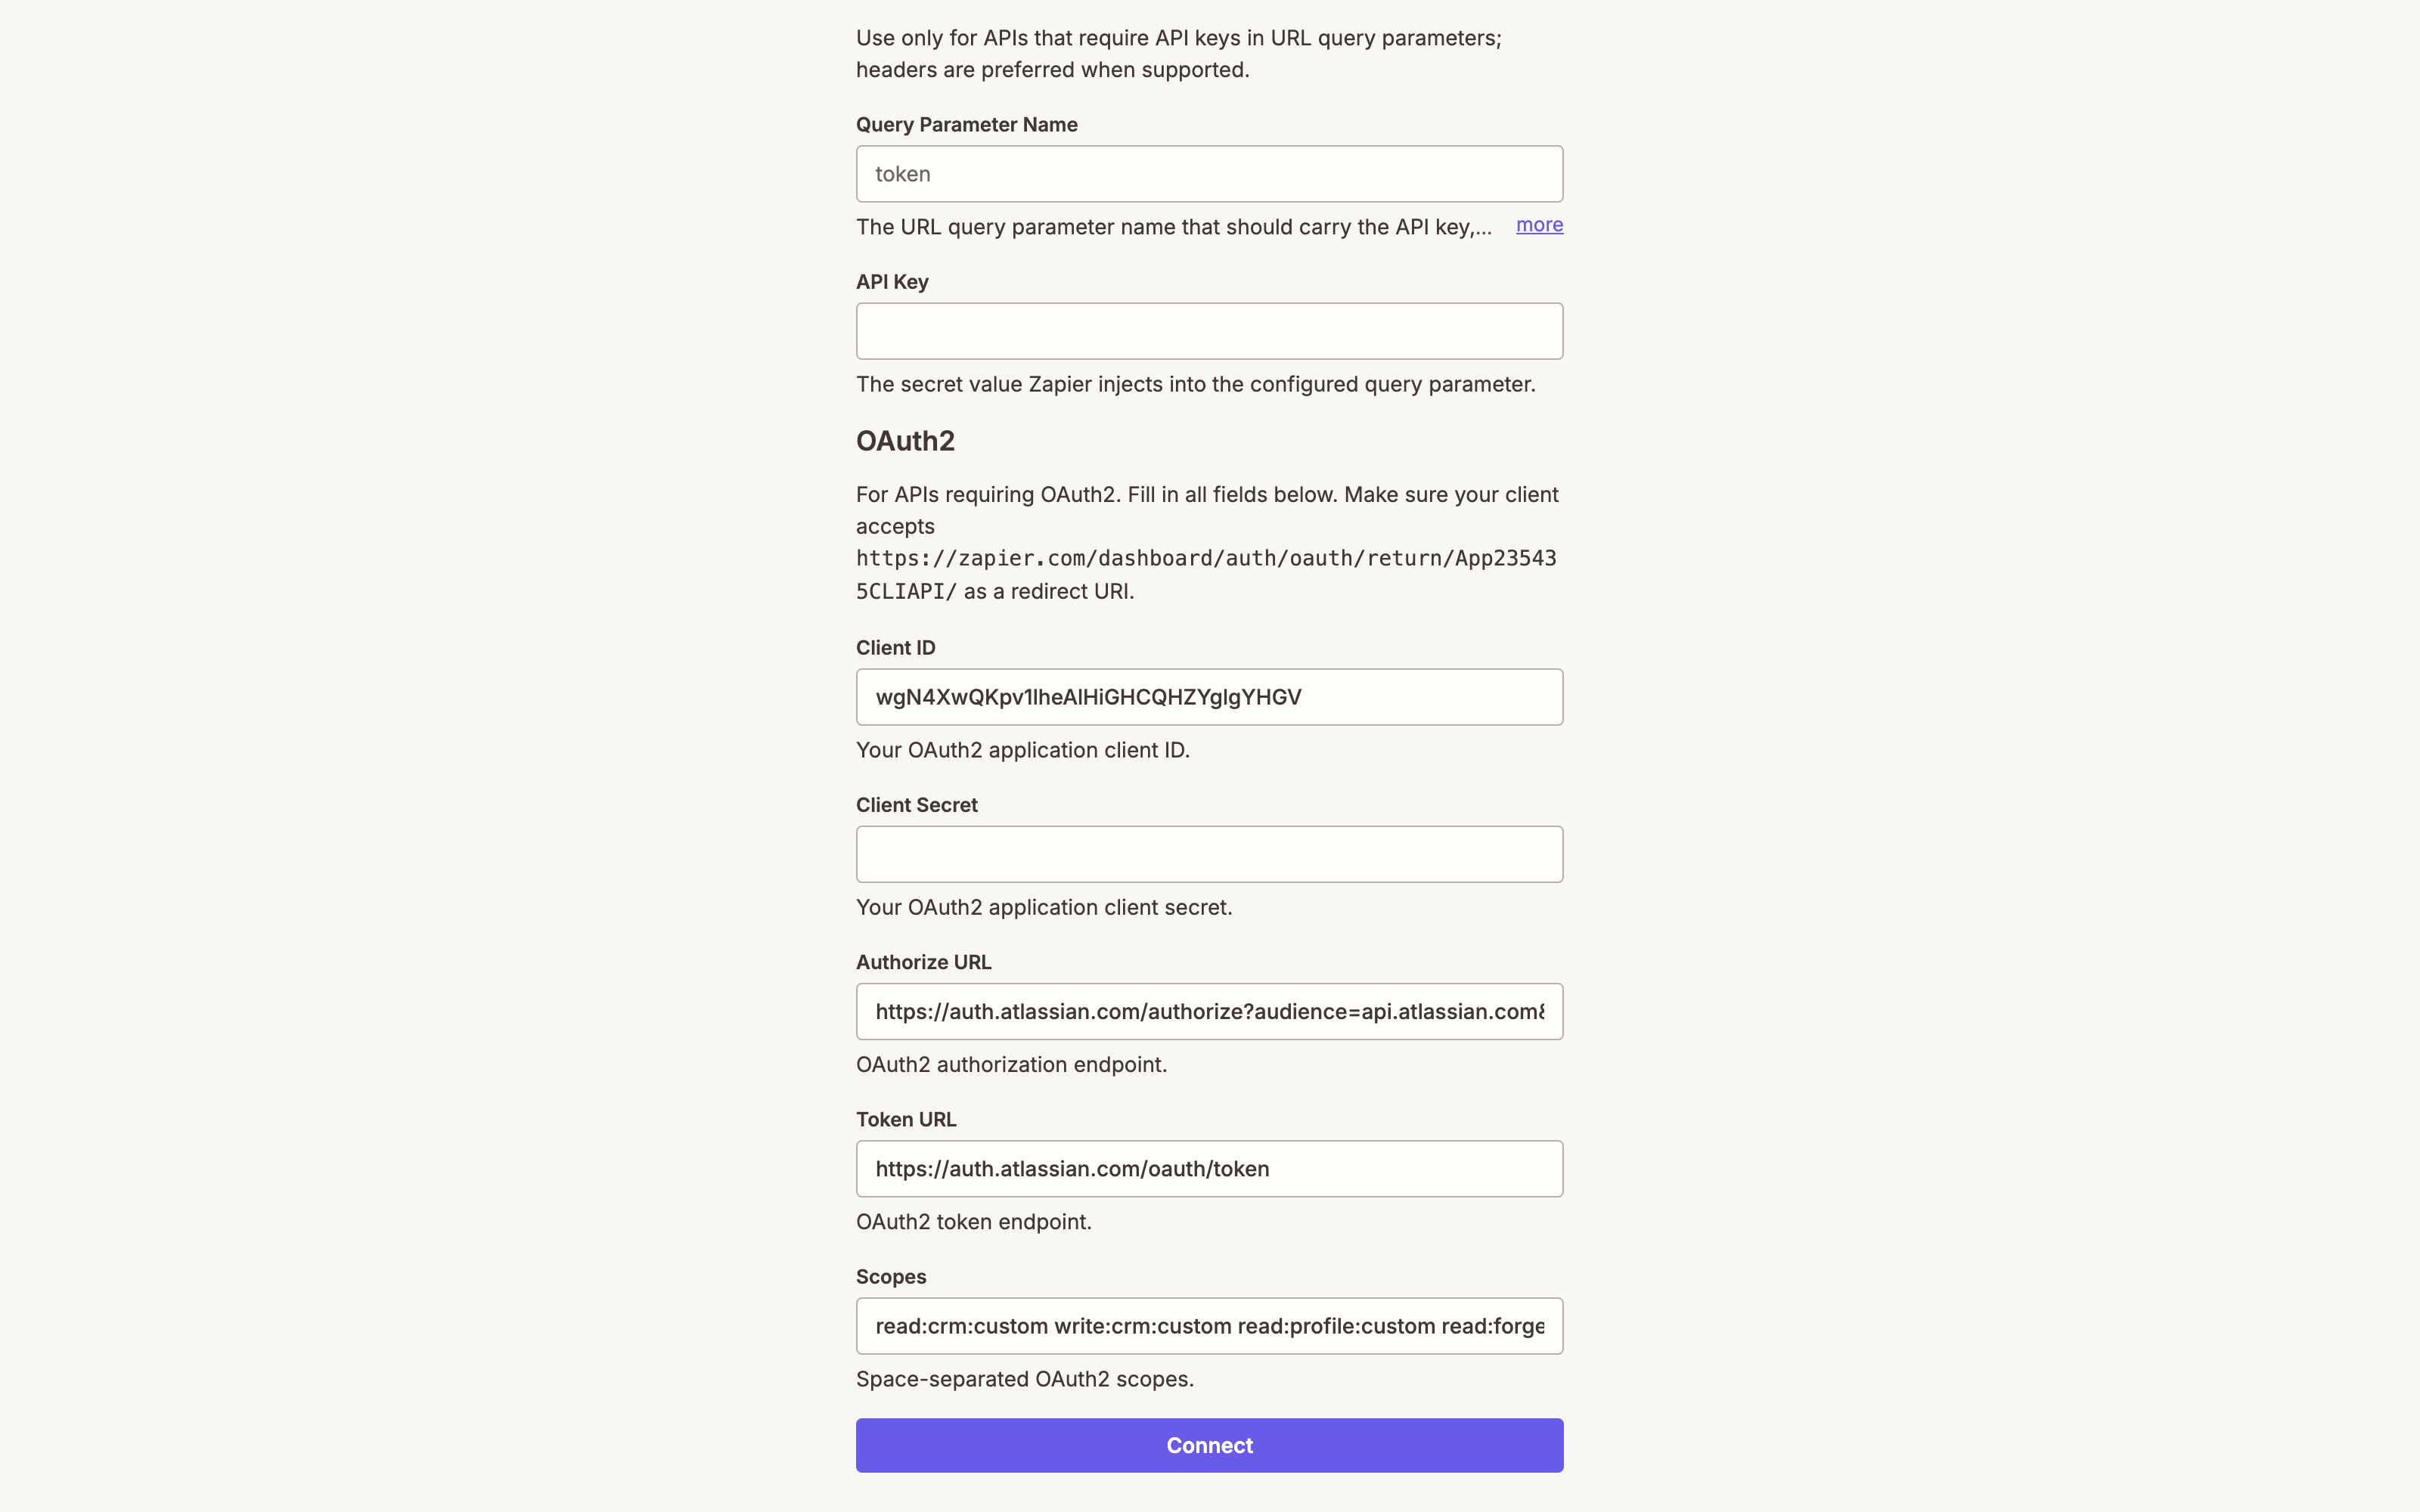
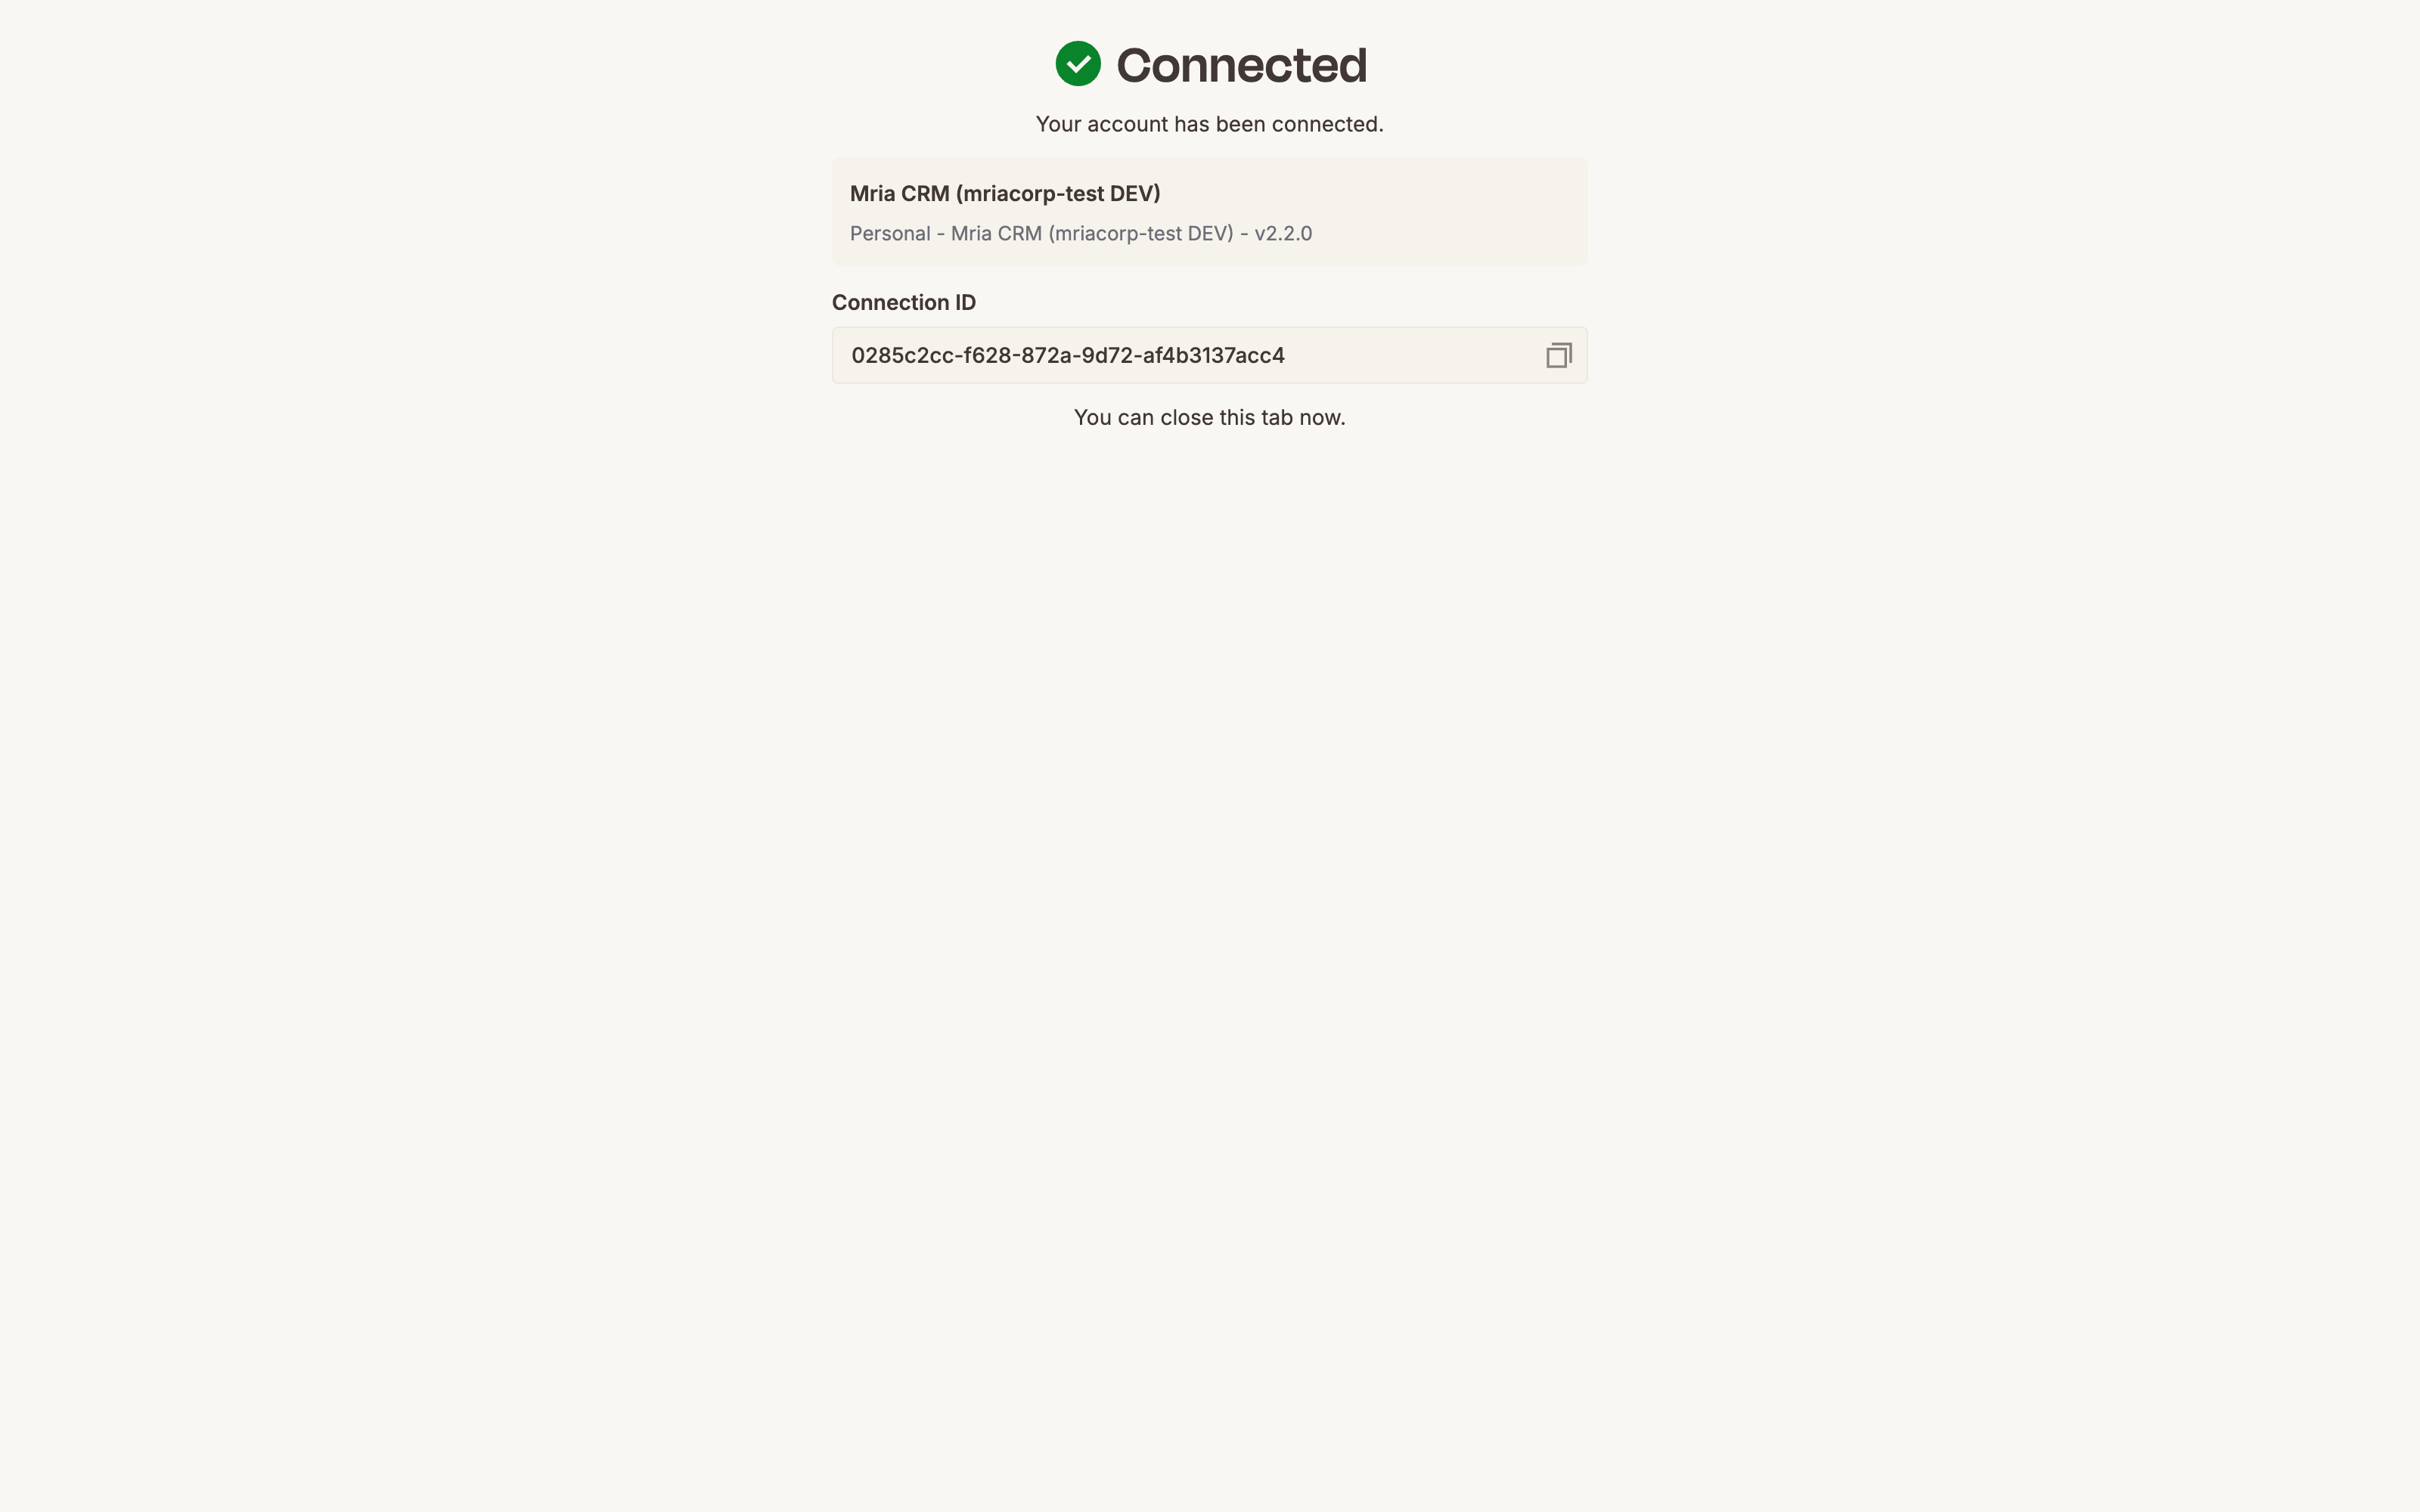
Press Connect. Atlassian shows its consent screen; choose the site and accept. Zapier then calls the Test URL and reports the connection as Connected.
7. Build the Zap #
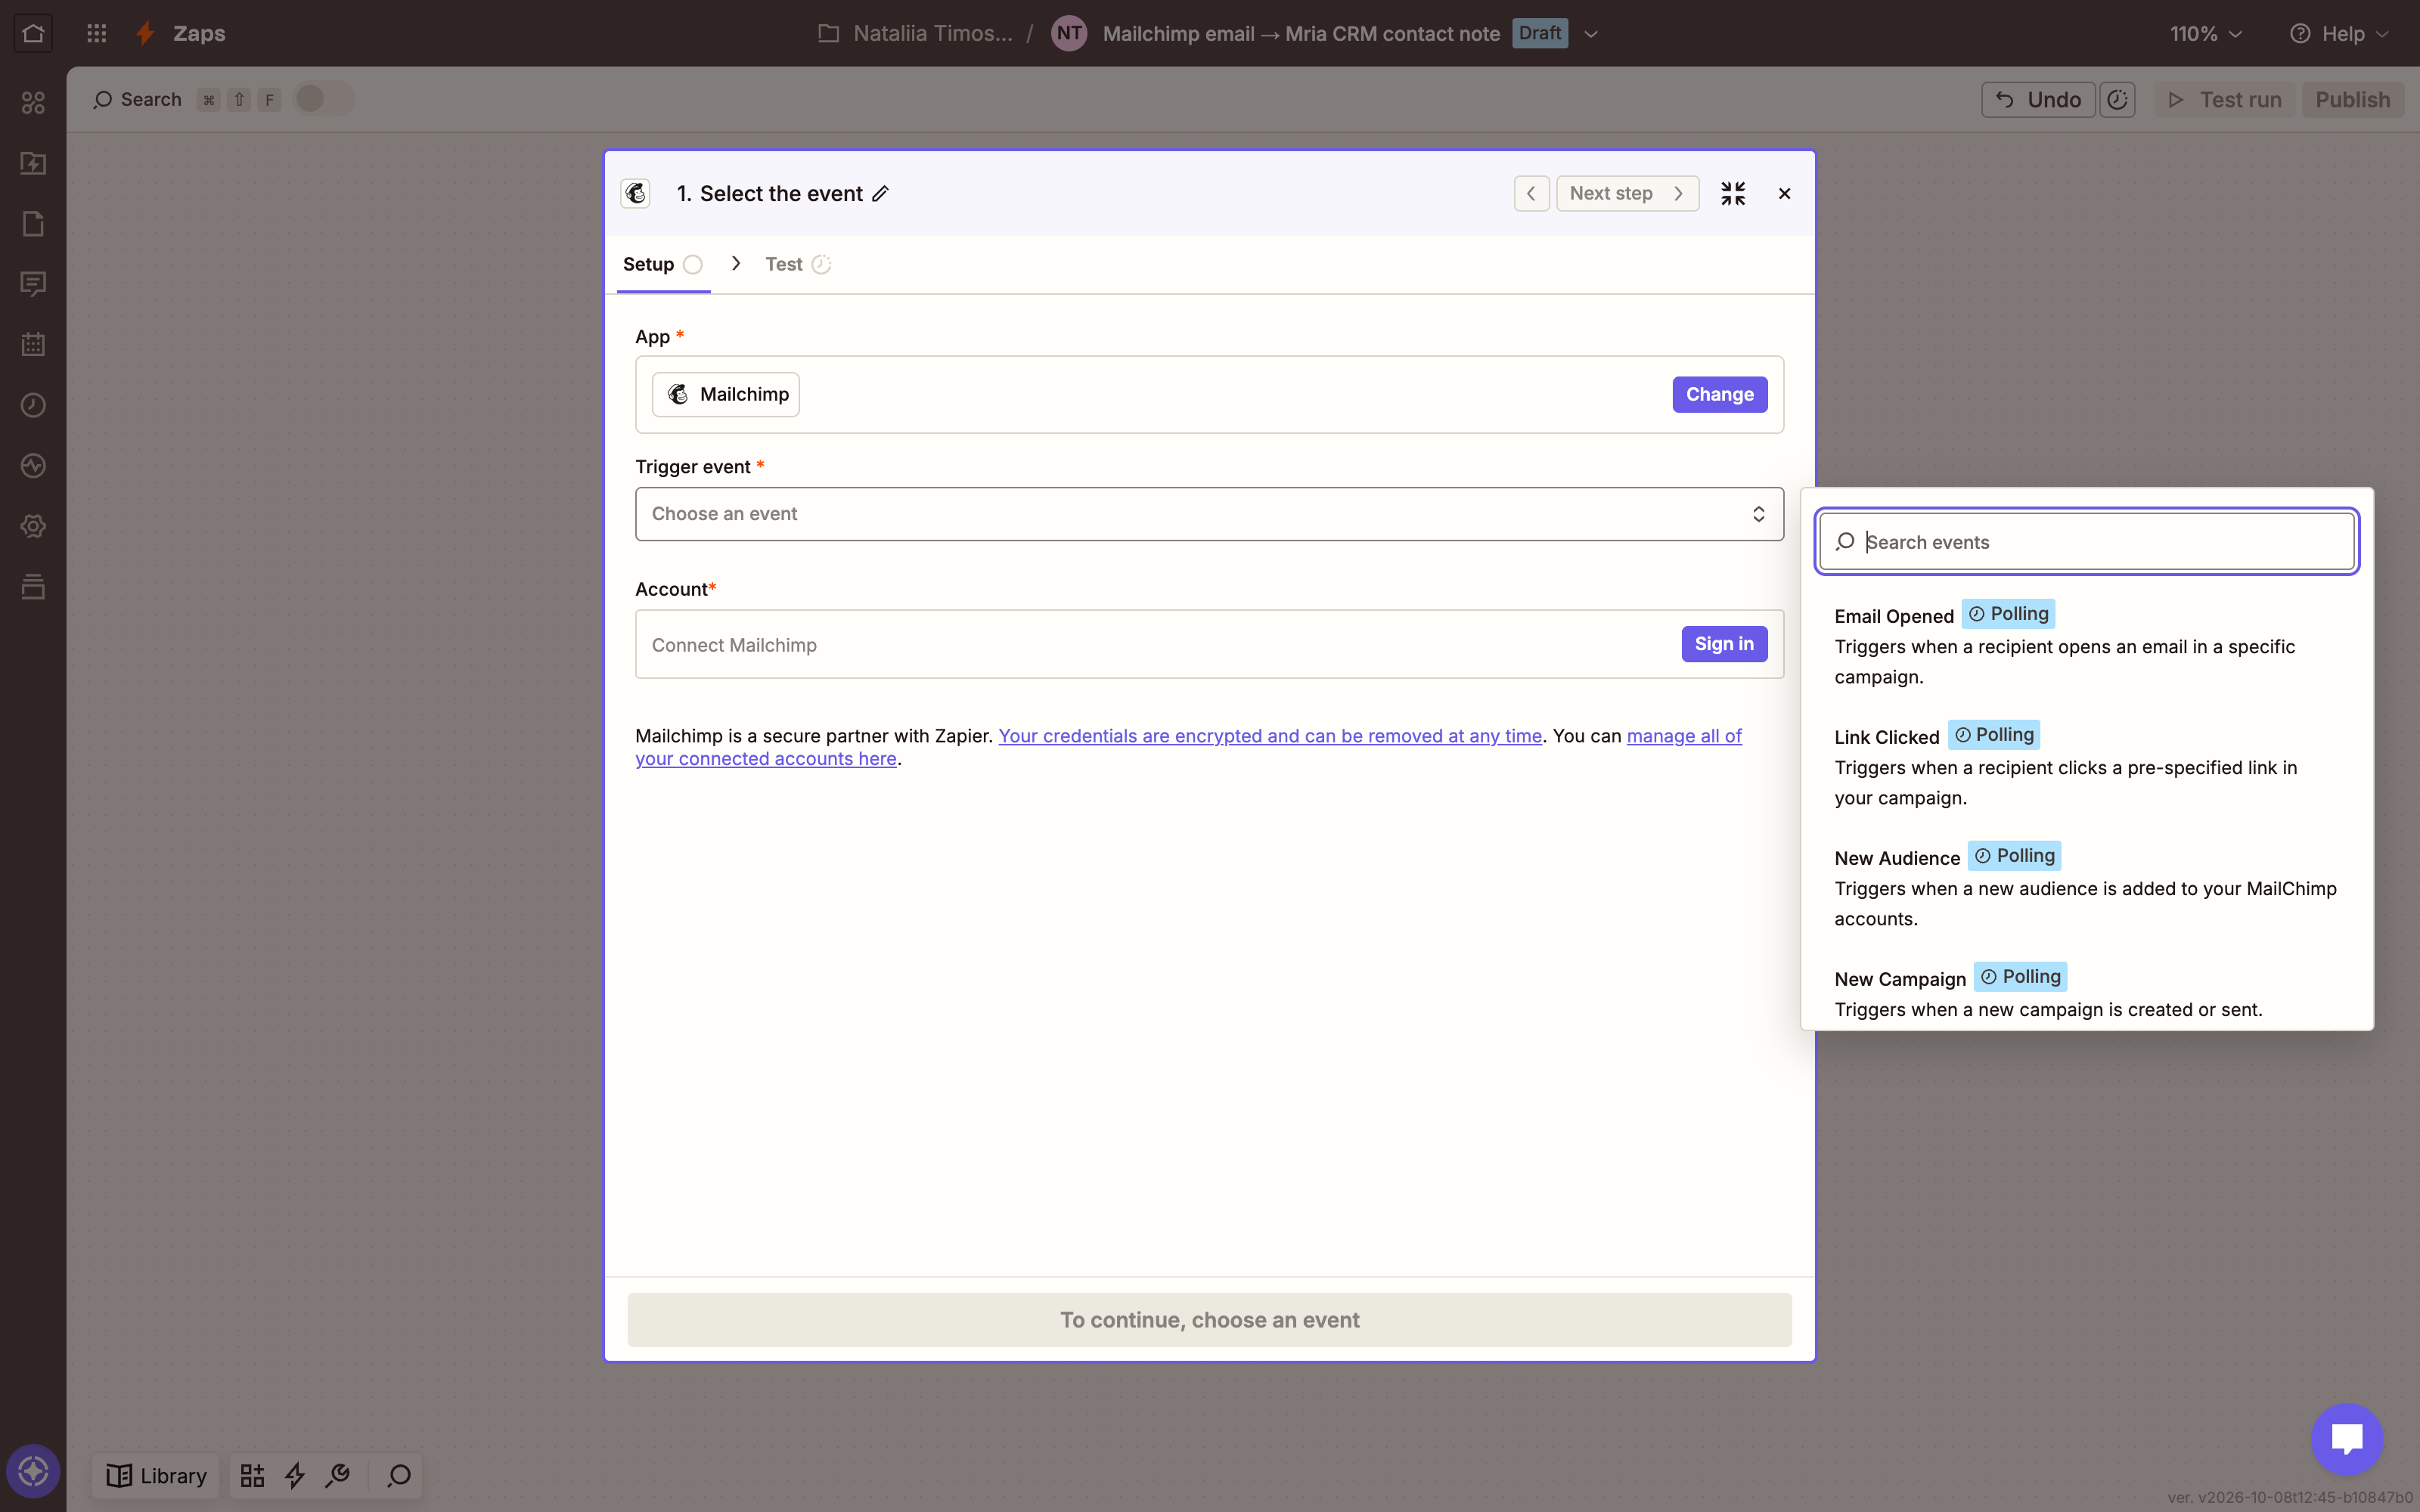
Create a Zap and pick the trigger of your source app. For Mailchimp, Zapier offers these events; note that there is no per-recipient “email sent” event, so a campaign-level trigger is the usual choice.
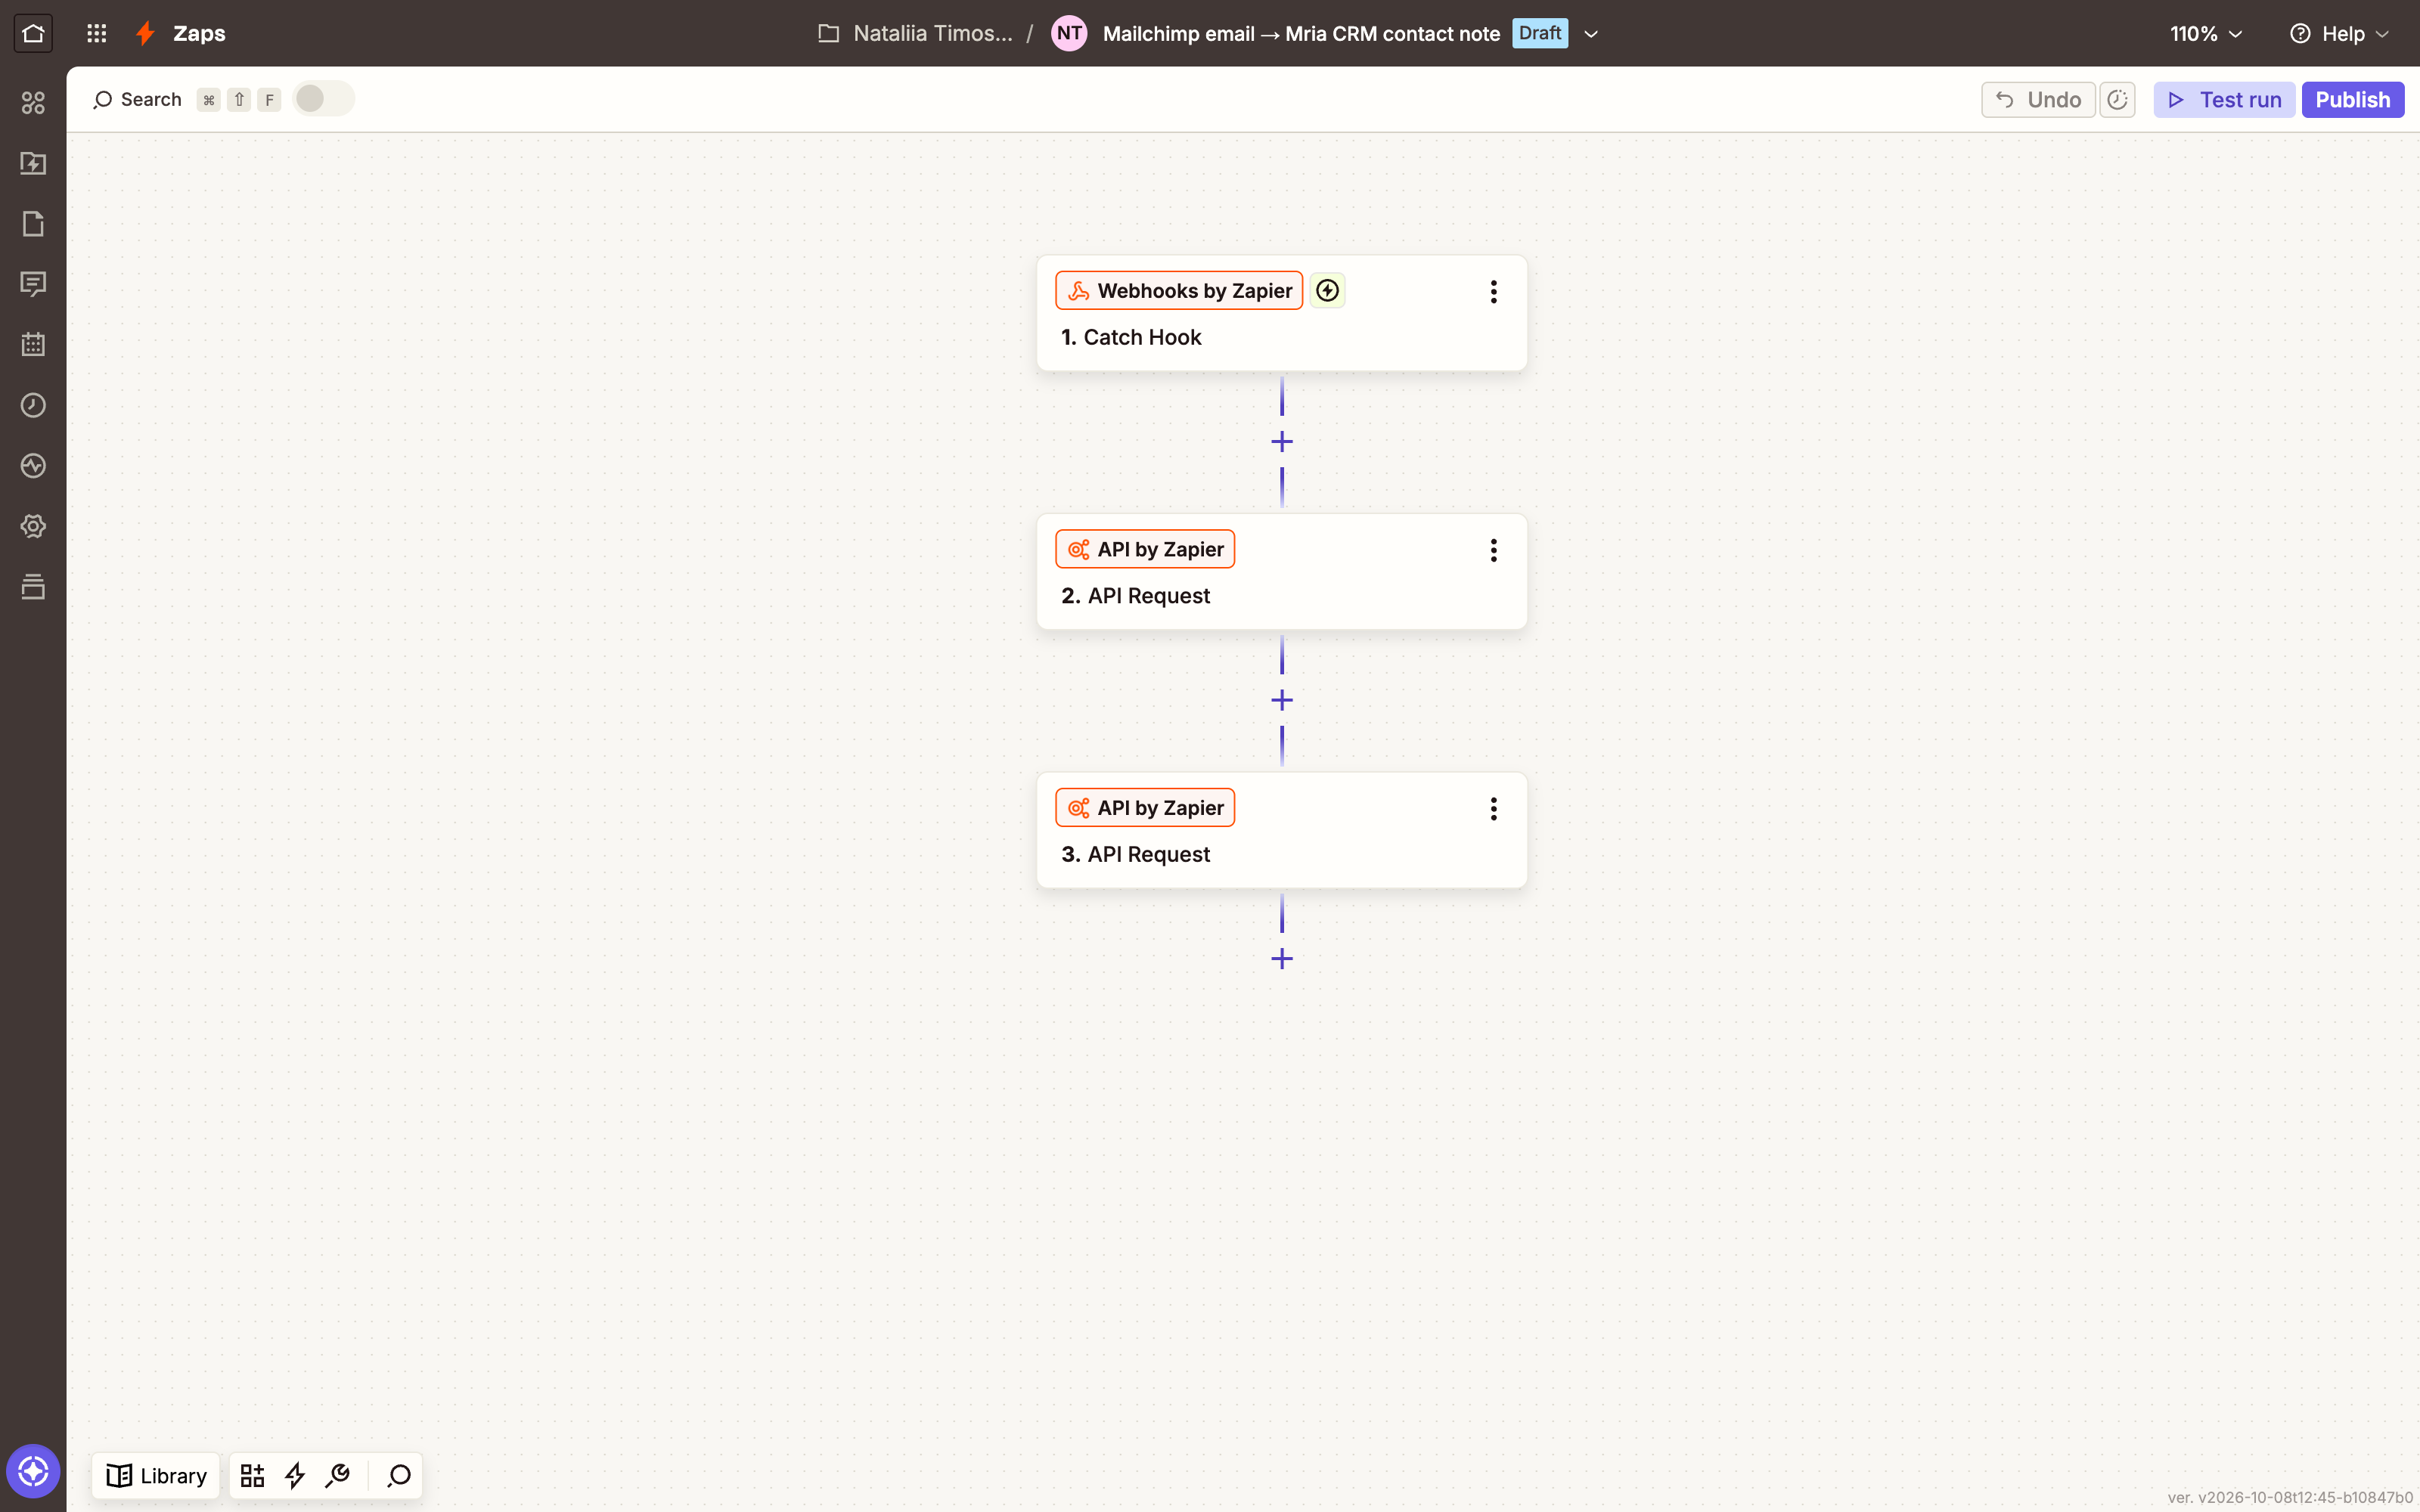
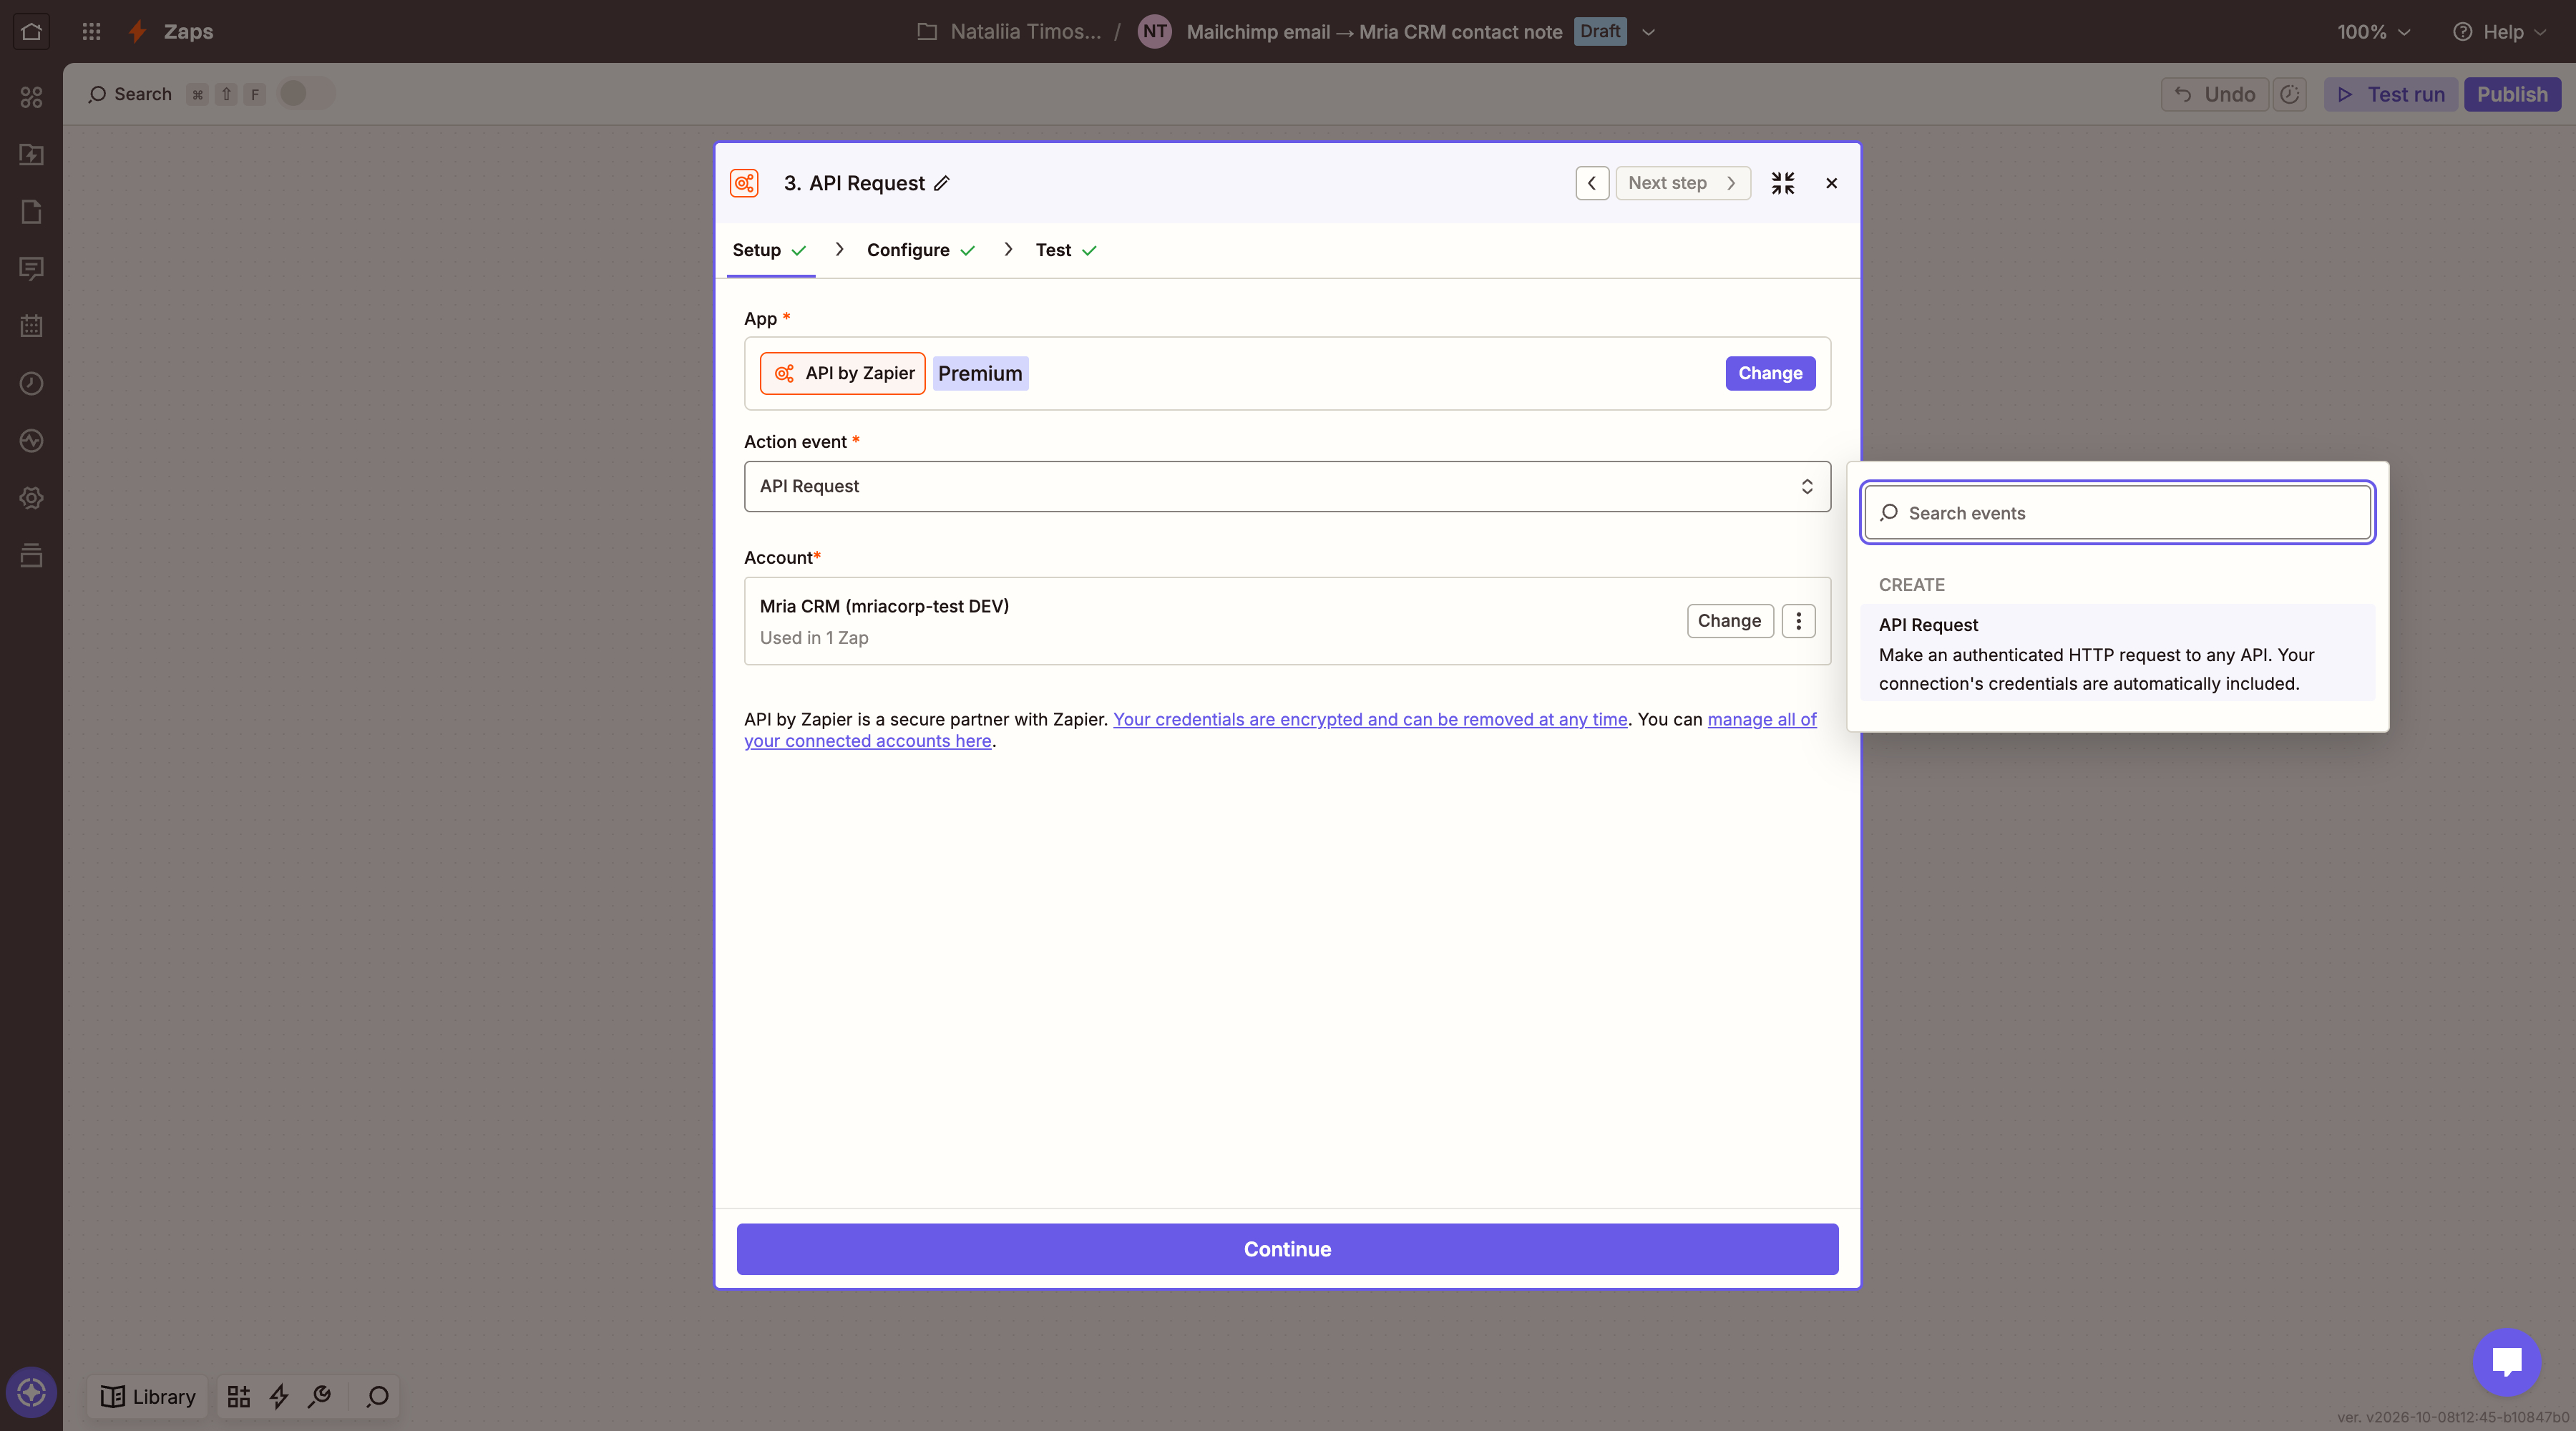
The finished Zap has the trigger and two API by Zapier → API Request actions. Each action uses the connection from step 6, so you never set an Authorization header yourself: Zapier adds the bearer token to every request.
8. Action: find the contact #
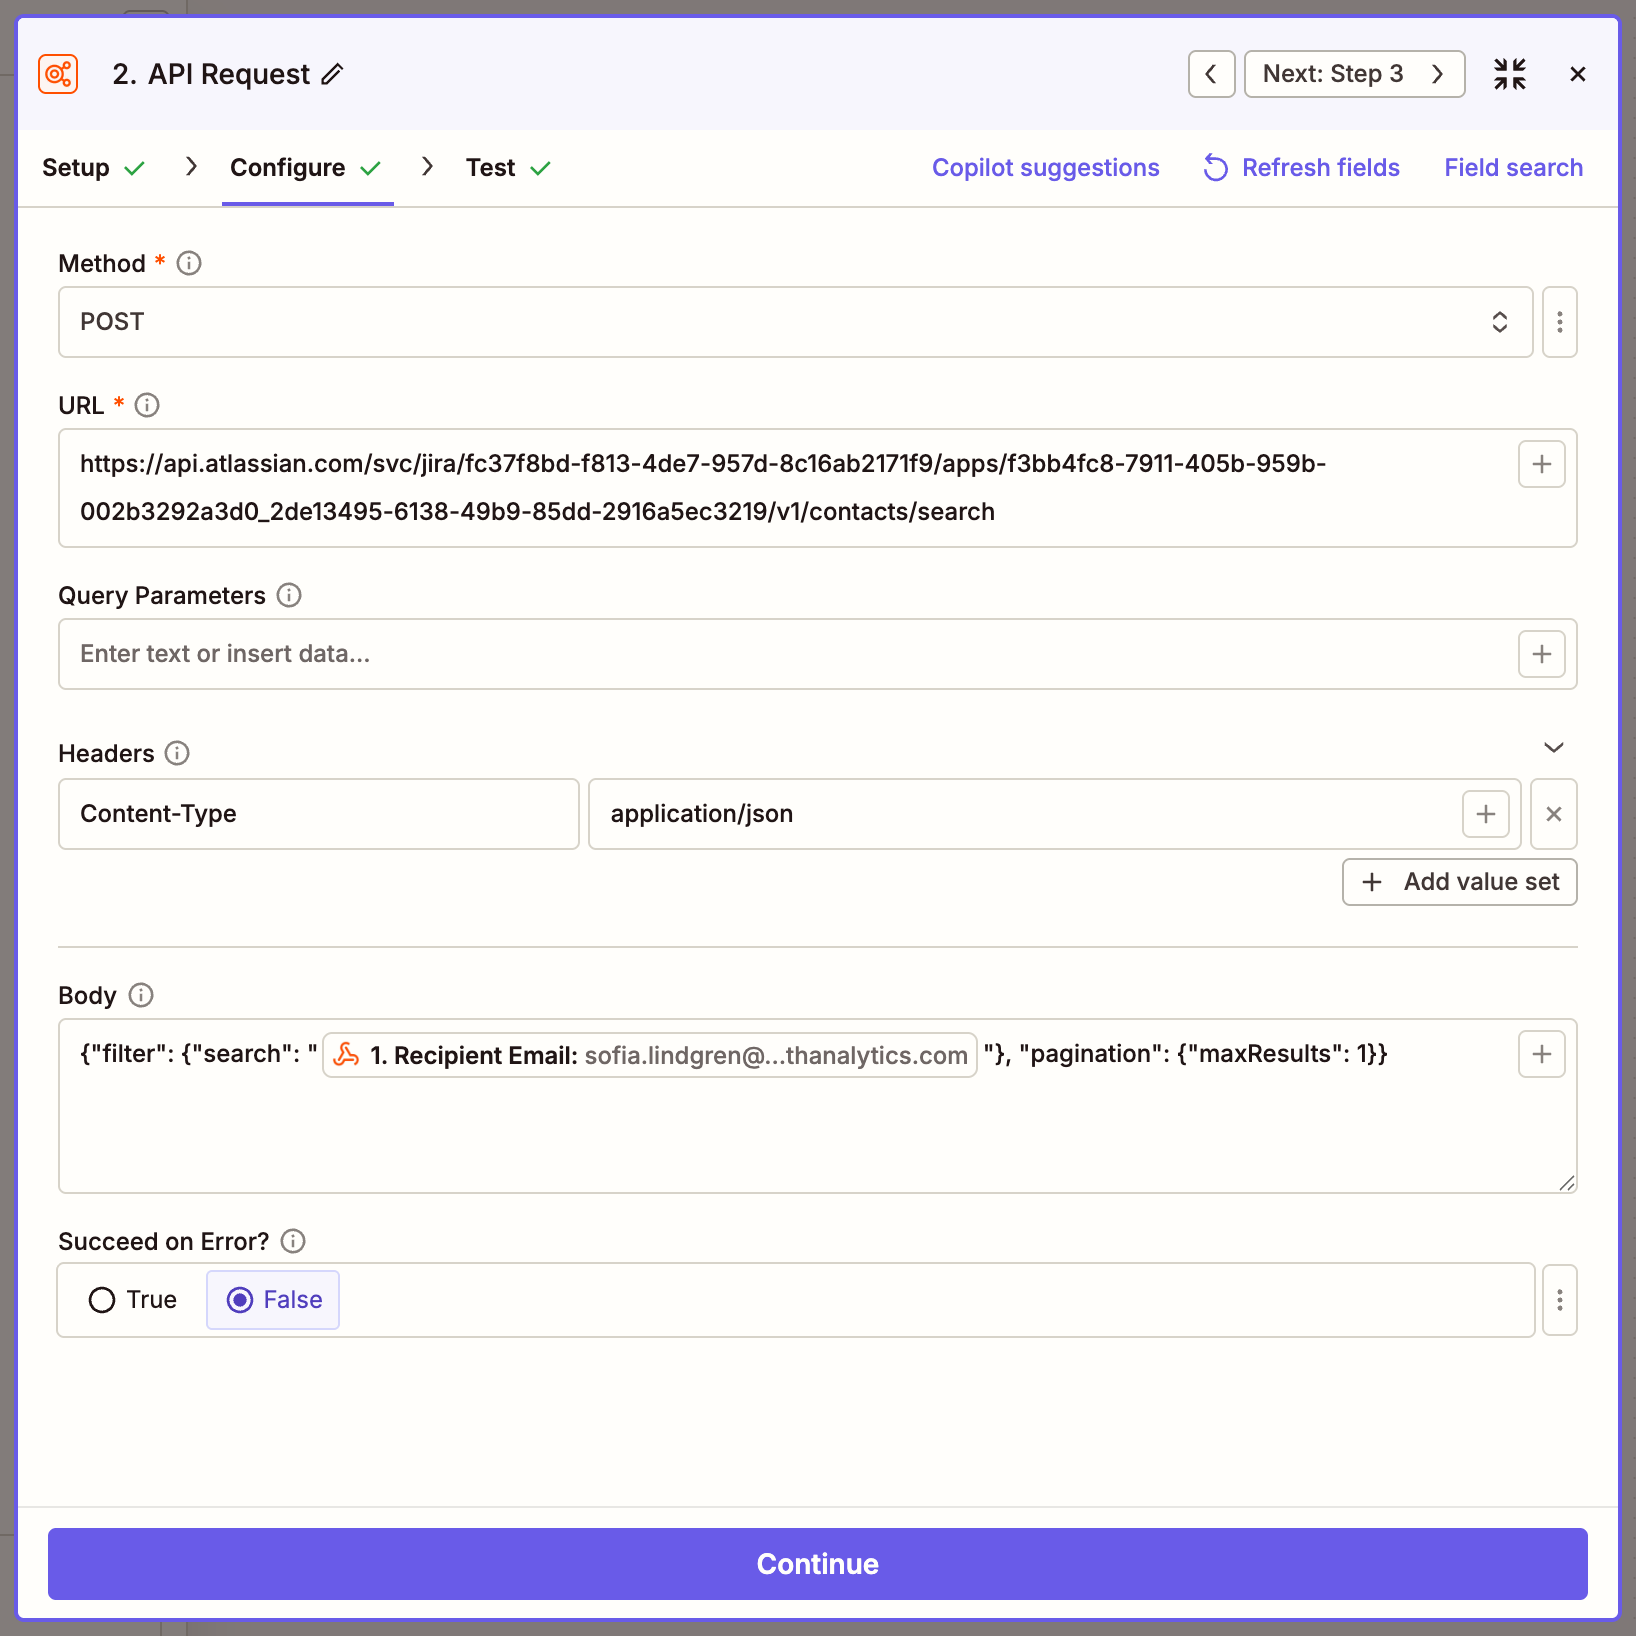
| Field | Value |
|---|---|
| Method | POST |
| URL | https://api.atlassian.com/svc/jira/<cloudId>/apps/<appId>_<envId>/v1/contacts/search |
| Headers | Content-Type = application/json |
| Body | {"filter": {"search": "<recipient email from the trigger>"}, "pagination": {"maxResults": 1}} |
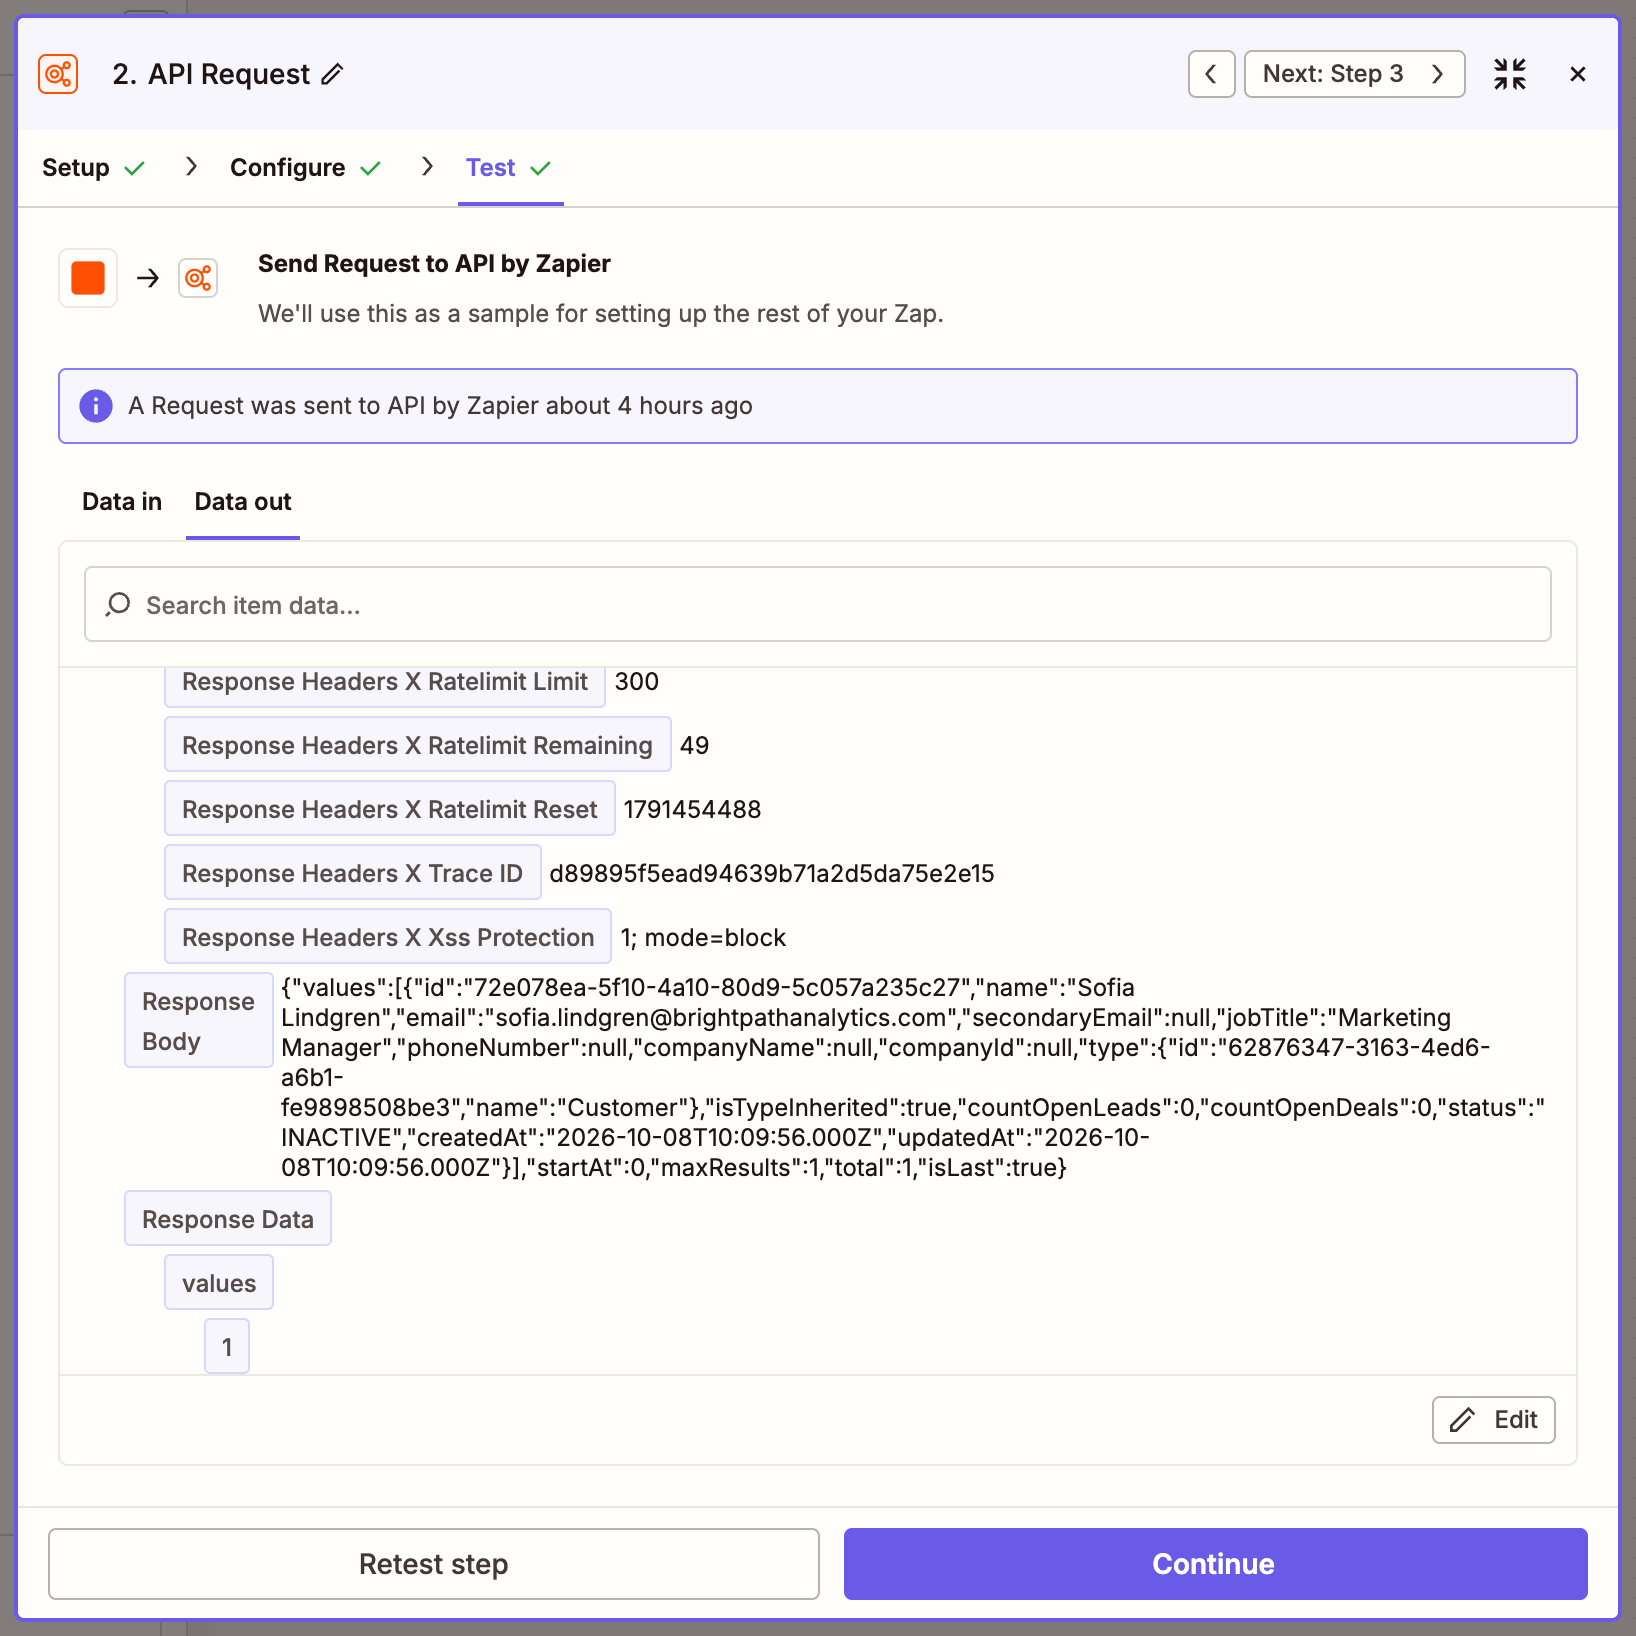
Insert the trigger’s email field into the body with the + button next to the field. The test returns the matching contact; its values[0].id (shown by Zapier as Response Data Values ID) is what the next step needs.
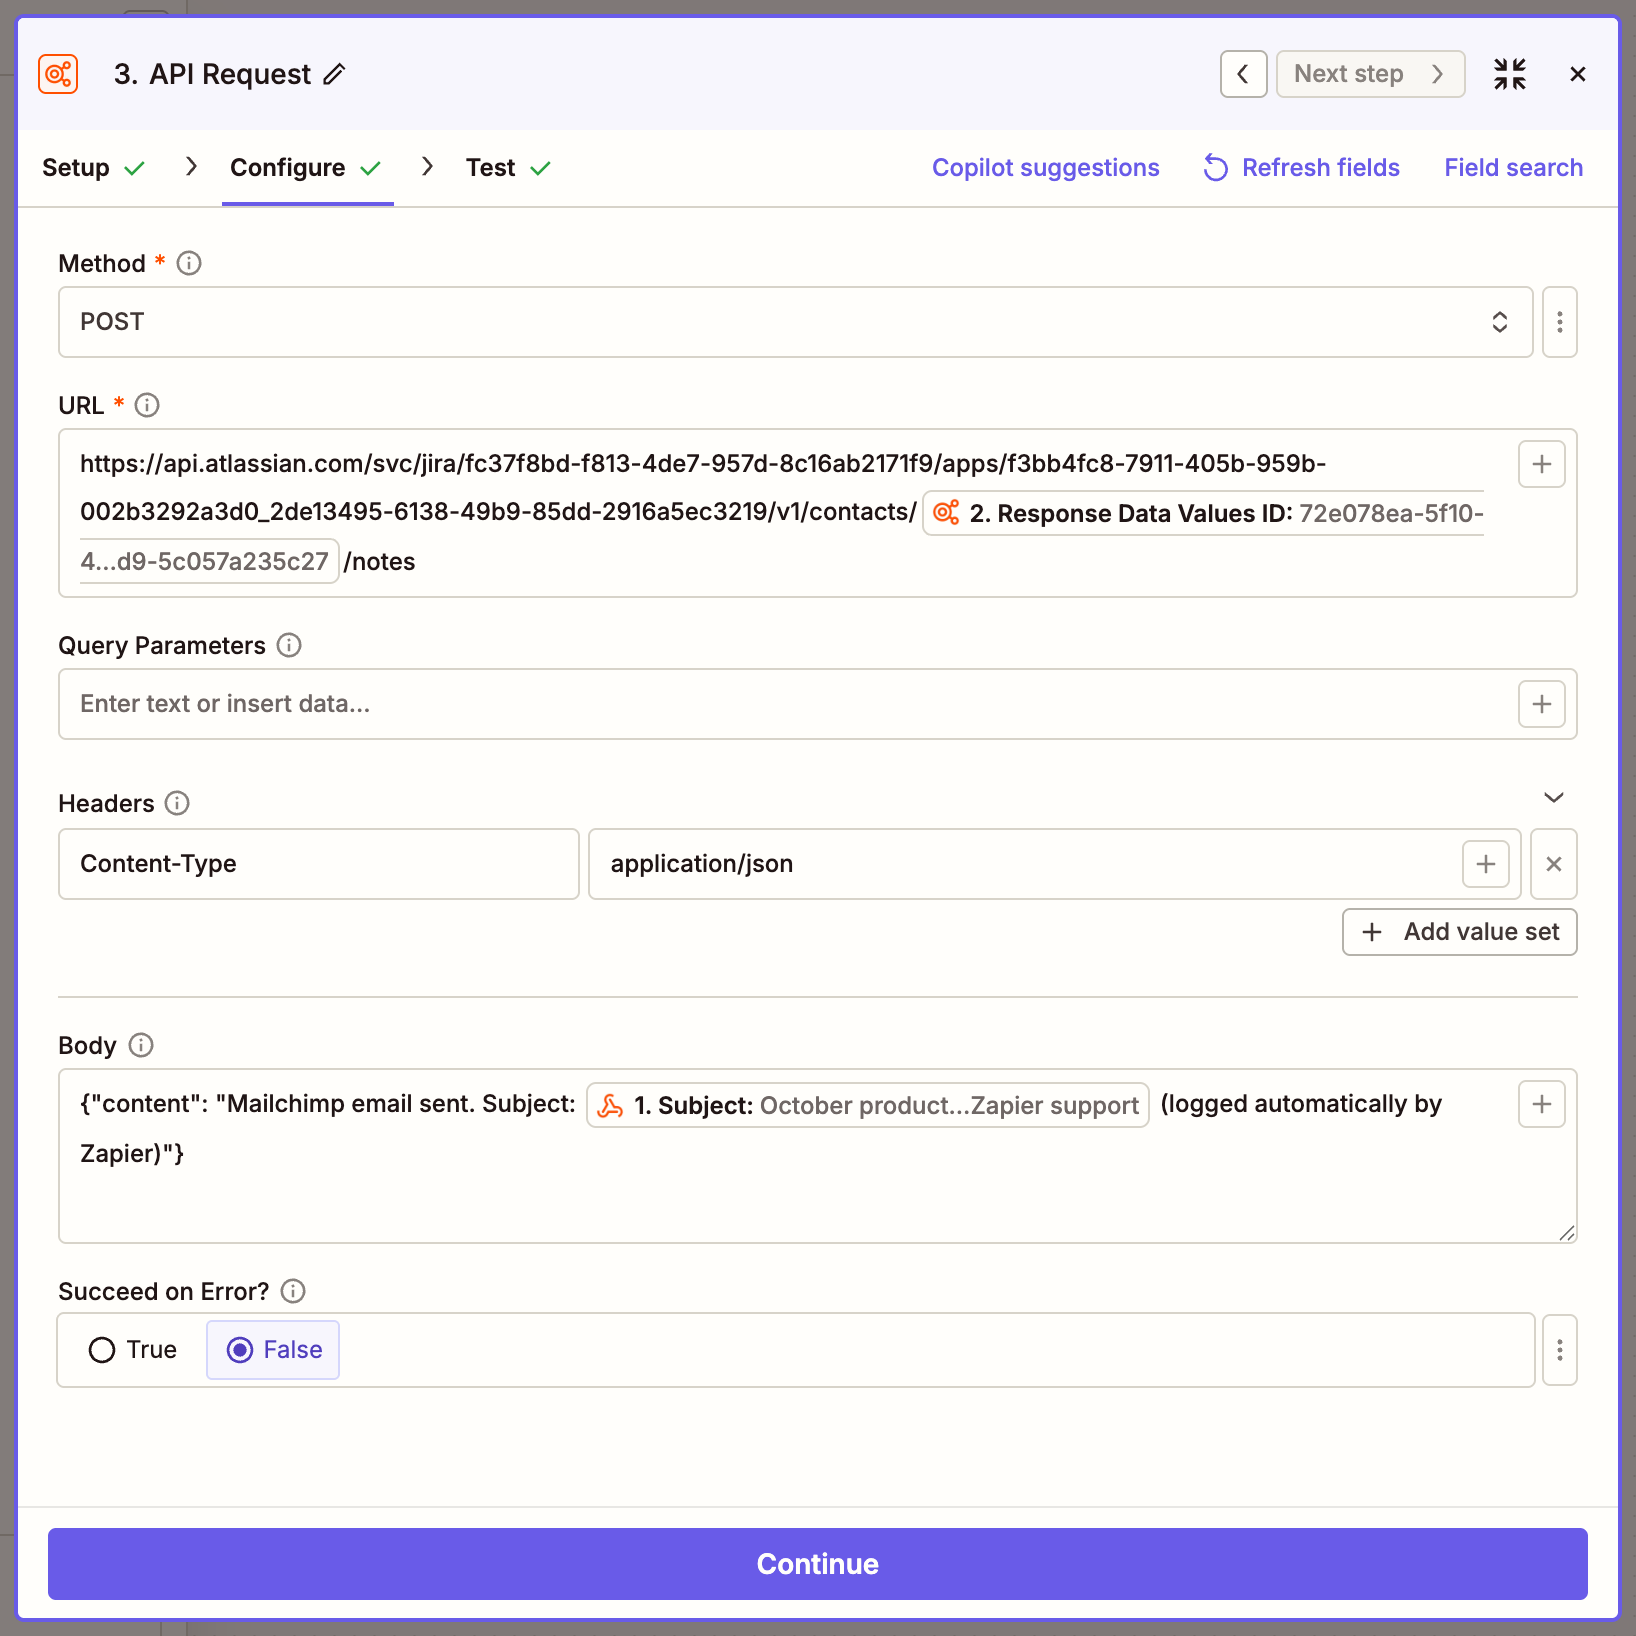
9. Action: add the note #
| Field | Value |
|---|---|
| Method | POST |
| URL | https://api.atlassian.com/svc/jira/<cloudId>/apps/<appId>_<envId>/v1/contacts/<Response Data Values ID from step 8>/notes |
| Headers | Content-Type = application/json |
| Body | {"content": "Mailchimp email sent. Subject: <subject from the trigger>"} |
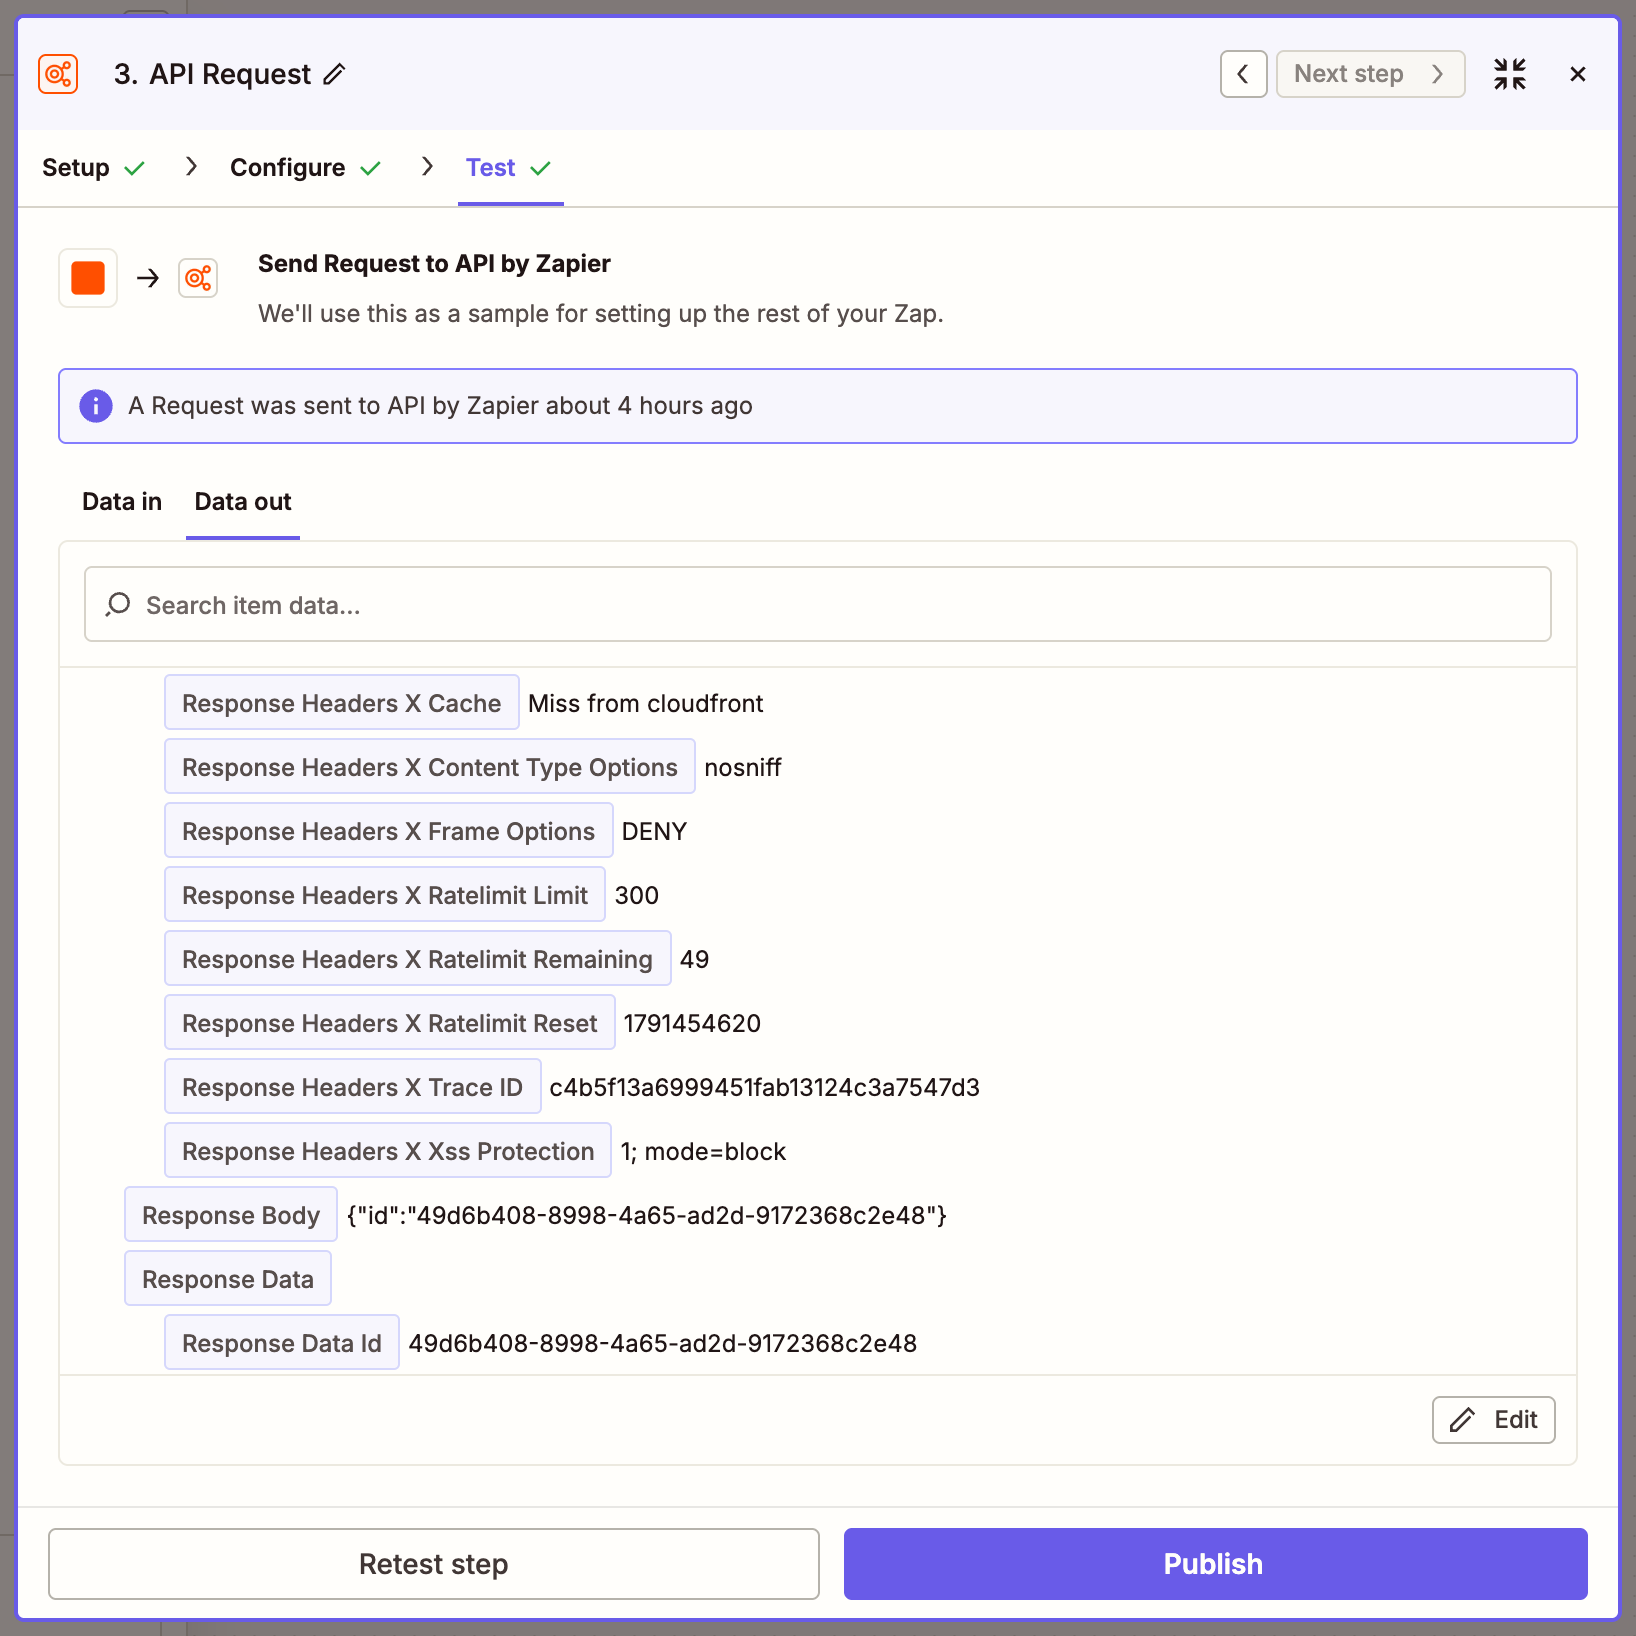
A successful test answers 201 with the id of the new note.
10. The result in Mria CRM #
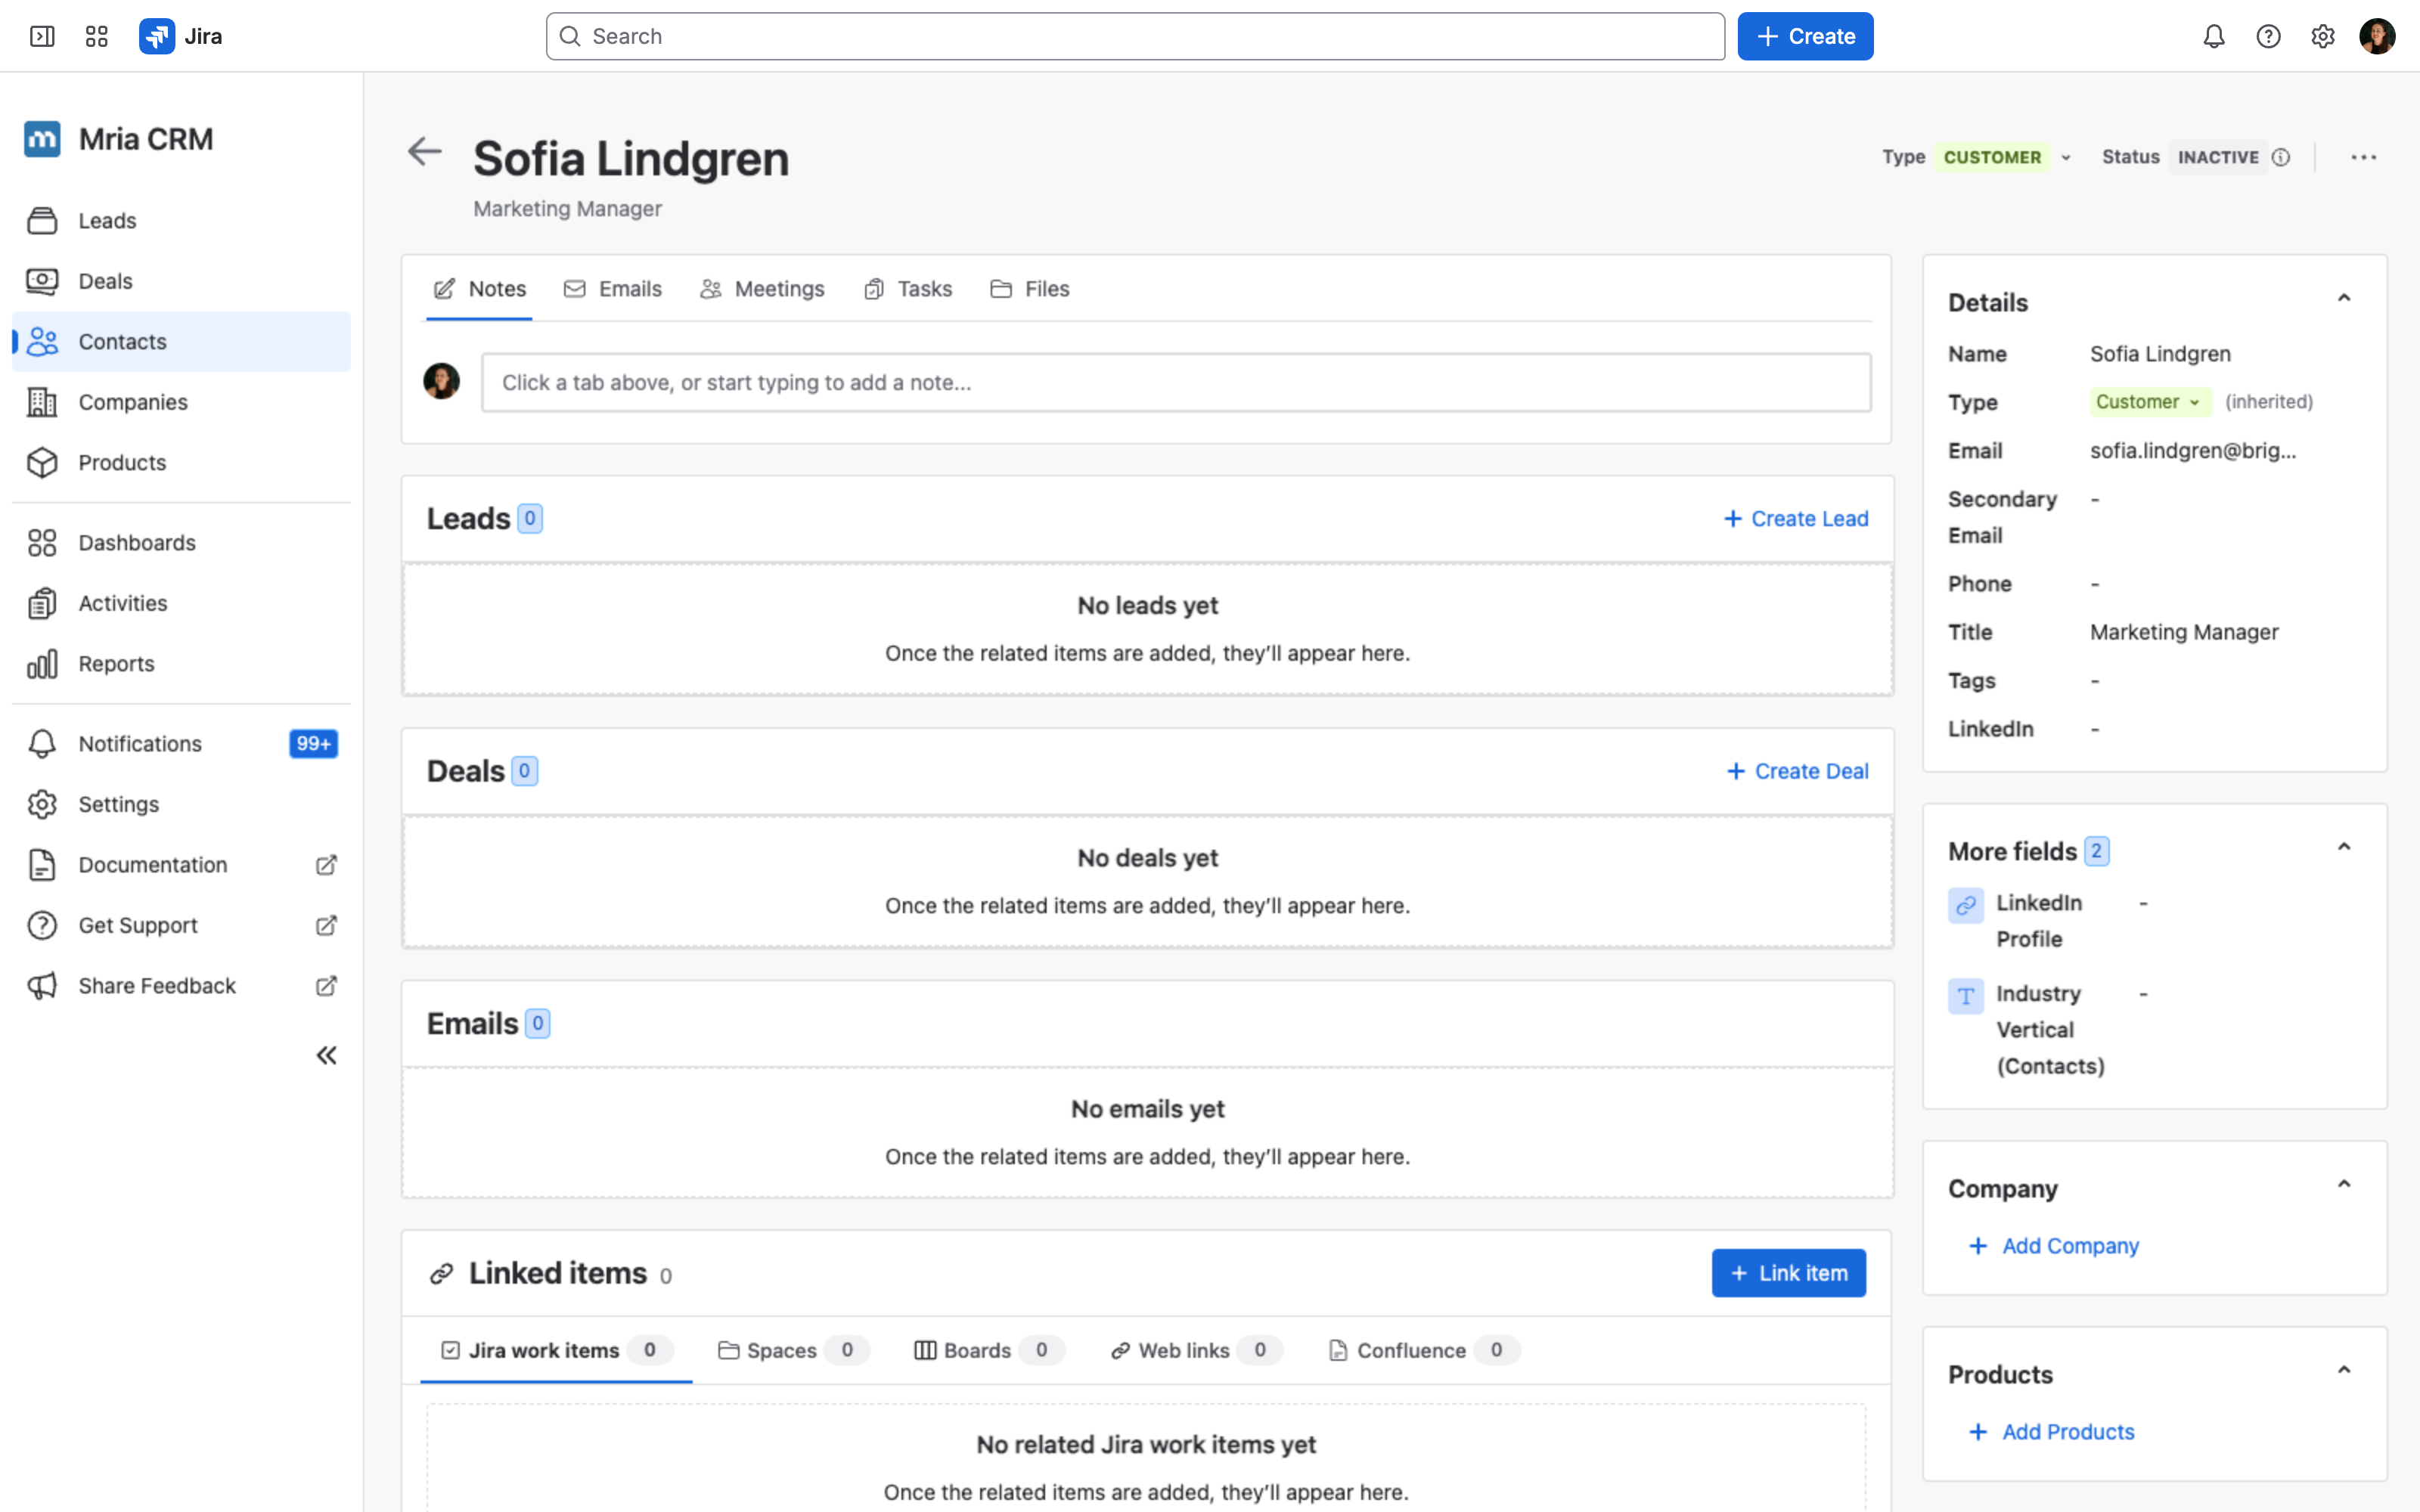
The note appears on the contact, authored by the user who connected the account, and the contact’s timeline records it. Publish the Zap once the tests pass.
Other endpoints and limits #
- Any endpoint in the OpenAPI spec works the same way: one API Request action per call, JSON body,
Content-Type: application/jsonon writes. - Writes need
write:crm:custom, an active license and a CRM role that allows the edit; a read-only user gets403on the note step. - Notes take up to 10 000 characters of plain text.
- Each API Request action counts as one Zapier task.
- If you cannot use API by Zapier, the same OAuth values work in a private integration built on the Zapier Developer Platform (Platform UI → Authentication → OAuth v2).
This API is supported and actively developed, so it can change without notice. It builds on Atlassian’s Forge App REST APIs (Preview). Send feedback to the Mria CRM team.


